Word 2016 Complete Guide (Part 24): How to use Track Changes and Comments
When you are asked by someone to check or edit a document on paper, you'll have to use a red pen to mark misspelled words and add comments to the side. However, with Word documents, you can use Track Changes and Comments to do so. Today, TipsMake.com will guide you how to use these 2 features in Word 2016!
Turn on Track Changes feature
From the Review tab , click Track Changes .

Track Changes feature will be activated. From this point on, any changes you make to the document will appear as colored lines.

Review the changes
These tracked changes are in fact only suggestive changes. In order for them to become officially changed, they need to be accepted.
Accept or reject changes:
Choose the change you want to accept or reject.

From the Review tab , click Accept or Reject.

The previously marked changes will disappear and Word will automatically switch to the next change. You can continue to do the same until the end.
When done, click the Track Changes item in the toolbar to turn it off.
Note: To accept all changes at once, click the drop-down menu in the Accept section, then select Accept All Changes . If you no longer want to track those changes, click Accept All and Stop Tracking .
Hide tracked changes
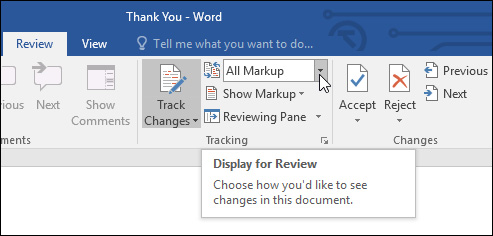
From the Review tab , click Display for Review on the right side of Track Changes.

Click the option you want from the drop-down menu. In this example, we will select No Markup to preview the final version of the document before accepting the change.

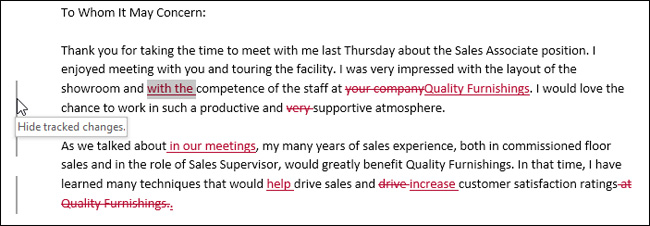
You can also click the vertical margin on the left of the document to switch between the Simple Markup and All Markup options .

Add comment (comments)
Step 1: Mark or place the insertion point in the text you want to comment.
Step 2: From the Review tab, click New Comment.

Step 3: Enter your comment. When done, you can close the comment box by pressing the Esc key or clicking anywhere outside the comment box.

Delete comment
Step 1: Select the comment you want to delete.
Step 2: In the Review tab, click the Delete command .
Note: To delete all comments, click the drop-down arrow in the Delete section and select Delete All Comments in Document .

Compare two documents together
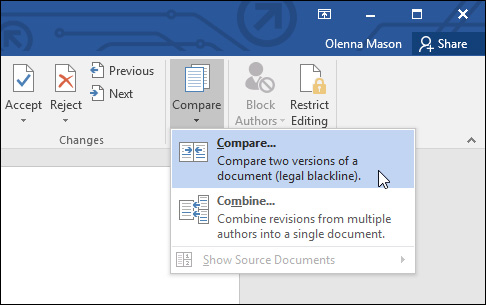
Step 1: In the Review tab, click Compare, then select Compare command from the drop down menu.

Step 2: A dialog box will appear. Click Original document by clicking on the drop-down arrow and selecting the document from the list. If the file you want to select is not in the list, click the Browse button to find its location.
Step 3: Select Revised document , then click OK.

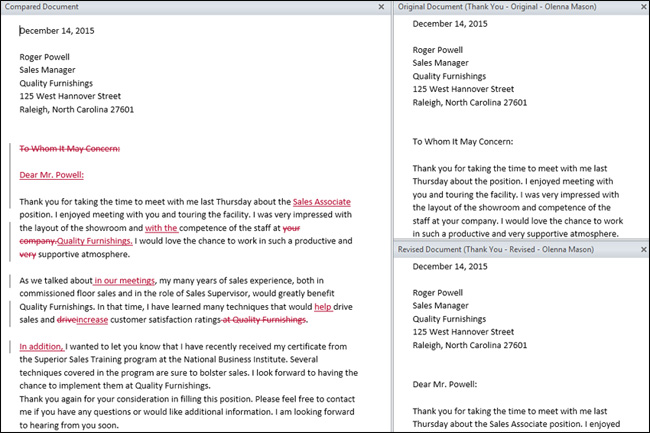
Word compares these two files to identify the changes and then creates a new document. Changes will appear as color markers, similar to Track Changes. You can then use the Accept and Reject commands to complete your document.

Good luck.
See more:
- Word 2016 Complete Guide (Part 21): How to insert and create tables
- Complete Word 2016 tutorial (Part 22): How to create a chart