Instructions for inserting text into images in Word - Design banners, greeting cards,...
To create a highlight for an image, or need to present something more unique, you can insert text into the image in Word.
Table of Contents
Then we proceed to write text on the photo in Word with unique font styles, or even use artistic text in Word for the photo. Below are detailed instructions for inserting text into images in Word.
How to insert text into images in Word 2019
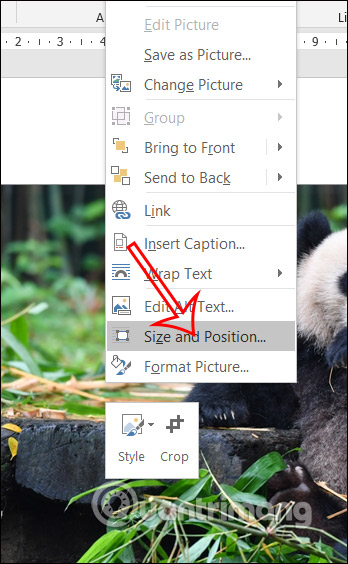
Step 1:
First, insert the image into Word as usual. Next, right-click on the image and select Size and Position in the right-click list.
Step 2:
Display the custom interface, here you click on the Text Wrapping tab . Look down below, click Square in the interface and then click OK.

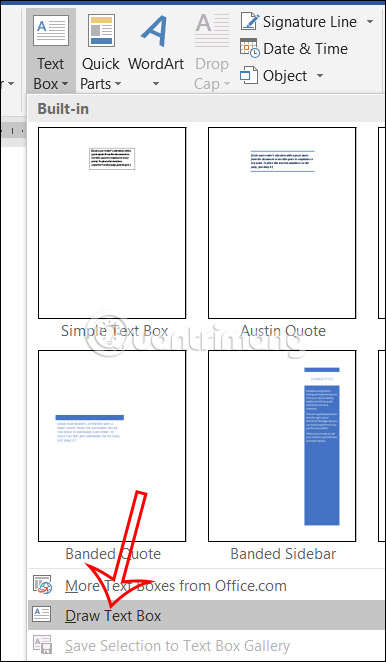
Step 3:
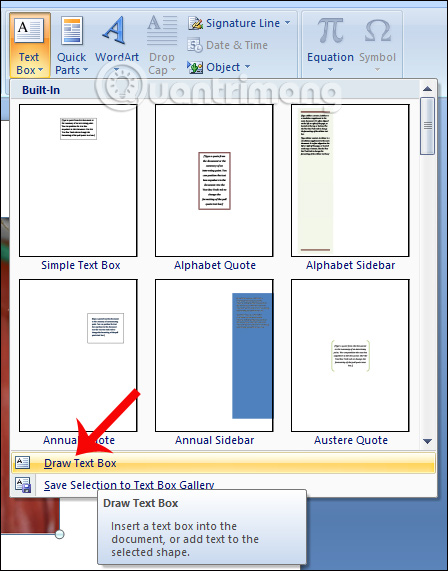
Next, click on Text Box and then select Draw Text Box to draw a frame on the image.
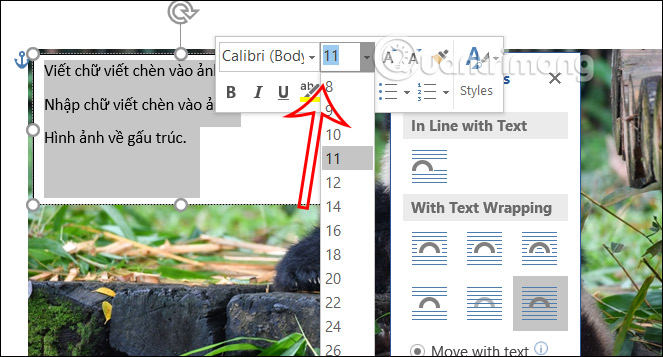
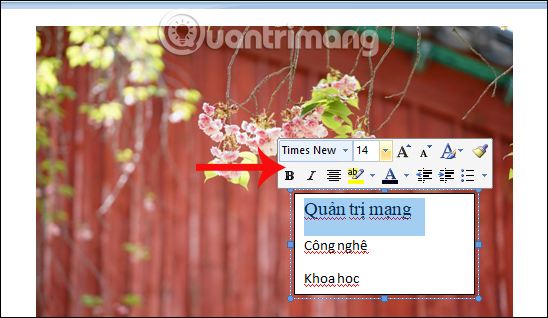
After drawing a frame on the image , you proceed to enter content into this frame . Next we proceed to adjust the format of the text inserted in the image. Note that when you choose the font color, you need to pay attention to the image background to avoid the text being submerged.
Step 4:
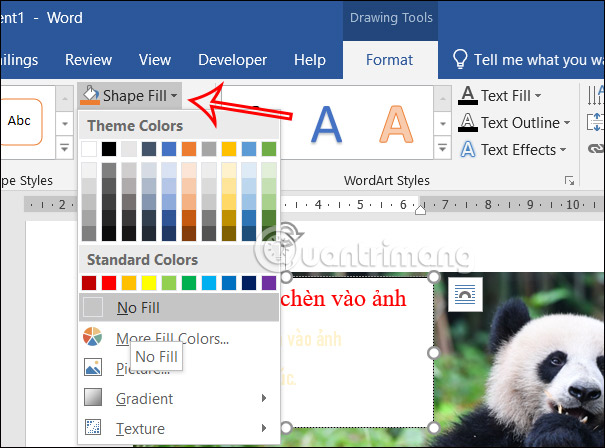
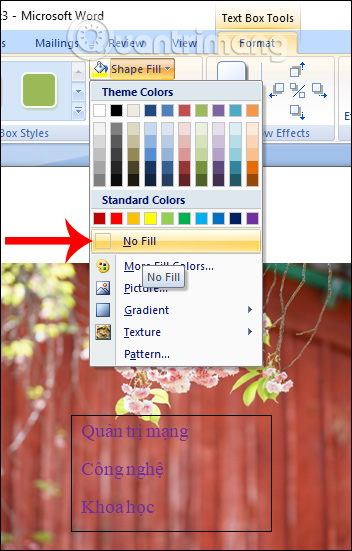
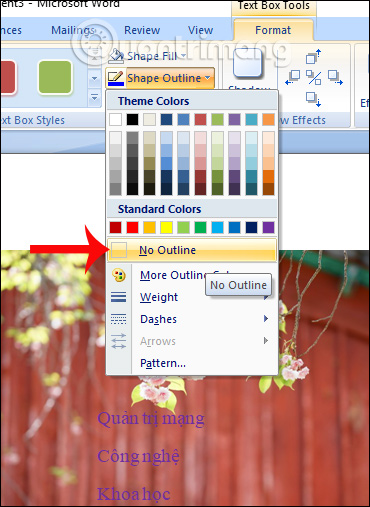
Next, click on the text box and select Format . In the Shape Fill section you can choose No Fill , in Shape Outline you click No Outline .
In case you want to choose a frame for writing, in the Shape Fill section we choose the color.
Step 5:
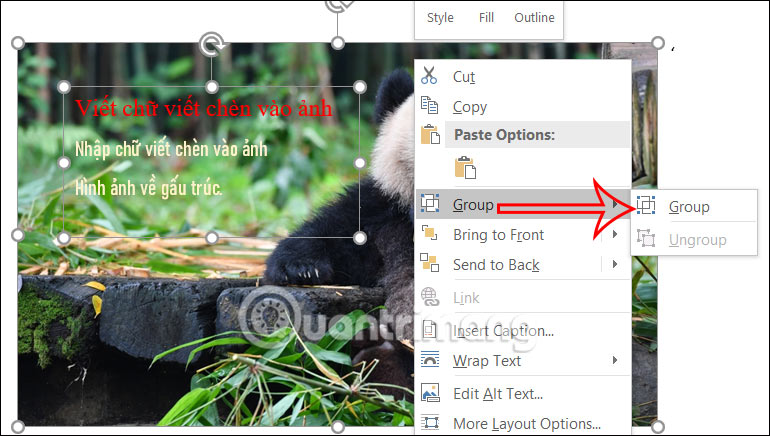
Finally, when you have finished writing text on the image, to avoid accidentally moving the text, press the Ctrl key, then click on the image and text box , then right-click and click Group .
Then text and images are grouped together for you to move freely.
How to insert text into Word images using WordArt
Step 1:
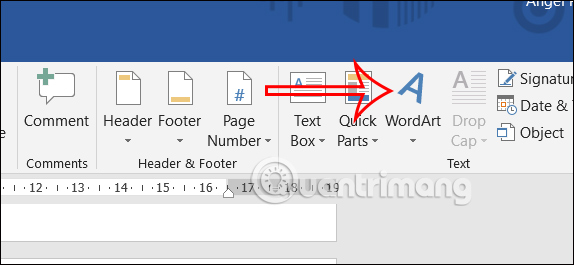
We also download the image into Word, then click on Insert , then look down at the Text group, click on WordArt .
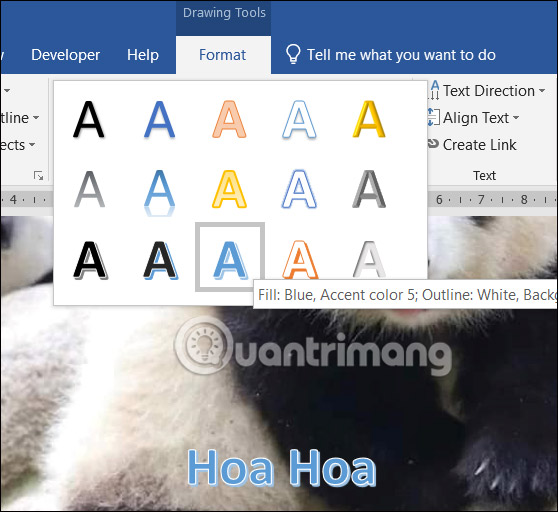
Step 2:
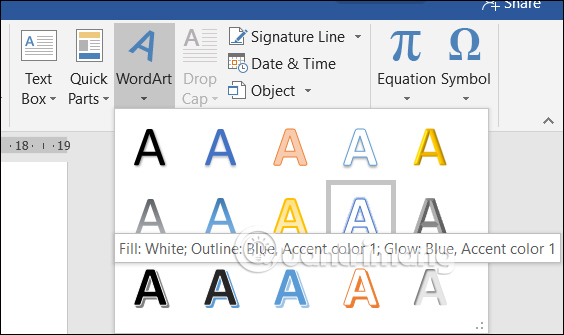
Now you choose the WordArt font you want to insert into the image in Word.
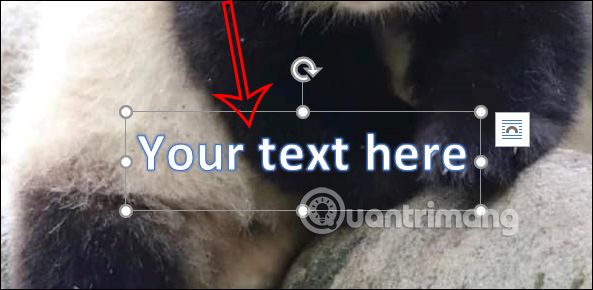
As a result, you will see a frame to write WordArt text. We just need to drag this frame to the image position where we want to insert text. Then we write the text in this box.
Step 3:
You enter text into the box as usual. Next, adjust the format for the text in the Format section to get the WordArt text as you like.
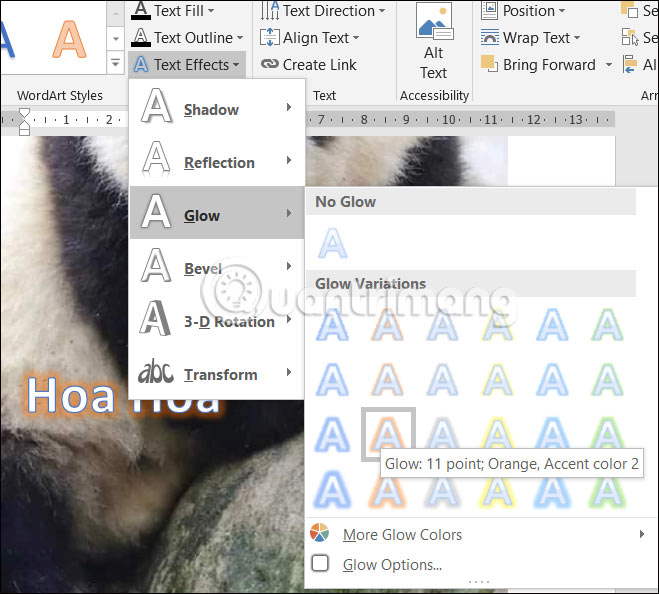
In addition, users can also add effects to text in the Text Effect section.
Instructions for writing text on photos on Word
Step 1:
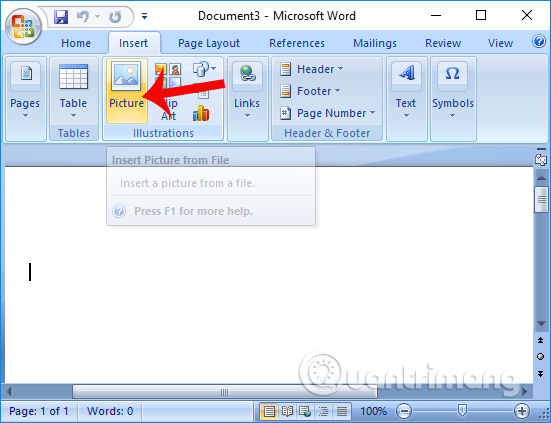
First, we open the Word interface, then click on the Insert tab on the Ribbon, select Picture to get the image to insert into the Word interface.
Step 2:
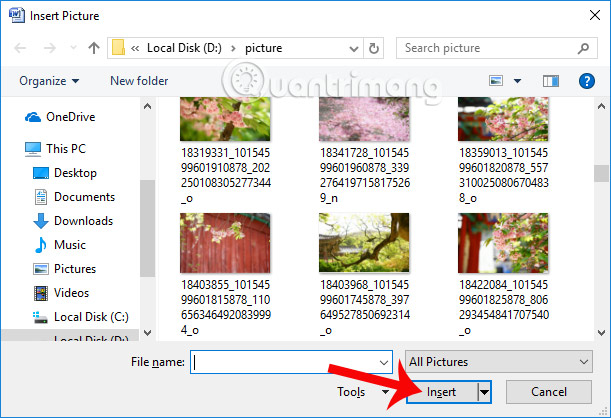
A folder appears on the computer. Click the image you want to insert into the folder and then click Insert . Images in Word can be changed in size or position depending on each person's requirements.
Step 3:
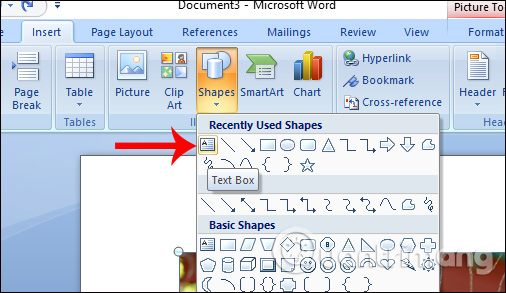
To insert text into images in Word, we will use the Text box tool. The user clicks on Insert > Text box > Draw Text box .
Or you can insert text into the image by clicking Insert > Shapes > Text box as shown below.
Step 4:
Then at the image you want to insert text, select the position you want to insert, then click and drag the left mouse button to create a text input box. The text input frame can be enlarged or reduced in size, moving the frame to any position you want.
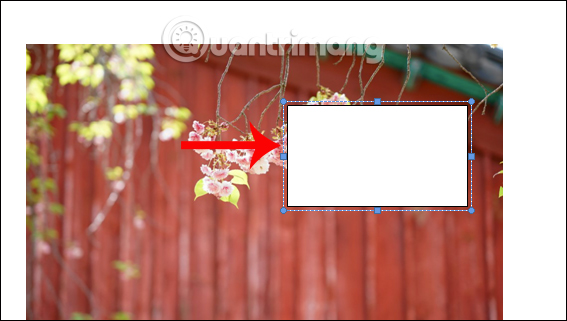
The next thing is to enter text content into the frame.
Step 5:
Next will be the job of customizing the text, adding effects, and reformatting the text if desired.
The first step will be to reformat the text, including selecting the font, font style, and font color if desired. Highlight all the text and then right-click to display the text customization panel.
Then, to remove the background color of the text , click on the Format tab , then select Shape Fill and click No Fill . Immediately you will see the white background color in the frame disappear.
Next, to delete the border surrounding the text input box , click the Format item , then select Shape Outline and click No Outline . The border surrounding the text input box also disappears.
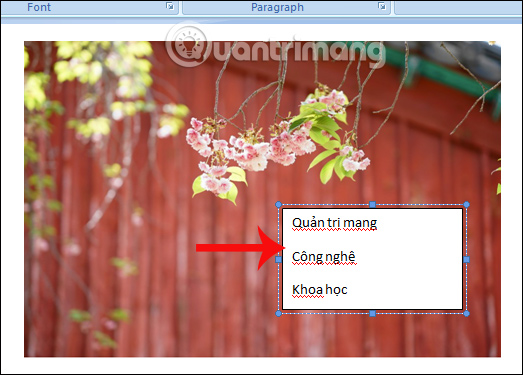
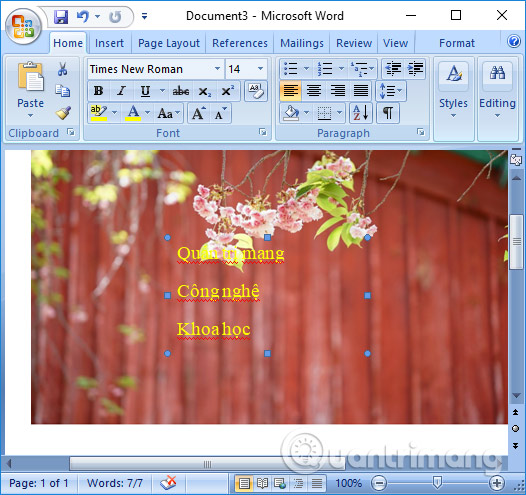
The final result will be an image with text inserted as shown below. The text frame can still be moved and zoomed in and out if desired. Users just need to click on the text area to display a surrounding frame.
With this simple method, you can insert many words with different formats into the image. After inserting text into an image, you can still change its color, font, size, etc. if desired. So you do not need to edit photos on other photo editing software, but can insert text into photos right in Word.
Wishing you success!
Was this article helpful?
Your feedback helps us improve.
Related Articles
 How to insert text into images on Word4 minutes read
 Easy guide to adding text to images in Photoshop2 minutes read
 Guide to inserting images under text in PowerPoint - Changing image position3 minutes read
 Design your own Tet greeting card in 5 steps2 minutes read
 Instructions for inserting text into photos in Photoshop, adding text to photos4 minutes read
 How to insert images into Word documents3 minutes read
Reader Comments 0
Sign in with email or Google to join the discussion.