Table of Contents
This guide explains how to quickly Save All Pictures in Word File into a Separate Folder, with clear steps, practical tips, and important checks before you begin.

Here are ways to quickly save all pictures in Word files into a separate folder, please follow along.
Method 1: Save as web page
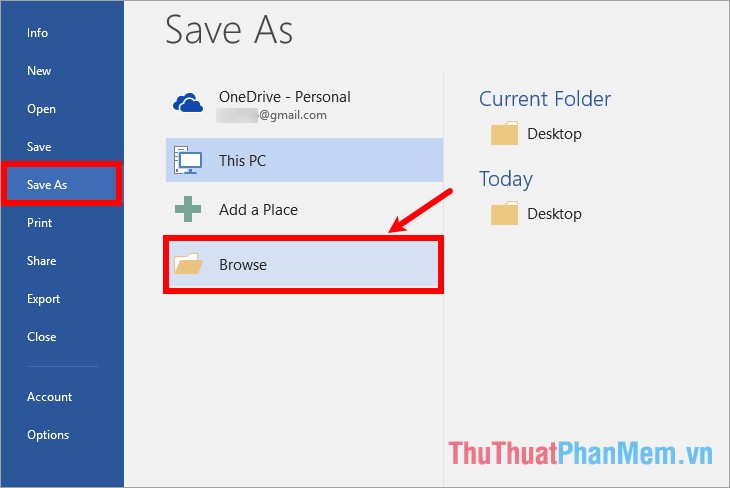
Step 1 : On the Word file you want to quickly save the entire image, select File -> Save As -> Browse (or press the F12 key ) to open the Save As window .
Step 2 : In the Save As window, select the path to the folder that will contain the images in the Word file, next in the Save as type section, select the Web Page format (*. htm; *. html) and click Save .

So you open the folder or location that you have chosen to save the Word file image, you will see there is a. htm file and a folder as shown below.

Open the folder, you will see all the images in the Word file. You can select the image you want to use. Many times you will see an image with different sizes, you just need to choose the largest image.

Method 2: Convert the Word file into a zip file
Note: if you want to use this way, the word format must be. docx if the. doc format, then you need to save as. docx format. Then perform the steps below.
Step 1: Open the folder containing the Word file, click the Word file to save the image and press F2 to rename, then change the. docx format to. zip. Rename dialog box appears, select Yes to confirm renaming.

Step 2: Right-click on the. zip file you just changed and extract it with Winrar or Winzip on your computer.
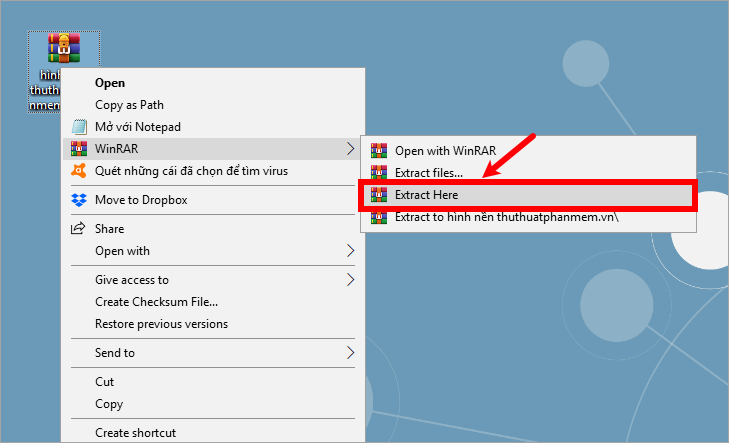
Step 3: In the folders that you extracted, you choose Word -> media , all images will be saved in this media folder.

If you still want to use the Word file, then you need to change the. zip format to. docx format and confirm the name change is complete.

Method 3: Save images manually
Saving images this way will take more time with Word files that have lots of pictures, but for files with fewer images, this method is also quite effective. You can do as follows:
Step 1 : Create a folder to save the image.

Step 2: In the Word file, right-click the image and select Save as Picture.

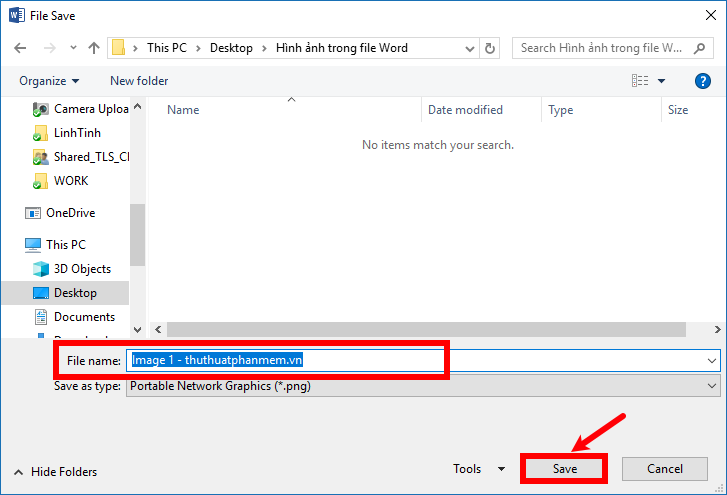
Step 3: Open the File Save window, select the path to the created folder and name the image in the File name box and select Save .
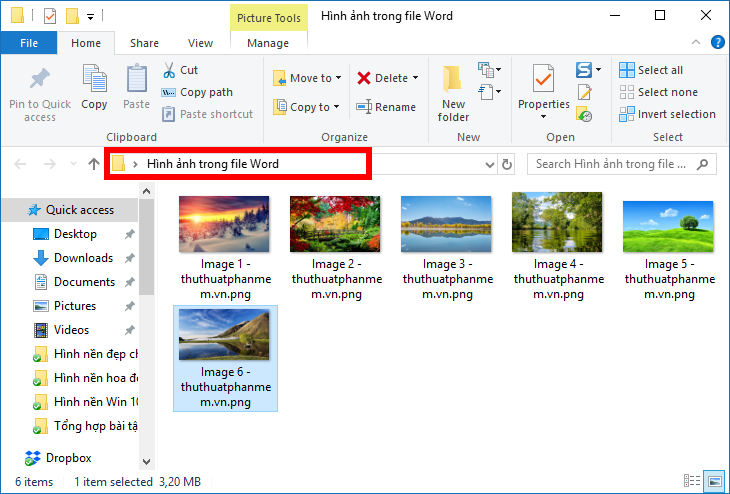
You do the same with the other images.
Above are ways to quickly save all pictures in Word files into a separate folder, hopefully through this article you will choose a way that you think is the fastest to remember and use when necessary.
FAQ
What should I know about Quickly Save All Pictures in Word File into a Separate Folder?
Focus on the key features, requirements, limitations, and practical use cases explained in this guide.
How do I get the best results with Quickly Save All Pictures in Word File into a Separate Folder?
Follow the recommended steps, use current software or information, confirm compatibility, and review settings before major changes.
Are there any risks or limitations?
Potential limitations depend on compatibility, data quality, cost, privacy, support, and how the product or method is used.
Related Articles
 How to Quickly Find the Pictures Folder on a Mac4 minutes read
 Tip to Save All Images in Word File Out2 minutes read
 No Need to Use Software, Here Are 3 Ways to Get Images from Word4 minutes read
 How to Extract Multiple Files at the Same Time with WinRAR, Each File into2 minutes read
 What Is a Folder the Concept of a File (File) and a Folder (Folder) in a5 minutes read
 The Fastest Way to Insert Text into Pictures in Word, Anyone Can Do It!4 minutes read
Reader Comments 0
Sign in with email or Google to join the discussion.