How to edit images in Word 2016
Photo editing, image formats in Word 2016 will make images appear more professional in Word, you can make cards, make cards and many other types of documents easier in Word 2016 without the need for additional software.
In the previous section we talked about how to insert images into Word 2016 , as well as how to customize the position of the image so that it appears where you want it in your document. In this section, we will continue to learn about images in Word, specifically editing images after inserting in Word 2016 .
There are many ways to format, edit photos in Word . For example, you can change the size or shape of the image to make it more suitable for the document you are working on. You can also make your photos look better thanks to the image enhancement tools that Microsoft has equipped for Word 2016. Follow our Word column to constantly update your best Word tips. .
How to cut photos in Word 2016 simply
When cutting photos, part of the image will be removed. Cropping an image is useful when you have to process the image too loudly and only want to use / retrieve part of the image.
To cut the inserted image in Word 2016, follow these steps:
Step 1: Select the image you want to cut, the Format tab will appear
Step 2: On the Format tab select Crop

Step 3: The cropping frame appears, click on the black button on the edge and drag to the desired position to crop the image. Because the position of the photo button is very close to the image resizing button, be careful not to press the wrong button. The black button in the corner will be handy when you need to crop the image horizontally or vertically.
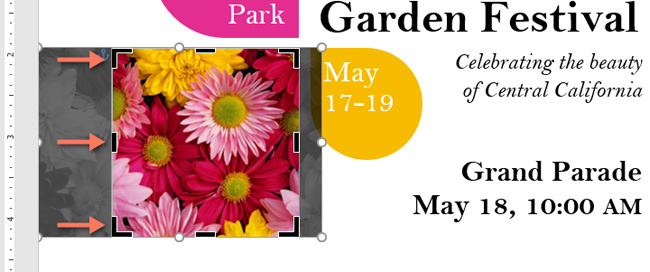
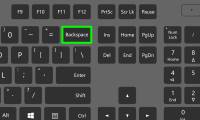
Step 4: To confirm, click Crop again, the image will be cut

Cut pictures in Word 2016 into another shape
With Word 2016, you can not only crop images but also cut them into different shapes. This cropping feature is suitable if you want to make cards, make cards or cards with simple decorations.
To cut photos in Word 2016 with special shapes, follow these steps:
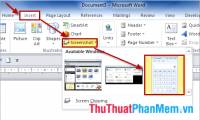
Step 1: Select the image you want to cut, click the Format tab
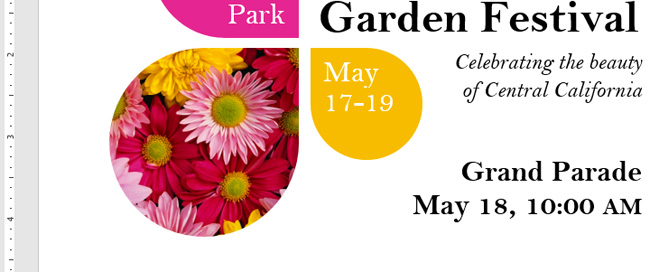
Step 2: Click the arrow pointing down at Crop, hover over Crop to Shape and select the shape you want to use to crop the image in the drop-down menu.

Step 3: The image will be cut to the shape you selected
Add an image border to the inserted image in Word 2016
To highlight the image you can add borders and change the border color to match the image. This can be done right away in Word 2016.
Steps to add image borders in Word 2016 are as follows:
Step 1: Select the image to add borders, click the Format tab
Step 2: Select Picture Border, a menu will appear
Step 3: Here, you choose colors (Color), thickness (Weight), and border type (Dashes)
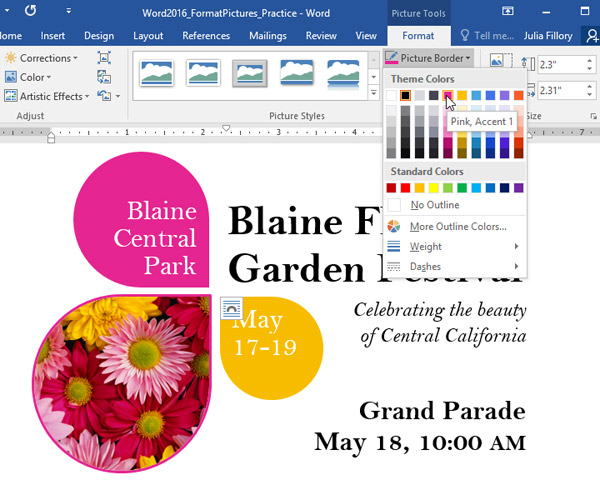
When finished, the border will appear in the image as you selected.
Adjust images in Word 2016
With image editing tools in Word, you can easily fine-tune image properties such as color, contrast, saturation, and color tones. Word also provides image styles that allow you to add frames, drop shadows and other available effects.
When you're ready to adjust the image in Word 2016, just select it, click the Format tab and use the options highlighted in the picture below:

- Corrections: Here, you can sharpen or soften the image by adjusting the focus or blurring it. You can also adjust the brightness and contrast so that the image appears as you want.

- Color: Use this tool to adjust saturation (color brightness), color tone (image color temperature, from cold to hot) and add color (the overall color of the image).

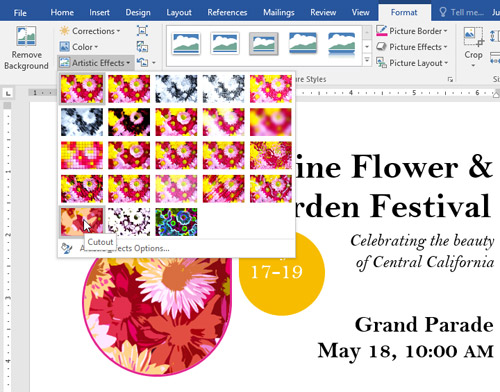
- Artistic Effect: Select the effect available to apply to the image. The effects are quite strong, so you need to consider when using, so that it is suitable for the document and not "overshadowed".
- Picture Styles: This group of tools contains a lot of pre-installed image styles, making it easier to format images. Picture Styles are designed to add frames to images without changing the basic settings or effects.

Compress images in Word 2016
Word 2016 also provides a tool for you to compress images, which helps reduce the image size in particular and the overall file size.
To compress images in Word 2016, do the following:
Step 1: Select the image to compress, click the Format tab
Step 2: Select Compress Pictures
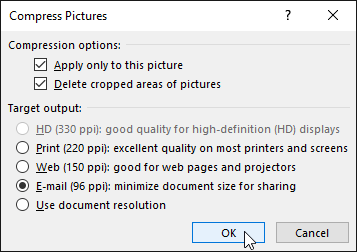
Step 3: Select Delete cropped areas of pictures. You can choose to apply this setting to all images in the document or just for the selected image
Step 4: Select Target output. If you plan to send this document via email, select Email to reduce the file size
Step 5: Select OK
Above is a very detailed photo editing guide in Word 2016, hoping the article can help you create Word documents with a more professional image.
Word 2016 (Part 16): Insert images and customize the location of photosWas this article helpful?
Your feedback helps us improve.
Related Articles
 How to insert pictures into Word, edit size and format8 minutes read
 How to Edit Text in Word5 minutes read
 Insert images into Word 2016 and align images in Word 20165 minutes read
 Capture and edit images in Word3 minutes read
 How to rotate images in Word3 minutes read
 How to edit photos in Word is extremely useful that you should know2 minutes read
Reader Comments 0
Sign in with email or Google to join the discussion.