Table of Contents
This updated guide explains how to Insert Text Into Pictures with Word through clear steps, practical examples, and important checks that help prevent common errors.
Step 1: First you need to insert the image into Word by clicking Insert -> Pictures .
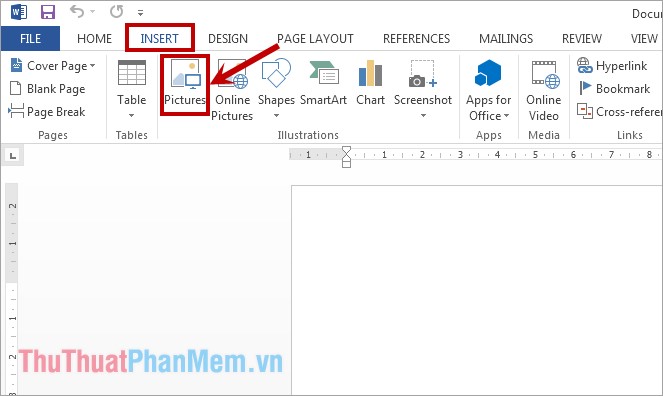
The Insert Picture dialog box appears, select the image to insert text and click Insert to add the image to Word.

Step 2: Next you add a Text Box to write text. Select Insert -> Text Box -> Draw Text Box .

Click and hold the left mouse button to start the Word insertion and drag a selection of the writing area on the image.

Appears the white background area that you have just selected, you enter the text you may need to insert into the image as you like.

Step 3: Next, you edit the font, size, font style, font color in the Home tab as you compose Word so that the text fits your purpose.

You can move the position of the text on the image by moving the mouse to any edge of the text frame when the mouse appears symbol as shown below, then hold down and drag the text to the position to insert.

Step 4: Remove the white background and the text border.
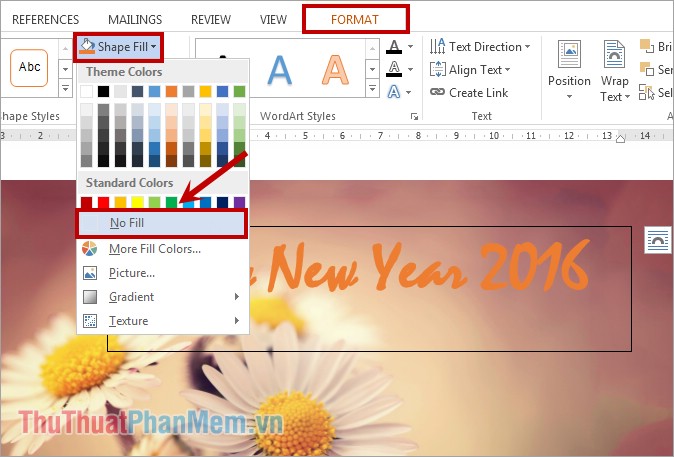
- To remove the white background, select the text box and select the Format tab -> Shape Fill -> No Fill .
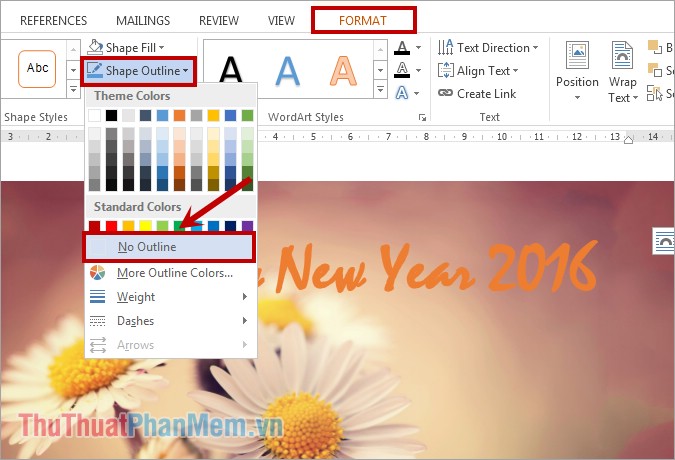
- To remove borders, select Format -> Shape Outline -> No Outline .
FAQ
What is the easiest way to Insert Text Into Pictures with Word?
Start with the requirements in this guide, then follow each step in order. Check the result after every major change so problems are easier to identify.
Can beginners follow these instructions?
Yes. The process is organized into practical steps, and you can repeat any step before moving forward.
What should I check if the method does not work?
Confirm your software or device version, permissions, settings, file format, and internet connection when the task depends on online services.
Related Articles
 The Fastest Way to Insert Text into Pictures in Word, Anyone Can Do It!4 minutes read
 How to Insert Text into Images on Word: Insert Text into Word Image5 minutes read
 Word 2013 Complete Guide (Part 15): Insert Images and Text Wrapping7 minutes read
 Instructions for Inserting Captions for Photos in Word3 minutes read
 How to Use the Insert Key to Insert Copied Text in Word?2 minutes read
 How to Create Text Wallpaper in Word: Insert Word Background6 minutes read
Reader Comments 0
Sign in with email or Google to join the discussion.