Table of Contents
This guide provides a clear, practical overview of steps to block Windows 10 from automatically connecting to, with useful context, important details, and straightforward takeaways for everyday readers.
1. How to block Wifi from automatically connecting in Settings
Settings on Windows 10 allows you to set up almost all the features of your computer, including Wi-Fi connection.
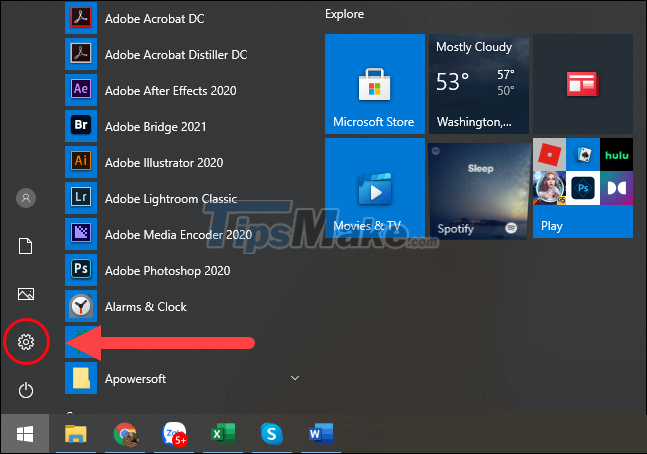
Step 1: Open MenuStart and select the Settings icon (gear shape) to open the settings on your computer.
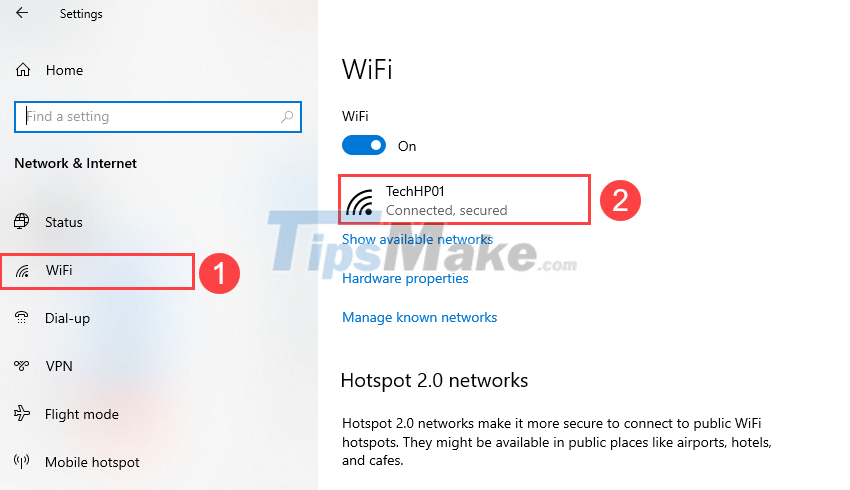
Step 2: Next, select the Network tab and go to Wifi (1) to customize the settings related to Wifi. To select the Wifi in use, click on the Wifi name that is being connected (2).
Step 3: At Wifi network settings, you will see Connect automatically when in range. Now, turn off this feature so that the computer does not automatically connect to the Wifi network.

2. How to block Wifi from automatically connecting in Control Panel
The Control Panel allows you to customize a variety of computer parameters as well as available features. You can also turn off automatic Wi-Fi connection in Control Panel.
Step 1: Open MenuStart and enter Control Panel to open.

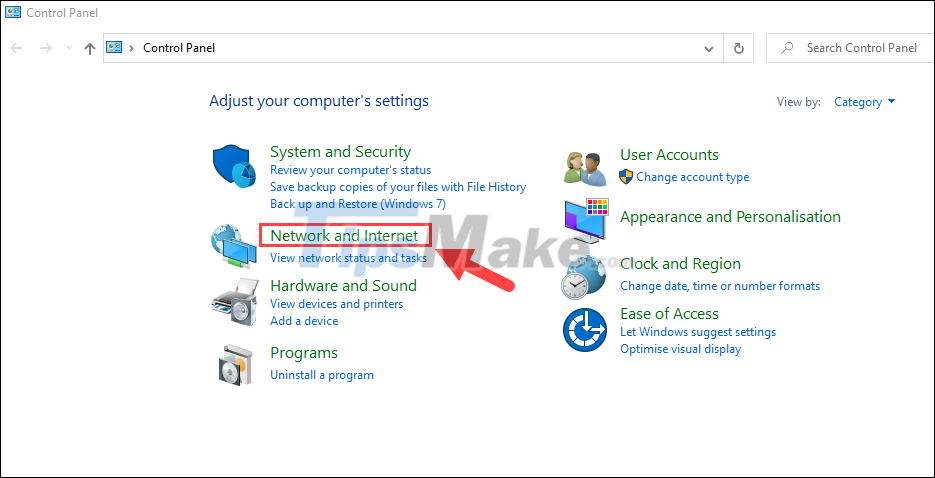
Step 2: In the Control Panel window, select the Network and Internet item.
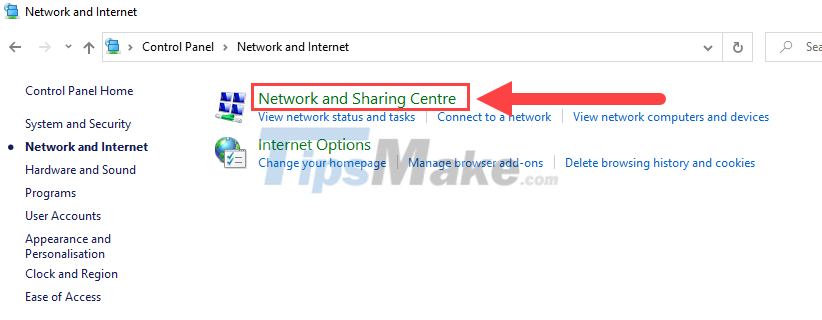
Step 3: Then, select the Network and Sharing Center item to search for the network you are using.
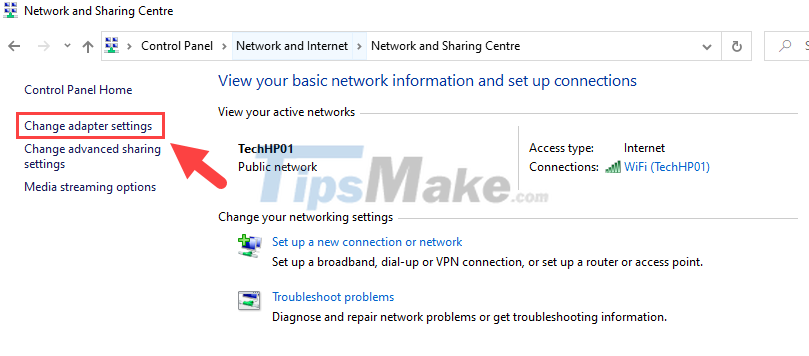
Step 4: To open the network settings being used, select Change adapter settings to view.
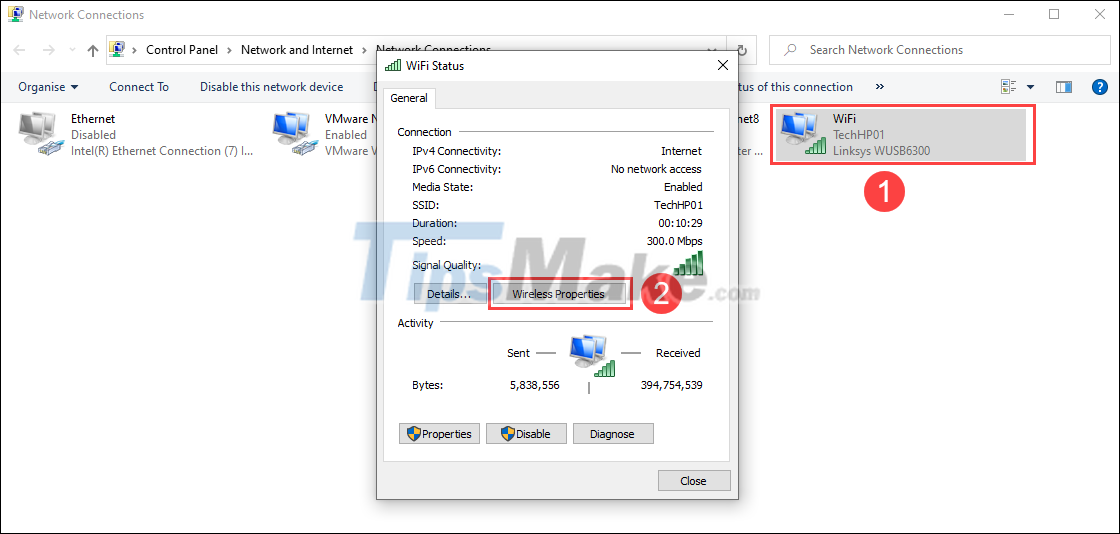
Step 5: Now you just need to double-click on the connected Wifi network (1) and select Wireless Properties (2) to view the settings.
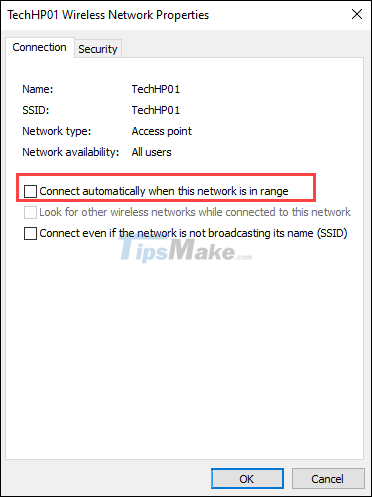
Step 6: To stop connecting to the network automatically, simply uncheck the Connect automatically when this network is in range setting.
3. How to block Wifi from automatically connecting in Command Prompt
In the Command Prompt, you can also adjust the setting of not connecting to the strange Internet through commands.
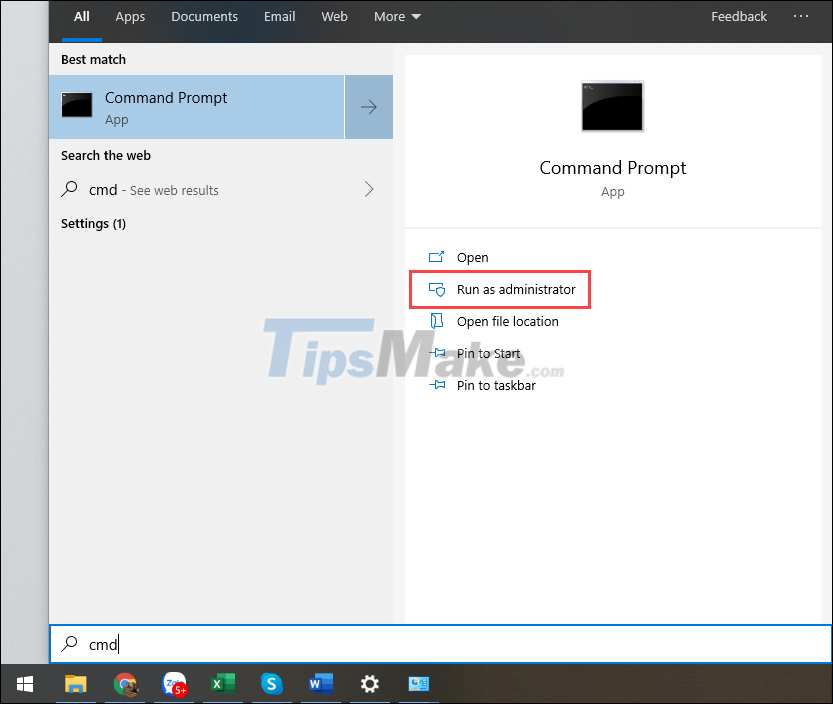
Step 1: Open MenuStart, enter Command Prompt and select Run as administrator to open with Admin rights.
Step 2: In the Command Prompt window, enter the command below to see the name of the connected Wifi network.
netsh wlan show profiles
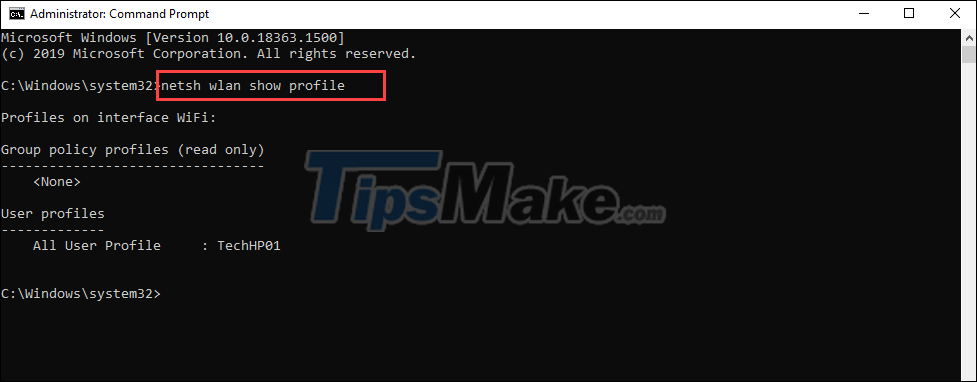
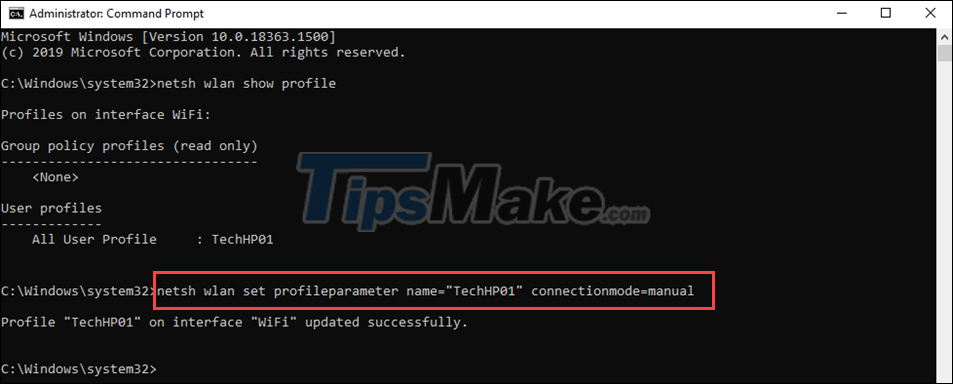
Step 2: After getting the Wifi network name in the All User Profile section, continue to use the following command and change the 'Wifi name' section to the Wifi name in use.
netsh wlan set profileparameter name="Wifi name" connectionmode=manual
When the command is successful, you will get a Successfully message, you can exit CMD because it's done.
In this article, Tipsmake has shown you how to block strange Wifi connections on Windows 10 computers. Have a nice day!
Key Takeaways
Use the information above as a practical reference for steps to block Windows 10 from automatically connecting to. Review each step carefully, confirm any requirements, and choose the option that best fits your situation.
FAQ
What does this guide explain about Steps to Block Windows 10 from Automatically Connecting to?
It explains the main concepts, practical considerations, and useful steps related to steps to block Windows 10 from automatically connecting to without requiring advanced knowledge.
Who can benefit from learning about Steps to Block Windows 10 from Automatically Connecting to?
This information is useful for readers who want a clear overview, practical guidance, and reliable steps related to steps to block Windows 10 from automatically connecting to.
What should I check before applying this information?
Review the requirements, confirm that your device, software, or situation matches the instructions, and back up important data before making major changes.
Related Articles
 7 Extremely Interesting Wi-Fi Features on Windows 10 Not Everyone8 minutes read
 How to Block Wi-Fi Networks in Windows6 minutes read
 How to Check Wi-Fi Passwords on Windows 113 minutes read
 How to Prevent Wi-Fi Automatically Turn on on Android3 minutes read
 Fix PS5 Not Connect to Wi-Fi4 minutes read
 Automatic Timer to Turn on Wi-Fi After 1 Hour, 4 Hours or 1 Day4 minutes read
Reader Comments 0
Sign in with email or Google to join the discussion.