Fix 'Windows was unable to connect to' error when connecting to wifi
Recently, the online community often complains about the Windows was unable to connect to error I encountered when connecting to wifi. Actually, the fix is very simple, you just need to follow the steps below for more details..
Every time you connect to a wifi hotspot, your computer will automatically save the access point information and corresponding password. Therefore, you will not have to waste time filling in the information again in the future. However, sometimes it happens that the computer displays the error message "Windows was unable to connect to" when connecting to wifi as below.
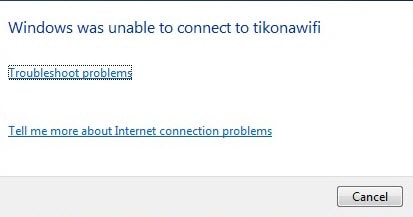
Fix "windows was unable to connect to" error when connecting to wifi
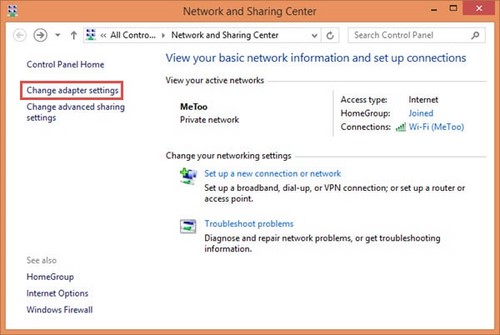
Step 1 : First, right-click on the wifi icon, then select Open Network and Sharing Center .

Step 2 : Next, select Change adapter settings .
Step 3 : Here, right-click and select Remove network then reconnect successfully.

Above, TipsMake has just introduced to you how to fix the "Windows was unable to connect to" error encountered when connecting to wifi. If you often encounter this problem, you should configure your wifi with a simpler password format. Please refer to changing wifi password
In addition, if you encounter a limited error, you can also refer to how to fix the Limited Wifi error that TipsMake has introduced in the tips.