10 common errors on Windows 10 and how to fix bugs
WiFi Sense feature allows Windows 10 users to share WiFi networks with friends, without entering a password. It brings convenience but also a security risk. If you don't want to use or worry about security, you can disable the WiFi Sense feature to prevent any users from automatically connecting to your Wifi connection.
1. Cannot install Windows Update
Error:
It is not possible to install any update (update) version on Windows 10 after Windows Update "misses" a 1-day update because of some problems (such as an Internet connection or a system error crashes) , .).
Solutions:
The cause of the error may be due to corrupted Windows Update files. Therefore, to fix the error, the solution to fix the error is to remove the corrupted files.
Follow the steps below
- Press the Windows + R key combination to open the Run command window.
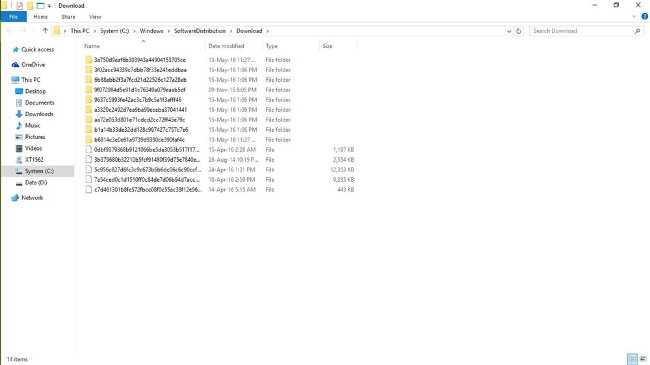
- Enter ' C: WindowsSoftwareDistributionDownload ' into the Run command window and press Enter or click OK .
- At this time, the Download window appears, where you select and delete all the files and folders (in case if you cannot delete the files, the folder you start Windows into Safe Mode and then delete files go).
- Restart your computer and try running Windows Update again.
2. Windows Store cannot install or update applications
Error:
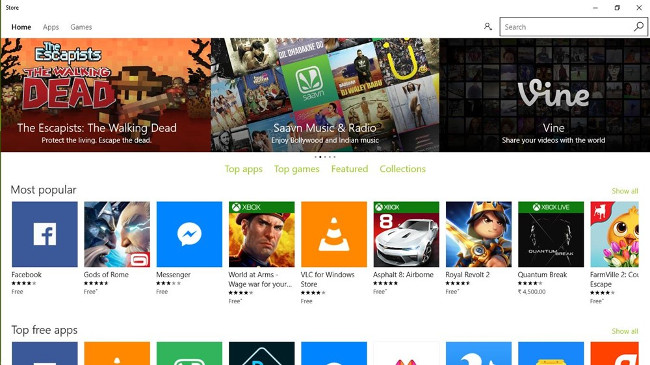
After upgrading to Windows 10, some users cannot install or update the Metro app on the Windows Store.
Solution to fix errors:
The problem arises may be due to cache files. To fix the error, you just need to clean the cache files away.
To do this, follow the steps below:
- Press the Windows + R key combination to open the Run command window.
- Enter ' WSReset.exe ' in the Run command window and press Enter or click OK.
- A blank black window will appear on the screen, then this window will automatically close.
- The Windows Store will open later, otherwise, if you open the Windows Store and try to install or update the application, the error will no longer appear.
3. No "Open with" option found on Windows 10
Error:
Users cannot find the " Open with " option on the context menu after right-clicking on any file on Windows 10.
Solutions:
This error rarely occurs, but if an error occurs, it may be because the file system is missing, missing, or due to configuration settings after upgrading to Windows 10.
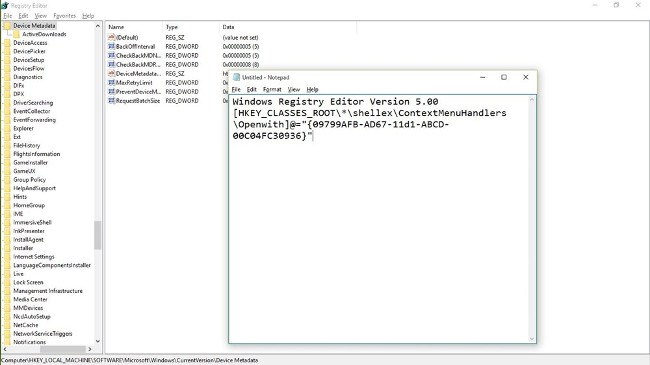
1. Open Notepad .
2. Then enter the following line into:
Windows Registry Editor Version 5.00
[HKEY_CLASSES_ROOT * shellexContextMenuHandlersOpenwith] @ = '{09799AFB-AD67-11d1-ABCD-00C04FC30936}'
3. Save the Notepad file by clicking File => Save as (not Save), name the file ' Openwith.reg ' and select the file type All files and then click OK .
4. Close Notepad, then double-click the file to open the file.
5. Click Yes on the confirmation dialog and try to check if the Open with option appears on the context menu.
4. Cannot log in automatically when using a Microsoft account
Error:
Users cannot log in automatically when using a Microsoft account. Each time you log in, you must type the password, which is very time consuming.
Solutions:
The error may be due to the automatic login feature when using a Microsoft account has been disabled, and you must operate to enable this feature.
Follow the steps below:
- Press the Windows + R key combination to open the Run command window.
- Enter ' netplwiz ' in the Run command window and press Enter or click OK.
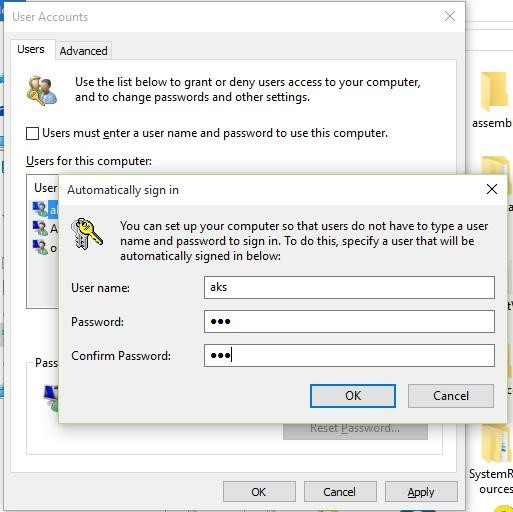
- At this time, a new window appears, where you click on the account you want to enable " automatic login ".
- Uncheck the Us ers option to enter a username and password to use this computer and then click OK .
- Enter 2 times the account password on the Automatically sign dialog box and then click OK to activate the Automatic Login feature.
5. Cannot open Start Menu on Windows 10
Error:
After upgrading to Windows 10, some users reflect that they cannot open Start Menu or Start Screen . Despite trying everything, pressing the Windows key, right-click the Start button on the Taskbar, but the Start Menu still doesn't work.
Solutions:
- Press the Windows + R key combination to open the Run command window.
- Enter sfc / scannow in the Run command window and press Enter or click OK .
- At this time, the Command Prompt window appears blank , then this window automatically closes.
- Restart your computer and check if the error is still there.
In case if the Start Menu does not work, follow the steps below:
- Enter cmd in the Search box on the Start Menu, then on the search results list, right-click cmd and select Run as administrator .
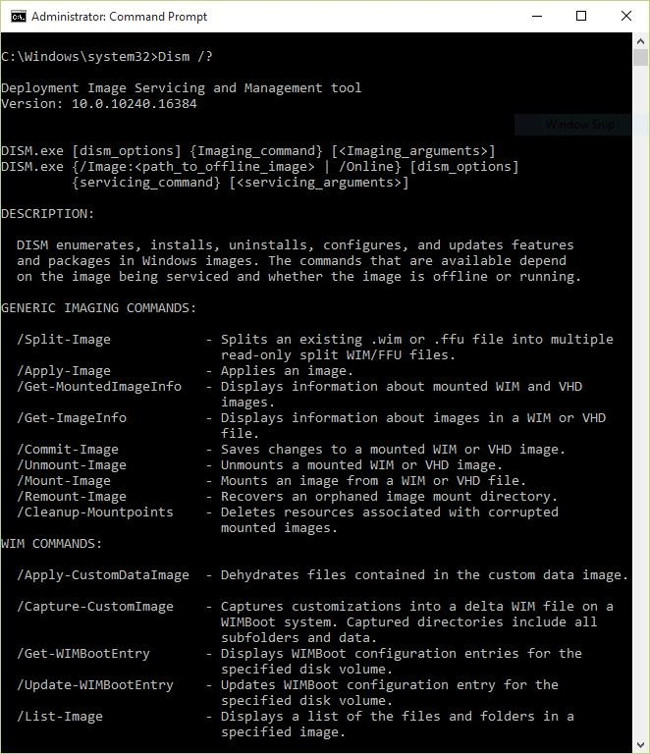
- On the Command Prompt window, enter the command below and press Enter:
- Restart your computer after the command executes.
In addition, readers can refer to how to fix errors Start Menu and Cortana do not work on Windows 10 here.
6. No applications found on Windows Search
Error:
Users cannot search for applications that they have just installed on their computers, Cortana's search function fails, cannot find applications on the system, even Notepad and computers.
Solutions:
To fix this error, follow the steps below:
1. Press Ctrl + Alt + Del and select Task Manager .
2. Kill the process named Explorer.exe again.
3. Press the Windows + R key combination to open the Run command window.
4. Enter regedit there and press Enter to open the Registry Editor window.
5. In the Registry Editor window, navigate to the key:
HKEY_LOCAL_MACHINESOFTWAREMicrosoftWindowsCurrentVersionExplorerFolderTypes {ef87b4cb-f2ce-4785-8658-4ca6c63e38c6} TopViews {00000000-0000-0000-0000-000000000000}
6. On Task Manager, go to File => Run new task .
7. Enter explorer.exe and then click OK.
If the error still occurs on Cortana, follow the steps below:
1. Press Windows + X key combination to open Power User Menu, then click Command Prompt (Admin).
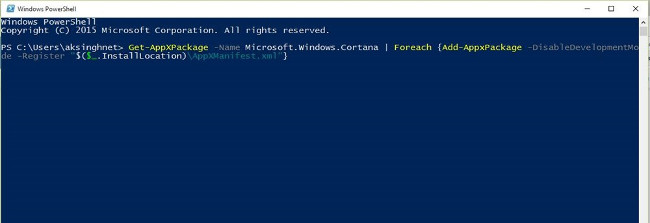
2. Type " start powershell " into it and press Enter to open the Windows Powershell window.
3. Enter the following statement in the Windows Powershell window and press Enter:
Get-AppXPackage -Name Microsoft.Windows.Cortana | Foreach {Add-AppxPackage -DisableDevelopmentMode -Register '$ ($ _. InstallLocation) AppXManifest.xml'}
4. And the error will completely disappear on Cortana.
7. Prevent automatic installation of drivers
Solution to fix errors:
To disable automatic driver installation, follow the steps below:
- Press Windows + E key combination to open File Explorer.
- Right-click This PC and select Properties.
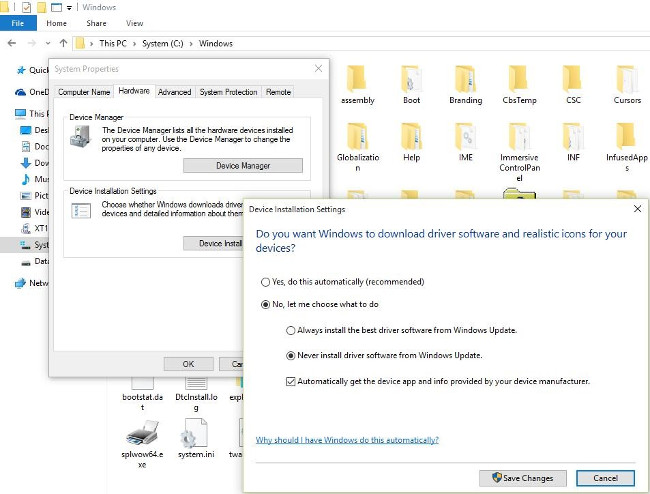
- On the Properties window, click on Advanced System Settings then select Hardware tab.
- Click on Device Installation Settings .
- Select " No, let me choose what to do ".
- Select Never install driver software from Windows Update and click Save Changes and then click OK.
8. Error "Your PC needs to be repaired"
Error:
During Windows 10 computer startup, a blue screen error appears with the " Your PC needs to be repaired " message. This error usually occurs after plugging in any USB drive or connecting an Android device to the computer.
Solution to fix errors:
The cause of the error may be because when you plug the USB drive into the computer that changed the hard drive partition number, Windows 10 cannot find the required file and cause the error. .
To fix this error:
- Remove the connected USB drive or cable from the computer, and then restart your computer.
- If required, plug in your USB drive after Windows loads.
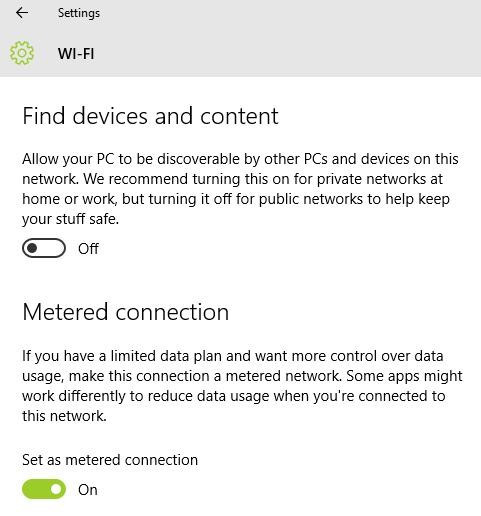
9. Windows 10 "consumes" mobile data
- Connect to Tethered (WiFi Hotspot) connection.
- Open Settings, then click Network & Internet.
- Select Wifi in the left pane, then click Advanced Options .
- Switch the option state Set as metered connection to ON .
10. WiFi Sense feature
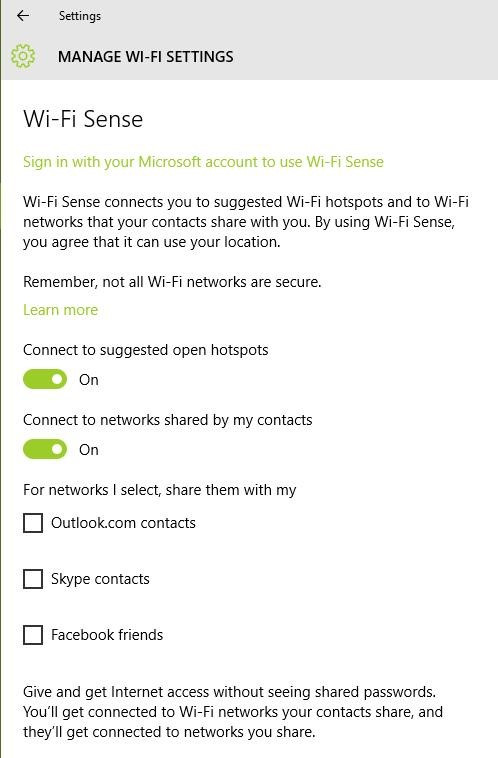
WiFi Sense feature allows Windows 10 users to share WiFi networks with friends, without entering a password. It brings convenience but also a security risk.
If you don't want to use or worry about security, you can disable the WiFi Sense feature to prevent any users from automatically connecting to your Wifi connection.
- Connect to Tethered (WiFi Hotspot) connection.
- Open Settings, then click Network & Internet .
- Select Wifi in the left pane, then click Manage Wi-Fi settings .
- Remove the Connect section to suggest opening hotspots and Connect to networks shared by my contacts to disable the WiFi Sense feature.
Additional:
In addition to quickly fix Windows 10, with just one click, users can use FixWin. FixWin for Windows 10 allows users to fix and fix errors on Windows 10 with just one click. To better understand FixWin 10 and how to use FixWin 10 to fix errors on Windows 10, readers can refer here.
Refer to some of the following articles:
-
How to activate Dark Mode on Windows 10?
-
How to use Command Prompt to manage wireless networks on Windows 10?
-
Trick to enable / disable Windows Updates on Windows 10 quickly and easily
Good luck!
You should read it
- ★ Turn off the Win 10 update, stop Windows 10 from updating automatically
- ★ How to fix the error of not finding Wifi after updating Windows 10
- ★ Turn off driver update on Windows Update Windows 10
- ★ Windows 7 continues to show errors, making it impossible for users to turn off or restart the computer
- ★ Error 0x80245006 during Windows 7, 8 and 10 update, this is how to fix the problem