Instructions on how to prevent Windows from automatically connecting to Wi-Fi
Windows usually automatically connects to the Wi-Fi network that the user entered the previous password. However, if you want to turn off this auto-connect feature because of the slow Wi-Fi network or some cause, you can do it. Windows will still remember the password, but will only connect when you do it manually.
- How easy is Crack WiFi?
- Instructions for fixing Wifi errors with yellow exclamation
How to turn off automatic Wi-Fi connection on Windows 10
To prevent Windows from connecting to Wi-Fi automatically, simply follow the steps below.
When you select the network in the pop-up menu that opens, uncheck the Connect automatically box before clicking the Connect button .

If you are not near the Wi-Fi network, it will not display and you will have to edit the Wi-Fi configuration saved on the system to change the settings.
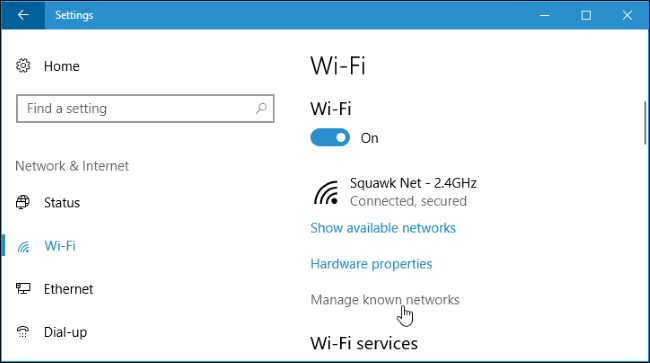
To do that, you need to access Settings> Network & Internet> Wi-Fi . Then click the link Manage known networks .

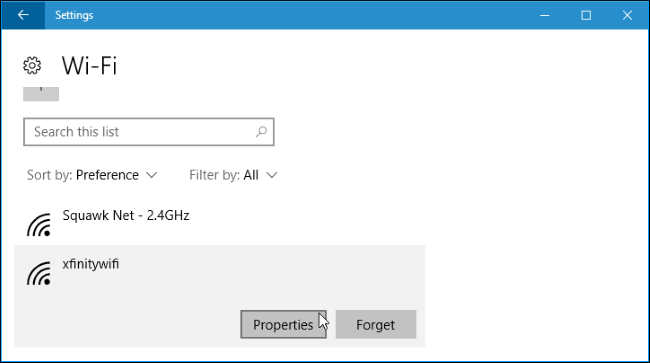
Select the network you want to edit in the list, then click Properties. You can use the search box or filtering options to find the exact network you are trying to edit.

Set the option to Connect automatically when in range to Off. Windows will no longer automatically connect to that Wi-Fi network, but you can connect manually without updating your password or any other settings.
How to turn off Wi-Fi connection automatically on Windows 7 and 8
Unlike Windows 10, the only way to prevent Windows 7 and 8 from automatically connecting to Wi-Fi is to ask the system to forget the saved Wi-Fi network. This means you will have to re-enter your password and other information if you want to use that Wi-Fi network again in the future.
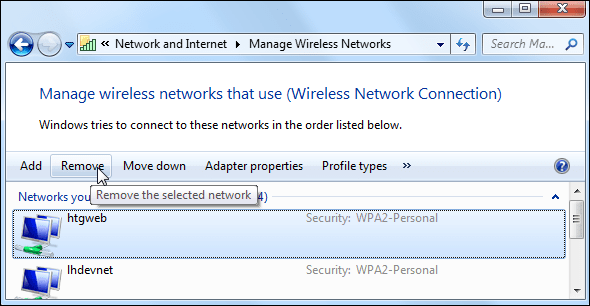
In Windows 7, go to Control Panel> View network status and tasks> Manage wireless networks . Select the Wi-Fi network you want to forget and click Remove.

In Windows 8, you must use the netsh command from the Command Prompt to delete the saved Wi-Fi network.
First you need to start the Command Prompt window and run the following command, replacing 'WiFiName' with the Wi-Fi network name you saved.
netsh wlan delete profile name = "WiFiName"
After running the above command, your computer will forget that Wi-Fi network and will not connect automatically the next time.
Good luck!
You should read it
- ★ How to prevent Windows 10 from automatically restarting
- ★ How to prevent Microsoft from automatically downloading Windows 10 updates?
- ★ How to turn off Wi-Fi when connecting to Ethernet in Windows 10
- ★ How to prevent mouse from automatically clicking or selecting when you move the cursor in Windows 10
- ★ The trick prevents Windows from automatically updating specific drivers