MS Word - Lesson 6: Format the text
The formatting of paragraphs allows you to change the way you look at the entire document. You can access the Paragraph formatting tool by clicking the Page Layout tab on the Ribbon or clicking the Paragraph group on the Home tab.
TipsMake.com - The format of paragraphs allows you to change the way you look at the entire document. You can access the Paragraph formatting tool by clicking the Page Layout tab on the Ribbon or clicking the Paragraph group on the Home tab.

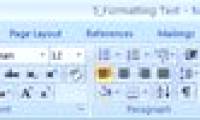
Align in Paragraph
Alignment allows you to set how text appears. To change the margin, do the following:
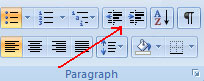
• Click the Home tab
• Choose the appropriate button for alignment on Paragraph groups:
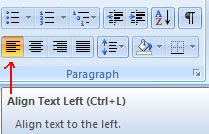
- Align Left ( Ctrl + L ): text is aligned to the left edge.
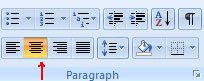
- Center ( Ctrl + E ): Text is centered between the margins.
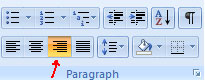
- Align Right ( Ctrl + R ): Text is aligned to the right edge.
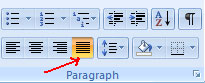
- Justify ( Ctrl + J ): Text is spread out both left and right.
Indent paragraph
Paragraph indentation allows you to specify text in a different alignment. There are several options for indenting:
• First Line : Control the left border for the first line of the paragraph.
• Hanging : Controls the upper left border with all lines in a paragraph except the first line.
• Left : Controls the left border with every line in a paragraph.
• Right : Controls the right border with every line in a paragraph.
To indent paragraph, you can do the following:
• Click the Indent button to control indentation.
• Click the Indent button a few times to increase the indent size.
Or:
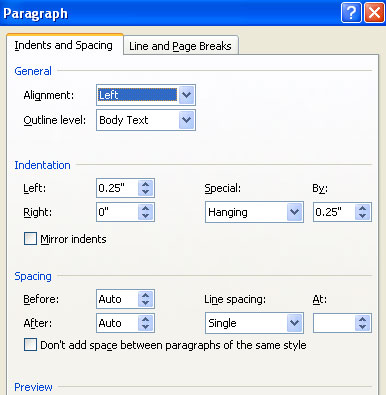
• Click on the dialog box on the Parggraph group.
• Select the Indents and Spacing tab.
• Choose the indents .

Add borders and shading effects
You can add borders and shading to paragraphs and whole pages. To create a border around a paragraph or paragraph, we do the following:
• Select the text area where you want the border or shading effect.
• Click the Borders button on the Paragraph group.
• Select Border and Shading .
• Choose the appropriate options.

Apply the Styles
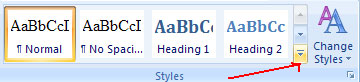
Styles are a set of existing formats that you can apply to text. To use Quick Styles:
• Select the text you want to format.
• Click the bottom button on the Styles group of the Home tab.
• Choose the style you want to apply.
Create links
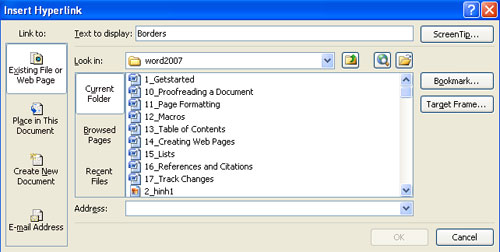
Creating links in a word document allows you to set a URL that readers can click on to visit a website. Subject to insert link:
• Select the Insert tab , click the Hyperlink button on the Links group.

• Enter the text in the 'Text to Display' section and the web address in the 'Address' section.
Change the distance between paragraphs and lines
You can change the spacing between lines and paragraphs by following:
• Select the segment or segments you want to change.
• On the Home tab, click the Paragraph dialog box.
• Select the Indents and Spacing tab .
• In the Spacing section, adjust the distance accordingly.
Next article: MS Word - Lesson 7: Styles
Was this article helpful?
Your feedback helps us improve.
Related Articles
 MS Word - Lesson 5: Format the text4 minutes read
 Full Word tutorial 2016 (Part 4): Formatting text5 minutes read
 Align text, adjust font in Word 20138 minutes read
 MS Word - Lesson 10: Read and check proofs for documents3 minutes read
 Format Tab text in Word1 minutes read
 Word 2013 Complete Guide (Part 6): Aligning page layout5 minutes read
Reader Comments 0
Sign in with email or Google to join the discussion.