Macromedia Flash - Making fireworks effects
This exercise is very simple, you will be guided on how to make a burst effect using a mask. No need to use Action Script code. To make this image more vivid, you can add sound effects! Through this exercise, you'll know how to use the Color Mixer Panel (Shift + F9), how to convert the layer to a mask ...
This exercise is very simple, you will be guided on how to make a burst effect using a mask.No need to use Action Script code.To make this image more vivid, you can add sound effects! Through this exercise, you'll know how to use the Color Mixer Panel (Shift + F9), how to convert the layer to a mask .
Step 1
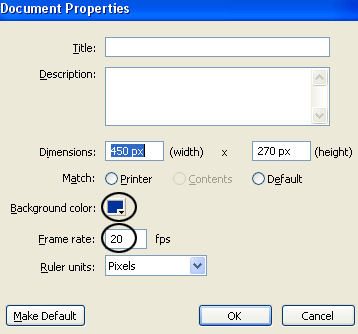
Create a new flash file. Press Ctrl + J (Document Properties) and set the file size to your liking. Select background color # 003399 and Frame rate to 20 fps , then click OK .
Step 2
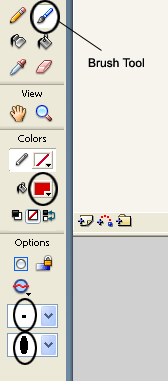
Select the Brush Tool and color options as follows:
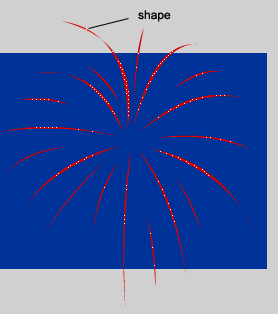
Then, draw a shape that looks like this:
Step 3
Click on frame 25 and press F6 key. After that, move this shape down a bit with the arrow keys or use the Selection Tool (V) to drag.
Step 4
Create a new layer (layer 2) and drag it below the layer 1. See the following image

Step 5
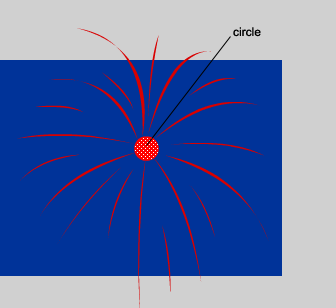
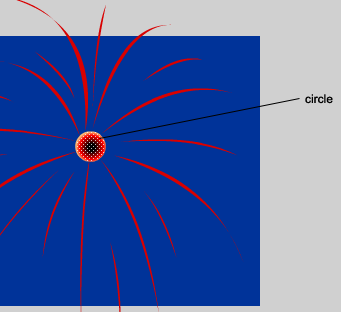
Select layer 2 and select the Oval Tool (O). Set the Stroke color (the border color with the icon to the pen) to No color (the rectangle has a red diagonal), the color of the drawing ( Fill color ) select any color you like and draw a circle of size. 30 x 30 px in the center of the original shape. After the drawing is completed, the results are as follows:
Step 6
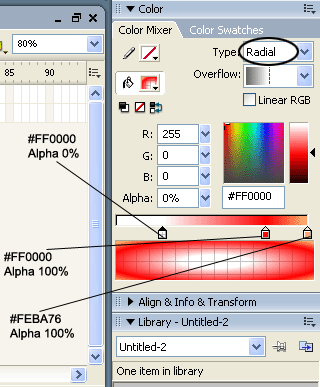
While still selecting the circle, go to the Color Mixer Panel (Shift + F9) and select the option according to the following markings:
After finishing the circle, the color is as follows
Step 7
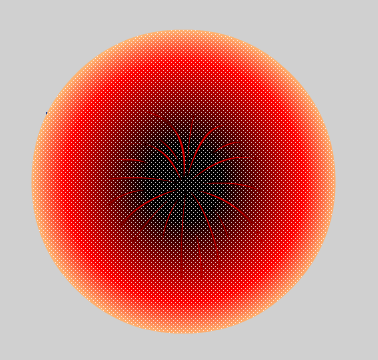
Click on frame 25 and press F6 key. After that, select the Free Transform Tool (Q) and enlarge the circle to cover the original shape. See the picture below
Step 8
Select layer 2 and go to the Properties Panel (Ctrl + F3) at the bottom of the working screen. In the left part of the panel, you will see the Tween drop-down box, choose Shape

Do the same for layer 1
Step 9
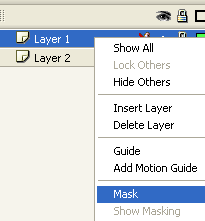
Select layer 1 and convert it to a mask by right-clicking on it and selecting Mask .
Step 10
Now you need to insert sound. You can download the original flash file and copy the audio file from the library file Library (Ctrl + L) to the Library on your file.
Create a new layer above the layer 1 and name it sound . Select the sound layer and drag the saved sound file from the Library into the workspace.
Test the file you created: Ctrl + Enter .


 How to Draw a Circle in Gimp
  How to play Among Us in color blind mode
  Create Button in CSS
  How to add color coded terminal code to Microsoft Word
  How to create and use custom gradients in Google Slides
  How to change the Facebook background color