Table of Contents
The following guide provides a clear overview of Step, with the most relevant background, details, and practical takeaways.
Step Overview
Step 1 First, select the picture as the background for this exercise. Step 2 Create a new flash file. Press Ctrl + J ( Document Properties ) and set the width and width (Hight) of the file to the width of the image. Select any background color and set the Frame rate of the file to 32, then click OK. Step 3 Select the file, go to Import > Import to stage (Shortcut: Ctrl + R ) and import it into the image you selected. Step 4 While the image is still selected, go to the Align Panel ( Ctrl + K ) and follow these steps: 1. Make sure that the Align / Distribute to Stage button is selected, 2. Click the Align horizontal center button 3. Click the Align vertical center button

Step 5 While the image is still selected, press F8 key ( Convert to Symbol ) to convert the image into a Movie Clip. Step 6 When the new Movie Clip is still selected, go to the Properties Panel below. On the left side of the Instance name field, enter the name of the Movie Clip. In this example will be photo.
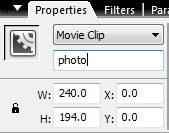
Step 7 Create a new layer and name it mask. Use the Oval Tool (O) to draw a circle like the image below (hold Shift in the drawing process).

While the circle is still selected, press F8 key ( Convert to Symbol ) to convert this circle into a Movie Clip. Figure 8 When the new made Movie Clip is still selected, go to the Properties Panel below the stage. In the left part, enter the name Movie Clip in the Instance name field, in this example enter the mask
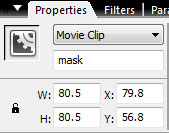
Step 9 Create a new layer above the layer mask and name it action. Step 10 Select the first frame of layer action, go to Action Script (F9) and enter the following code:
Stop (); photo. SetMask (mask); mask. OnPress = function () { startDrag (this); } mask. OnRelease = function () { stopDrag (); }
Check the newly created product (Ctrl + Enter)
FAQ
What is the main topic of Macromedia Flash - Advanced Masking with Action Script: Step?
The following guide provides a clear overview of Step, with the most relevant background, details, and practical takeaways.
Why is Step important?
Step Overview Step 1 First, select the picture as the background for this exercise.
What should readers remember about Step?
Step 2 Create a new flash file.
Related Articles
 Macromedia Flash - Advanced Icon in the Flash Menu: Step4 minutes read
 Macromedia Flash - Effects of Changing Position of Text2 minutes read
 Macromedia Flash - Create Banner Text Effect5 minutes read
 Macromedia Flash - Effects with the Cube: Select4 minutes read
 Macromedia Flash - Making Fireworks Effects4 minutes read
 Macromedia Flash - Complete Flash Banner Design4 minutes read
Reader Comments 0
Sign in with email or Google to join the discussion.