Table of Contents
This article examines Select and explains the main developments, practical implications, and context readers should understand.
Select Overview
Step 1 Open a new Flash file. Go to Modify > Document ( Ctrl + J ). Set the width and height respectively: Width: 400 pixels and Height: 250 pixels. Select background color # 72768, Frame rate: 42 fps and select OK.

Step 2 Select the Rectangle tool (R). You will draw a rectangle without border color. To do this, select the color for the Stroke to No color, the Fill color to white ( white ), and draw a 35 x 35px cube (See the picture below).

Step 3 Select the cube you just drawn, press F8 (or go to Modify > Convert to Symbol ) to convert that cube into a Movie Clip.
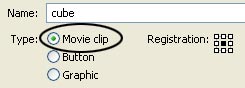
Step 4 Double-click the above Movie clip with the Selection tool (V). You will go inside Mobie clip.

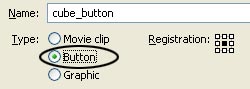
Step 5 Select the cube and press Ctrl + C key (Copy), create a new layer (layer2), select frame 2 and press F6 key, then press Ctrl + Shift + V (Paste in Place). Step 6 Go back to layer 1, select it and press F8 key (Convert to Symbol) to convert it to Button. See the picture below.
Step 7 Using the Selection Tool (V), click once on the cube to select it and open the Properties Panel ( Ctrl + F3 ). On the right you will see the Color menu. Choose Alpha with 17%.

Step 8 Select frame 8 and 13 and press F6. After that, go back on frame 8, select the Free Transform Tool (Q), press and hold Shift key, use the mouse to drag the cube a little bigger. See the picture below.

After that, take the Selection Tool (V), select the cube again and open the Properties Panel. On the Color menu, select Alpha again and the value is 100%.

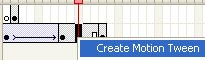
Step 9 Right-click anywhere in the color area between frame 1 and frame 8 and then between frame 8 and frame 13 with the same LINE, choose Create Motion Tween from the menu that appears.
Step 10 Go back on frame 1, take the Selection Tool (V) and select the cube again. Press F9 key or go to Window > Actions to open Actions panel. Step 11 Enter the ActionScript code below into the Actions Panel:
On ( rollOver ) { play (); }
Step 12 Lock layer1, select the first frame of layer 2, and in Action Panel (F9) enter the following code:
Stop ();
Step 13 Select frame 2 of layer 2, press F8 key ( Convert to Symbol ) to convert this cube to Graphic Symbol.
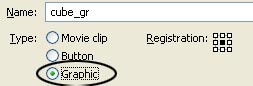
After that, take the Selection Tool (V), select the cube, go to the Properties Panel. In the Color menu, select Alpha and 17%. Step 14 Select frame 35 and 45 and press F6 key. Step 15 Go back on frame 35, take the Free Transform Tool (Q) to increase the cube shape as we did for the first cube (Step 8).

Step 16 Right-click anywhere in the area between frame 2 and 35 and then frame 35 with 45 and choose Create Motion Tween from the menu that appears.

Step 17 Go back to the main scene ( Scene1 ) and multiply the cube to multiple copies.
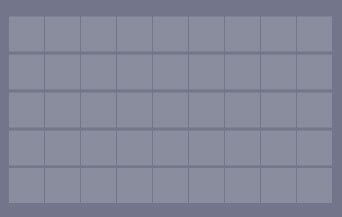
You can download the source file here for reference.
FAQ
What happened in Macromedia Flash - Effects with the Cube: Select?
This article examines Select and explains the main developments, practical implications, and context readers should understand.
What factors influenced Select?
Select Overview Step 1 Open a new Flash file.
What was the practical impact on users?
Go to Modify > Document ( Ctrl + J ).
Related Articles
 Macromedia Flash - an Attractive Photo Appearance Effect4 minutes read
 Macromedia Flash: Create Effects for Nature Photos4 minutes read
 Macromedia Flash - Photo Effects with Sound7 minutes read
 Macromedia Flash - Effects of Lighting on Photos4 minutes read
 Macromedia Flash - Animation and Rotation Effects4 minutes read
 Macromedia Flash - Create Menu Effects6 minutes read
Reader Comments 0
Sign in with email or Google to join the discussion.