Macromedia Flash - Water bubble effect
Carefully watching this detailed tutorial will know how to create an extremely unique and funny effect with water bubble images using Motion Guide. You will not need to use any Action Script code in this lesson but still create the following image:
Step 1
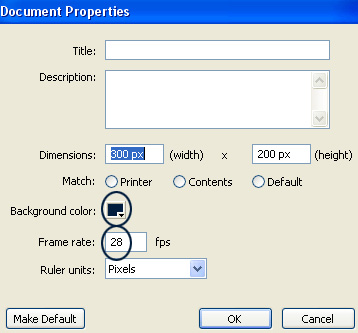
Create a new Flash file. Press Ctrl + J key on the keyboard (Document Properties) and set the width of the file as you like. Select # 64CDFF as background color and set the Frame rate to 28, then click OK .
Step 2
Select the Oval Tool (O) and go to the Properties Panel (Ctrl + F3) below, select the following options:
- Enter the border color as # 021E3E
- The background color for the drawing is optional (Fill color)
- Select the stroke is Solid with a thickness of 1.

After selecting the options above, draw a circle of size 20x20 px (see picture below).

Step 3
Pick the Selection Tool (V) and select only the Fill Color (the color of the stroke picks a white red cross). Click on the background color drawing, open the Color Mixer Panel ( Window > Color Mixer ) and select the following parameters:
- Click the color bucket icon to format the background color (Fill color)
- In the Type section select Linear
- Click on the small color box on the left side of the color slider and choose #FFFFFF color. Alpha attribute set is 30%
- Click on the second small square on the right side of the color slider and select the color as # 0066CC, but change the Alpha attribute to 0% (equivalent to transparent color)
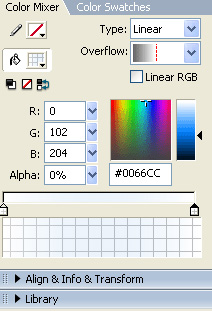
After selecting, you will get the circle color as follows

Step 4
Use Flash tools to draw a small white shape on the bubble as shown below

Step 5
Select both the bubble and the shape you just drawn and press F8 (Convert to Symbol) to convert the bubble image into a Graphic Symbol.

Step 6
Pick the Selection Tool (V) and double click on layer 1 to rename its name into bubble .
Step 7
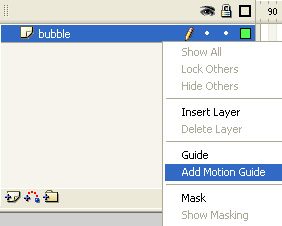
Select the bubble layer, right click on the layer name and select Add Motion Guide (see image below).
Step 8
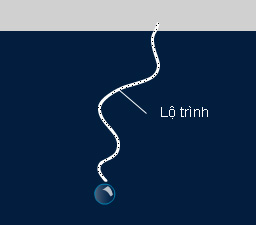
Select the layer Guide you've just created, use the Pencil Tool (Y) and draw a path for the bubble as follows
Step 9
Click on frame 150 of the Guide layer and press F5
Step 10
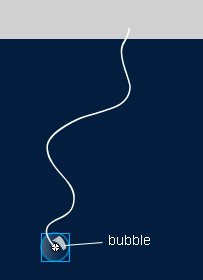
Go back to the first frame of the layer bubble and place the bubble at the first point of the drawn path (as shown below).
Step 11
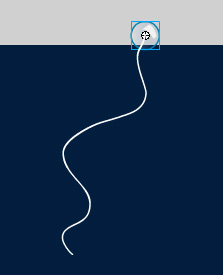
Click on frame 150 of the bubble layer and press F6 key. Place the bubble at the end of the route as shown below:
Step 12
Right-click anywhere on the gray area between frame 1 and 150 of the bubble layer and choose Create Motion Tween from the menu that appears. See the following picture

So you've created the route for the first bubble. Now let's create a few more bubbles with different travel routes similar to those created above. After creating the bubbles, import into a suitable background image and test the product.
Download the source file here.