Macromedia Flash - Visual effects using mouse click
In this article we will step by step learn how to create visual effects using mouse clicks. You can use these effects for flash banners, for some presentations
In this article we will step by step learn how to create visual effects using mouse clicks. You can use these effects for flash banners, for some presentations . Now we will start!
Step 1
First, save the image below

Step 2
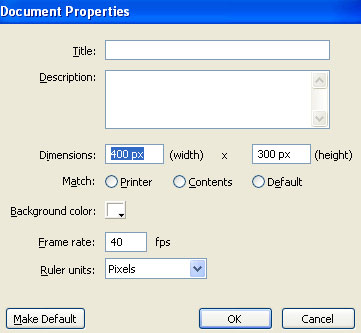
Create a new flash document. Press Ctrl + J key on the keyboard ( Document Properties ) and set your document width to 400 pixels and its length to 300 pixels. Choose white as the background color. Set the frame rate of Flash movie to 40 and click OK .
Step 3
Call the current image layer as image. Double-click on its default name (layer 1) to change the name. Press Enter when you have finished typing the new name.
Step 4
Now select File > Import > Import to stage ( Ctrl + R ) and import the image you just saved in step 1.
Step 5
While the image is still selected, press F8 key (Convert to Symbol) to convert it into a Movie Clip Symbol.

Step 6
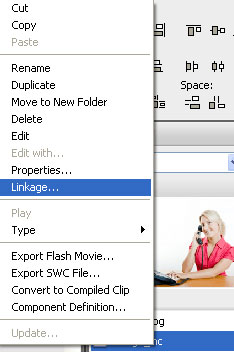
Now go to Flash Library ( Ctrl + L ), right click on image_mc and select Linkage
Step 7
In the Linkage Properties window, select Export for ActionScript and in the Class section type CoolImage as shown below:
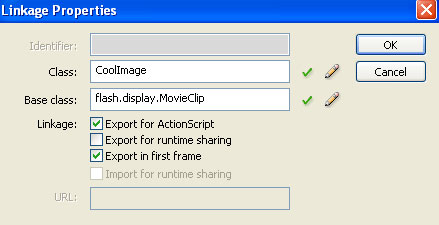
Now click OK , ignore the ActionScript Class Warning warning. Click OK .
Step 8
Now select the image in the stage and press the delete key on the keyboard to delete it
Step 9
Select the first frame and go to the Action Script Panel (F9). Then, find this code inside the actions frame:
function Main () {
stage.addEventListener (MouseEvent.CLICK, AddImage);
}
Main ();
function AddImage (e: MouseEvent): void {
newImage var: CoolImage = new CoolImage ();
this.addChild (newImage);
newImage.x = mouseX;
newImage.y = mouseY;
newImage.scaleX = 0;
newImage.scaleY = 0;
newImage.alpha = 0;
newImage.addEventListener (Event.ENTER_FRAME, ZoomImage);
}
function ZoomImage (e: Event): void {
var imageMC: MovieClip = MovieClip (e.target);
imageMC.scaleX + = .05;
imageMC.scaleY + = .05;
if (imageMC.scaleX <4) {
imageMC.alpha + = .05;
} else {
imageMC.alpha - = .05;
if (imageMC.alpha <.8) {
imageMC.removeEventListener (Event.ENTER_FRAME, ZoomImage);
}
}
}
We are finished. Good luck!
Was this article helpful?
Your feedback helps us improve.
Related Articles
 Macromedia Flash - An attractive photo appearance effect4 minutes read
 Macromedia Flash - Photo effects with sound6 minutes read
 Macromedia Flash - Create menu effects6 minutes read
 Macromedia Flash: Create effects for nature photos3 minutes read
 Macromedia Flash - Effects of lighting on photos3 minutes read
 Macromedia Flash - Animation and rotation effects4 minutes read
Reader Comments 0
Sign in with email or Google to join the discussion.