How to Cut an Object Using Knife Project in Blender 2.77
If you're using Blender 2.77, there are two options for cutting objects with the Knife Project Tool. You can cut an object with or without cutting through it. Either way, it isn't hard to do. Add a new cube by pressing » Mesh » Cube.
Table of Contents
Part 1 of 2:
Setting Up the Object
-
 Add a new cube by pressing ⇧ Shift+A » Mesh » Cube.
 -
 Continue to add a new circle by pressing ⇧ Shift+A » Mesh » Circle.
 -
 Press the R key, hit the X key and type 90 to rotate the circle 90 degrees around the x-axis.
 -
 Switch from the Perspective View Mode (persp) to the Orthographic View Mode (ortho). You can do this by pressing the Numpad 5 key.
 -
 Press the Numpad 1 key to view from the front of the cube.
 -
 Press G to move the circle to the center of the cube. Then press S to scale the circle.
 -
 Press A to deselect all visible objects in scene. Hold down the ⇧ and right click on the circle first. Then right click on the cube.
 -
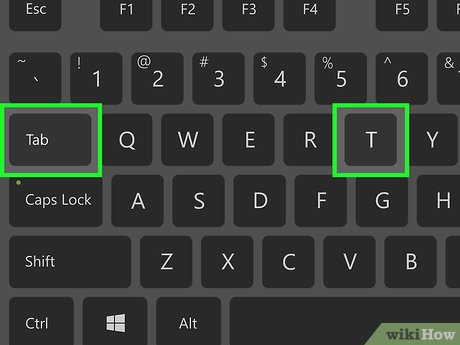
 Switch from Object Mode to Edit Mode by pressing Tab ↹. In the Tool Shelf panel, select Tool » Knife Project. Press T to open the Tool Shelf panel if you don't see it.
=== Making the Cut ===
Method 1: Using Cut-Through
-
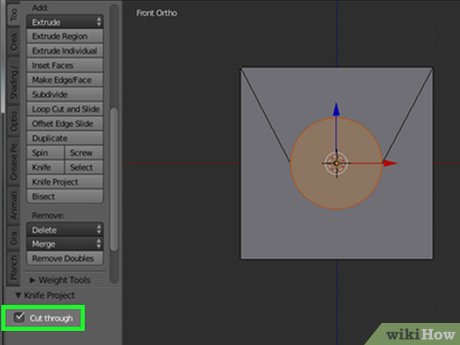 Select the Cut through option in Knife Project. This will cut both two sides of the cube.
 -
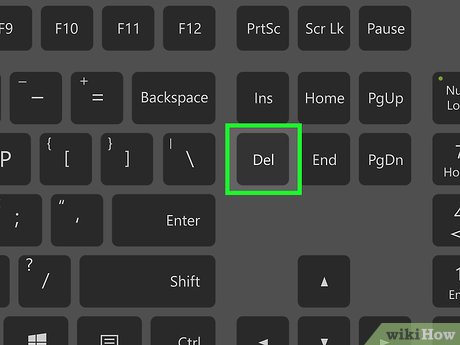
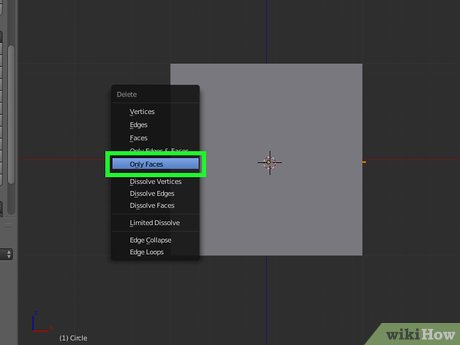 Press the Delete key » Faces to cut holes in the cube.
Part 2 of 2:
Method 2: Using the Cut Through Tool
-
 Deselect the Cut through option. You will cut only one side of the cube – the front of the cube.
 -
 Press the Delete key » Faces to cut a hole in the front of the cube.
Was this article helpful?
Your feedback helps us improve.
Related Articles
 How to Import Models Into Blender on PC or Mac3 minutes read
 Blender - Free and Powerful 3D Modeling Tool7 minutes read
 How to sharpen a standard knife as an expert?5 minutes read
 What's New in Blender 3.03 minutes read
 Common mistakes when using blender and how to fix it7 minutes read
![[Review] Is the Osaka blender good?](/data/thumbs_200x120/[review]-is-the-osaka-blender-good_thumbs_200x120_5MHR2bTZg.jpg) [Review] Is the Osaka blender good?7 minutes read
[Review] Is the Osaka blender good?7 minutes read
Reader Comments 0
Sign in with email or Google to join the discussion.