Instructions to uninstall Windows 8
Recently, the Windows 8 version for developers (Windows 8 Developer Preview) has officially been released, with a few features and improved user interface. However, many people after experiencing this new operating system want to remove it from their system. The Developer Build version is primarily for developers to write new applications for Windows and test and fix compatibility issues.
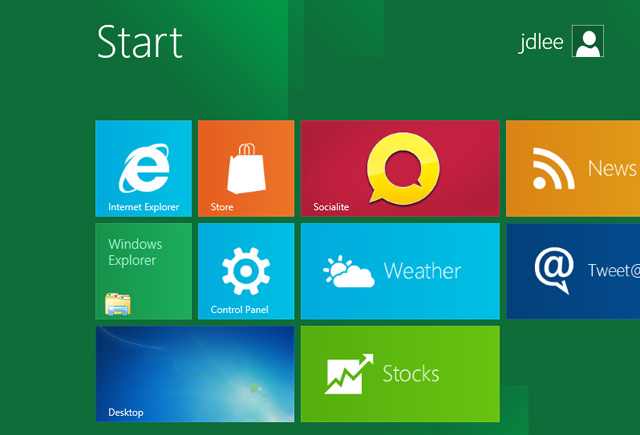
If you are trying Windows 8 and now want to uninstall or remove it from your system, there are some notes to take before starting this process.
First, it is recommended to remove or disconnect your Windows Live account and make a backup of your important files / folders to an external storage device. If you install Windows 8 dual boot with Windows 7, you can easily remove Windows 8 from your system by reformatting it. However, the dual boot option (requires that you select the operating system to boot) in the Advance Boot Options menu must be removed manually.
The following article will show you how to remove Windows 8 thoroughly and safely when dual boot Windows 8 with any OS.
To get started, log into Windows 8 and move all important files / folders to an external storage device or other location. Then reboot the system, select Windows 7 from the boot option.
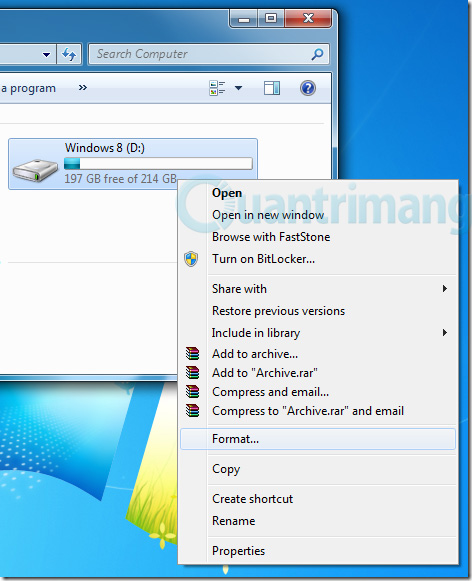
After logging into Windows 7, open My Computer , right-click the Windows 8 installation drive, select Format . Check the Quick Format item then press Start to get started:
Once the format is complete, you need to remove the Windows 8 Developer Preview option from the Advanced Boot Options menu. To do this, you need to use the BCDEdit command to modify or remove Windows 8 Developer Preview from the boot entry. However, if you do not want the command line interface, you can use the BOOTICE utility.
BOOTICE is portable, is a Windows utility that allows you to edit Boot Configuration Data files from a simple interface.
Download BOOTICE here .
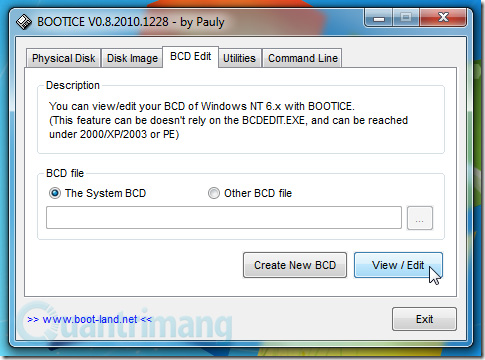
Start the BOOTICE.EXE file and select the BCD tab Edit . Select The System BCD option and then click the View / Edit button.
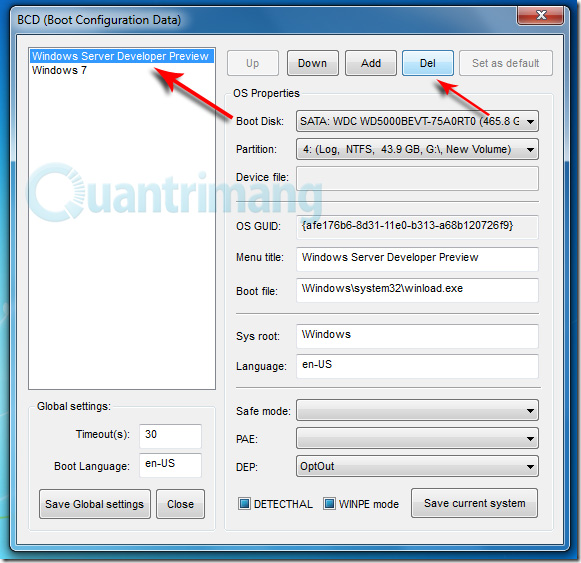
The BCD editor will open, select the Windows Developer Preview from the left bar and press Del to delete the Windows Developer Preview item from the Advance Boot Options menu.
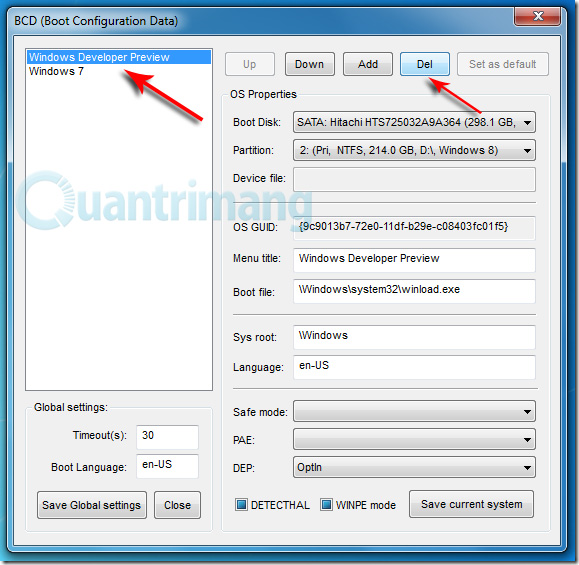
You can also take the same steps to remove Windows 8 Server Developer Preview from your system. After formatting the Windows 8 Server drive, open the BCD editor and delete the Windows Server Developer Preview item in the BCD file.
Users should be aware that Windows 8 has not yet been allowed to upgrade from Windows 7, so if you want to experience this new operating system, you need to use one of the ways to install on VirtualBox or dualboot Windows 7 System Setup and Windows 8 .