Create dual boot system of Windows 7 and Windows 8
The official appearance of Windows 8 recently has made users curious about the operating system's new features and interfaces. But make sure it takes a long time before we can 'give up' Windows 7 or XP to switch to Windows 8 ...
Table of Contents
TipsMake.com - The official appearance of Windows 8 recently has made users curious about the extremely new feature system and interface of this operating system . But make sure it takes a long time before we can "give up" Windows 7 or XP to switch to Windows 8. In the following article, we will show you how to create a dual boot system between Windows 7 and 8 in a very simple and easy way.
1. Create VHD:
To do this, open Run ( Windows + R ), type diskmgmt.msc and press Enter :

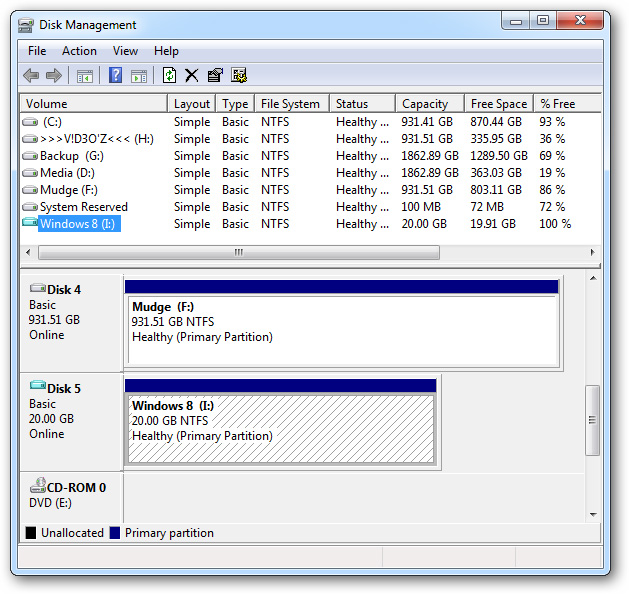
The MMC control panel displays, and here you will see the included Disk Management utility:

And to create a new VHD, click the Action menu on the Toolbar, then select Create VHD :

Select the archive folder for the VHD file, initialize the initial capacity (minimum of 20 GB), and you should select Fixed Size mode to increase performance:

After that, Windows will proceed to create VHD file. The process of this process will be displayed fully and accurately on the Status Bar of the MMC snap-in :

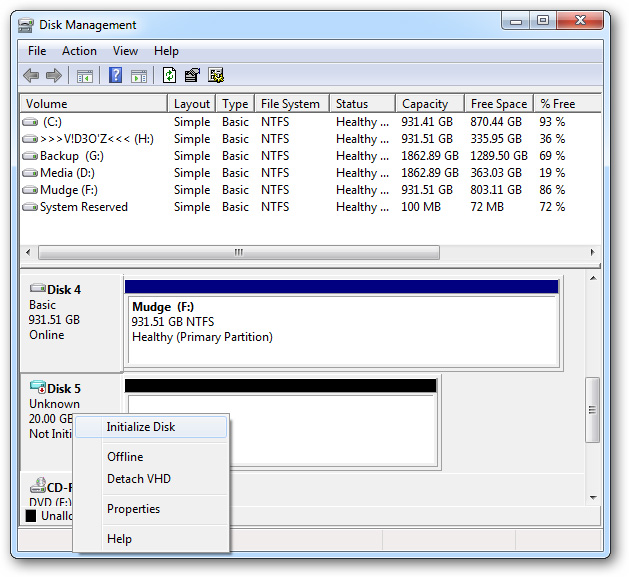
When finished, this virtual hard drive file will be listed in the Partition list in the Disk Management window. Right-click the VHD file and select Initialize Disk :
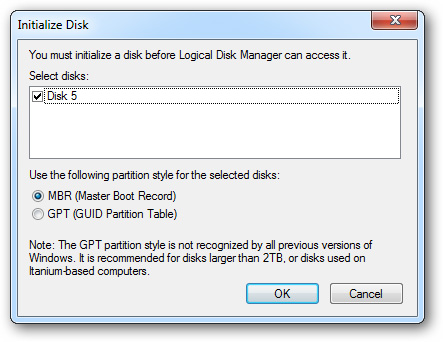
Keep the MBR (Master Boot Record) mode intact and click OK :
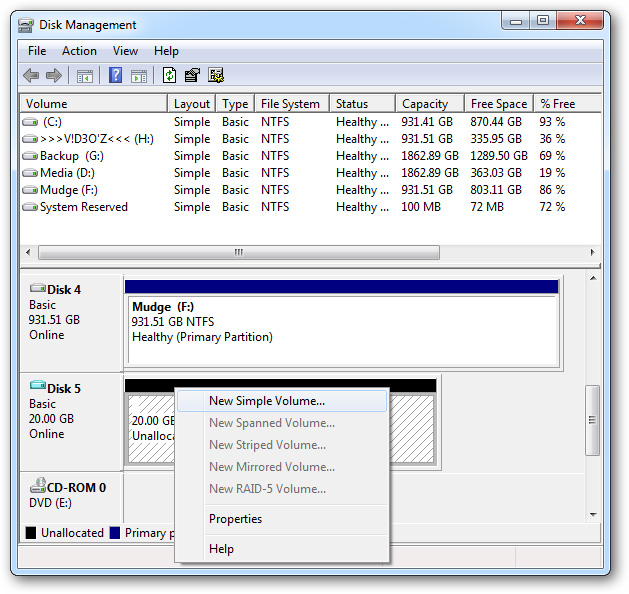
The next step here is to create Volume on that partition. Right-click on the black partition and select New Simple Volume:
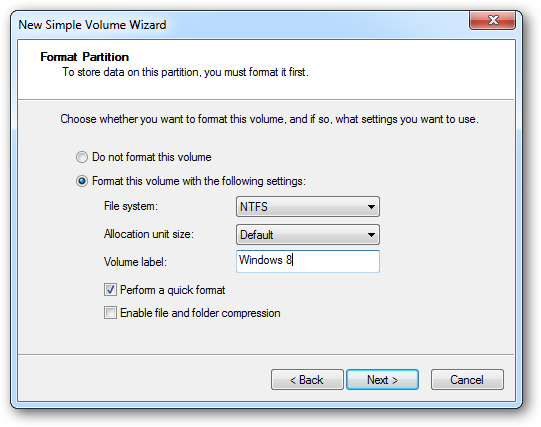
Keep the default options in the Wizard window displayed next, you can change the Volume to Windows 8, then click Next> Finish to finish:
And our VHD file can act as a real hard drive partition:
2. Install Windows 8 on the VHD partition:
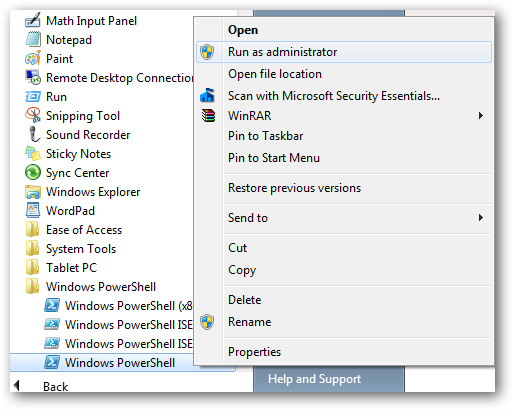
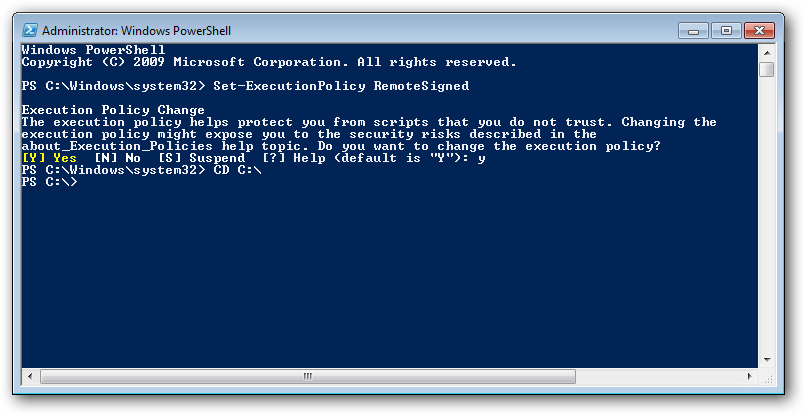
The first thing to do here is to open PowerShell ( Start Menu> All Programs> Accessories> Windows Powershell ) under Administrator :
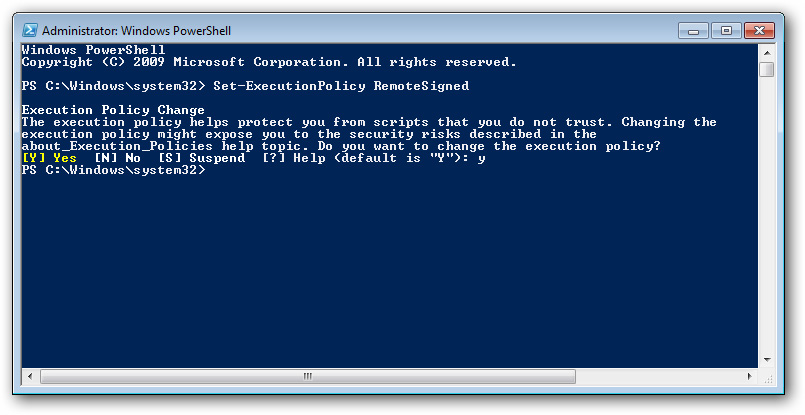
When PowerShell starts, you need to change the execution policy to allow the user account to run the necessary script. Type the command ' Set-ExecutionPolicy RemoteSigned ', the system will display a message with many options, press Y and press Enter to confirm. And after that, keep the PowerShell window as it was:
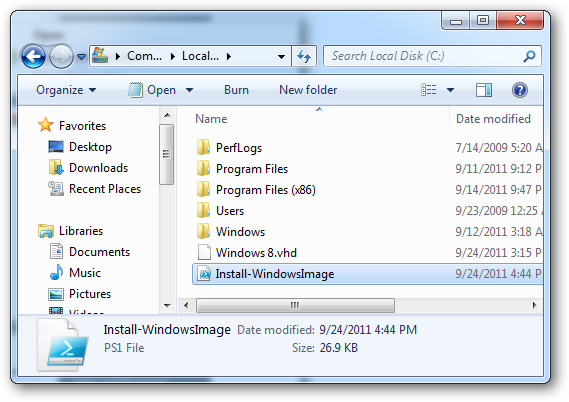
Next, download the Install-WindowsImage.ps1 code directly from Microsoft or at MediaFire, then copy to drive C or any other folder on the hard drive:
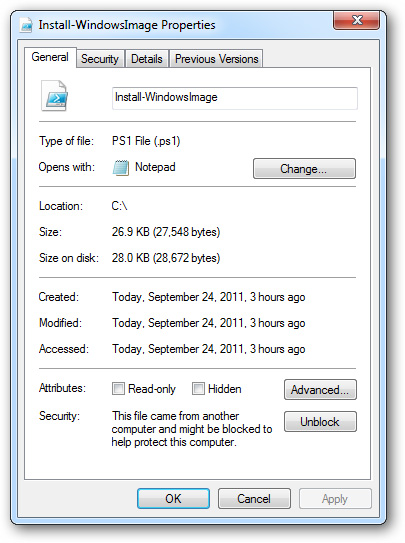
Right-click on the file and select Properties , click Unblock button as shown below:
And combine the * .ISO file of Windows 8 Consumer Preview, download it here, then go back to PowerShell and type the command ' CD C: '
Next, type in the following command:
.Install-WindowsImage.ps1 –WIM D: SourcesInstall.wim –Apply –Index 1 –Destination I:
You should pay attention and replace the drive letter with the character in this test (behind the –WIM parameter). Then press Enter:
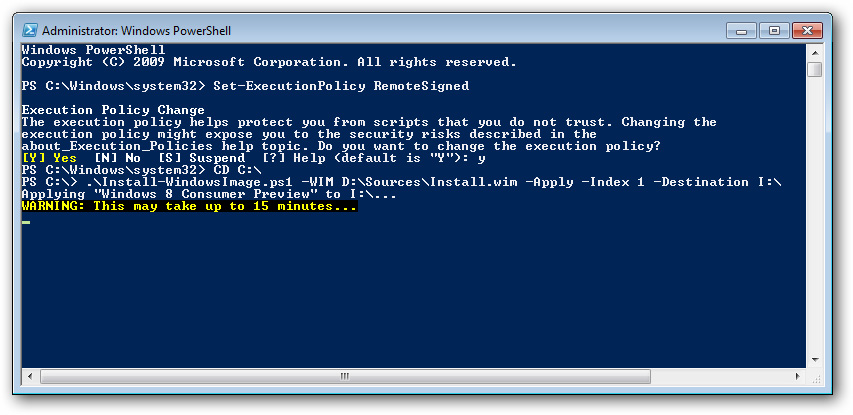 The drive E here is the VHD partition created in the previous step
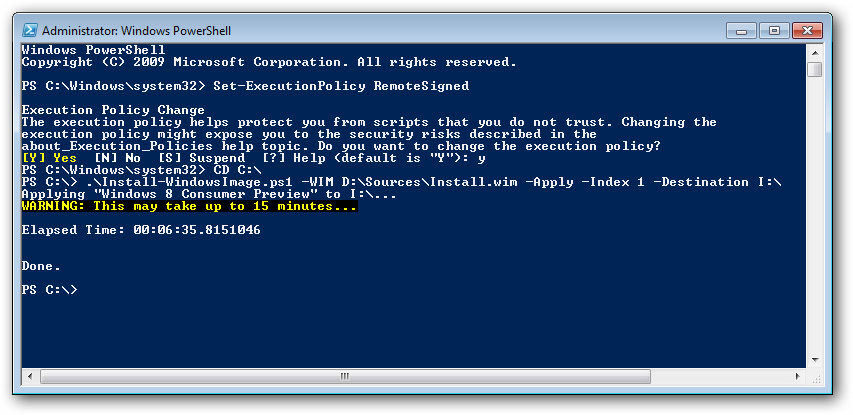
When completed, the system will display the message as shown below:
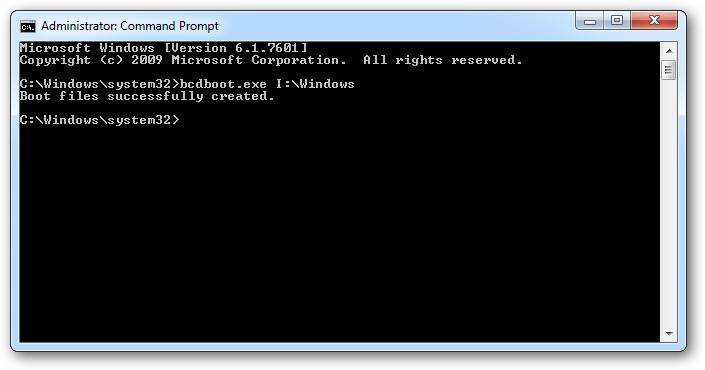
Then, open the Command Prompt and type bcdboot.exe I: Windows (assuming that I is a Windows 8 drive):
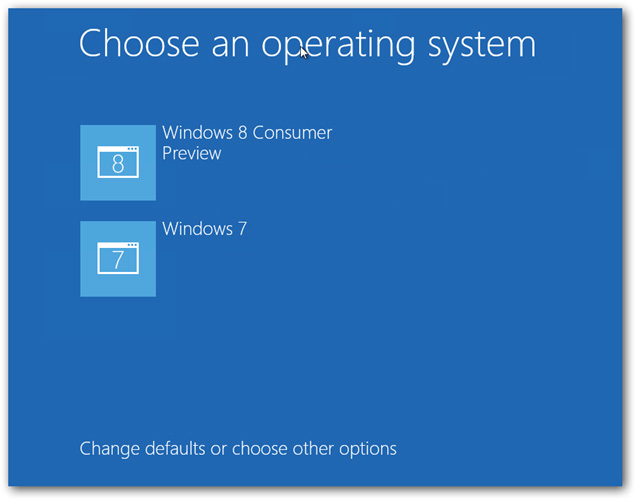
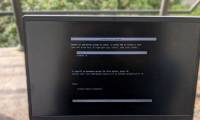
And when the system boots the next time, Windows will display the new operating system selection screen as shown below:
3. Data sharing:
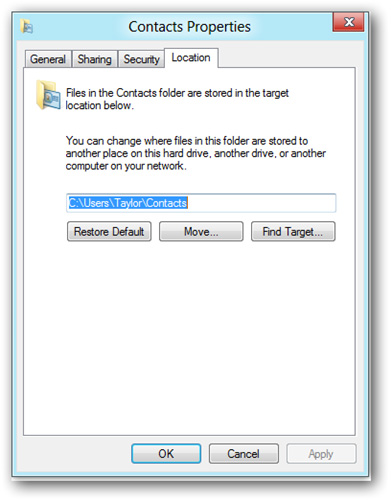
The last thing to do here is to change the file usage and sharing mode between the two operating systems. To boot directly into the Windows 8 installation process, you go to the account directory under the path:
C: Users [Account name]
Right-click the Contacts folder and select Properties from Context Menu , select the Location tab and click the Move button:
Next, move to the Contacts folder on the partition containing Windows 7:
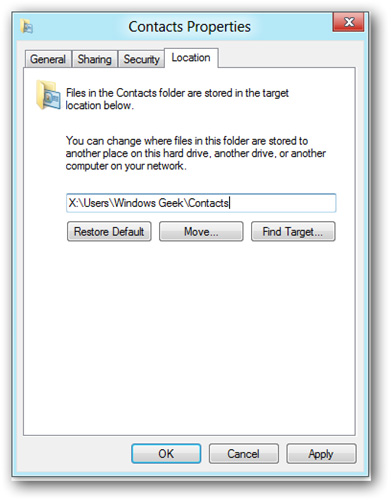
Click OK, and the system will automatically transfer data between the two locations. You just need to do this again with the following folders: Desktop, Downloads, Favorites, Links, My Documents, My Music, My Pictures and My Videos . Very simple and easy, wish you success!
Was this article helpful?
Your feedback helps us improve.
Related Articles
 How to create dual boot Linux and Windows 10 on Linux7 minutes read
 Steps to fix dual boot option not showing in Windows 106 minutes read
 Create dual-boot menu after installing Windows XP parallel Vista / 77 minutes read
 How to install dual boot Windows 10 and Windows Server7 minutes read
 Set up dual - boot system Windows 7 and Windows 84 minutes read
 Should Linux dual boot?8 minutes read
Reader Comments 0
Sign in with email or Google to join the discussion.