Remove Windows 8 from dualboot system
In the previous articles, we showed you some simple steps to create a dualboot system with Windows 8 manually or with VHD - Virtual Hard Drive. And this time, we will continue with the steps to completely remove Windows 8 from the dualboot system as above ....
TipsMake.com - In the previous articles, we showed you some simple steps to create a dualboot system with Windows 8 manually or with V HD - Virtual Hard Drive . And this time, we will continue with the steps to completely remove Windows 8 from the dualboot system as above.
In the following test, we will proceed with Boot Configuration Database - this is an inseparable process while the system starts up, so you should do it carefully and correctly, if otherwise the system will not work. The steps below are based on dualboot computers, and do not have any other operating systems other than Windows 7 and 8.
Restore Boot Loader:
This applies to dualboot setup systems based on the above two ways. The main tool used here is EasyBCD. The installation process is relatively simple and easy, just Next> Next> Finish , and this is the main interface of the program after booting:
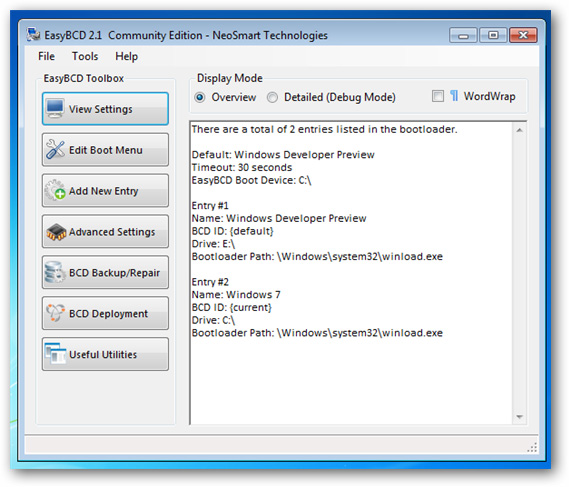
At this step, we need to remove Windows 8 from the Boot Configuration Database . Click the Edit Boot Menu button in the left pane:

In the right pane, the program will display the full list of boot loader components that have been configured for use. Select the Windows Developer Preview and press the Delete button. When the program continues to display the message, select Yes :

And now we only have Windows 7 left in the list, the next step is to set the default boot option for this section, check the box under the Default column:

In the Timeout Options section below, select Next Skip the boot menu:
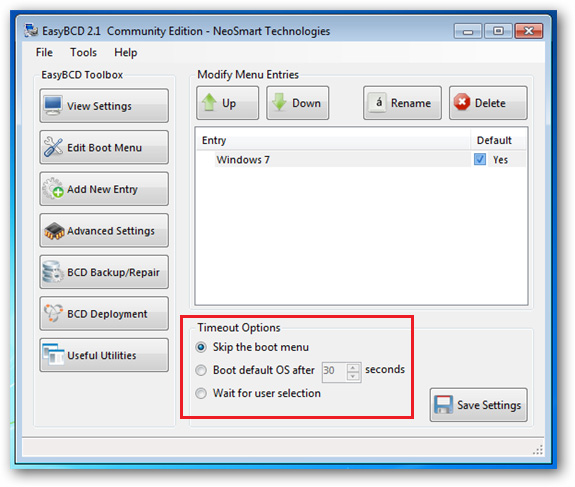
Then, click Save and restart the system to apply the change. To complete this process, you need to take the following steps, depending on the previous setup of the user.
Fordualbootsystemsmanually:
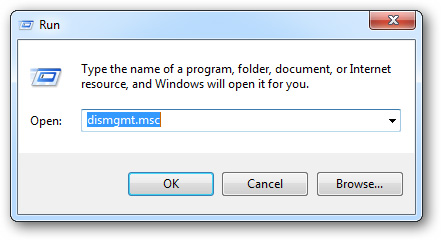
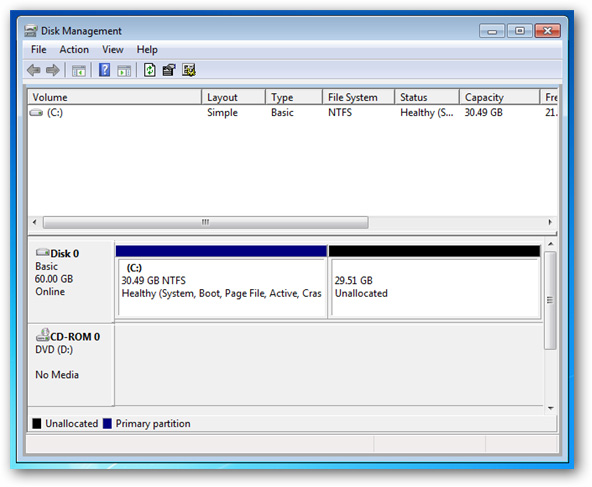
However, after the above process, we will have to 'get back' the amount of hard disk used previously. Open Run and type diskmgmt.msc, then press Enter:
After following the steps below, any information or data related to Windows 8 will be deleted
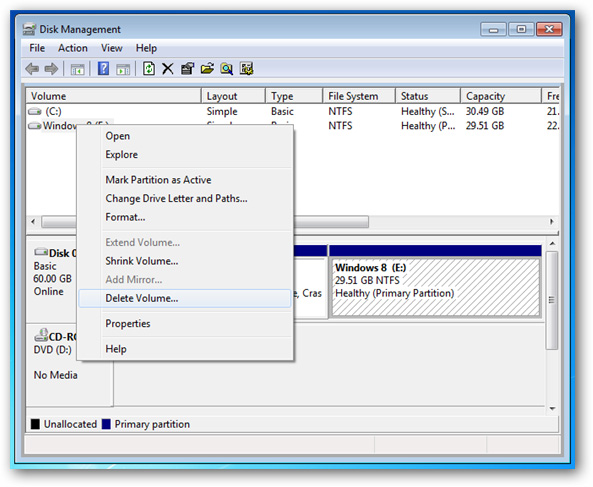
When Disk Management is displayed, we need to delete the corresponding partition of Windows 8. Right-click the partition on the drive and select Delete Volume , click Yes at the next screen:
And that partition will be deleted and displayed in black as shown below:
Next, right-click the partition just above (blue) and select Extend Volume:
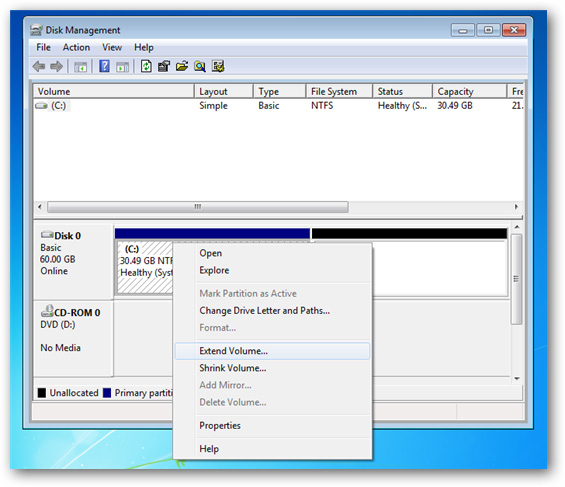
From this step, keep the default options and click Next> Next> Finish to finish the process. Once completed, the partitions on the computer will revert back to before you installed Windows 8.
For dualboot system withVHD:
In this case, all you need to do is delete the VHD file on the root partition (drive C):

Very simple and easy. Good luck!