Instructions on how to turn UAC on and off on Windows 10
User Account Control, or UAC, is part of the Windows security system. UAC prevents applications from making unwanted changes on your computer. When a software tries to change the system - in relation to a Registry or system files, Windows 10 displays a UAC confirmation dialog. If you want to make these changes, the user can confirm..
User Account Control, or UAC, is part of the Windows security system. UAC prevents applications from making unwanted changes on your computer. When a software tries to change the system - in relation to a Registry or system files, Windows 10 displays a UAC confirmation dialog. If you want to make these changes, the user can confirm.
UAC provides a specific security environment for user accounts that restrict access and can enhance a specific process with full access rights when needed. However, many users feel dissatisfied when the UAC window appears on the screen. If you are a Windows 10 user and you do not want to display the UAC window, then you can disable UAC.
In the article below, Network Administrator will guide you 2 ways to disable UAC on Windows 10.
If you are a Windows 7 or Windows Vista user, you can refer to how to disable UAC on Windows 7 and Windows Vista here:
- Disable UAC in Windows 7
- Disable UAC for applications in Windows Vista
1. Disable UAC through Control Panel
To disable UAC through Control Panel, follow the steps below:
1. Open the Control panel.
To open Control Panel on Windows 10, press Windows + X key combination to open Power User Menu, then click Control Panel .
2. On the Control Panel window, access the following link:
Control PanelUser Accounts and Family SafetyUser Accounts
Here, find and click the Change User Account Control settings link .

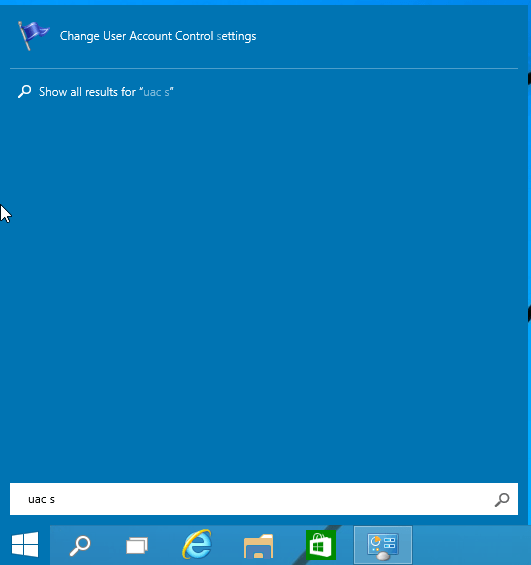
Alternatively, click the Start button to open the Start Menu, then enter the following command into the Search box:
uac s
Click on Change User Account Control settings on the search results list.
3. On the User Account Control settings window, move the slider to the bottom (Never Notify):

Click OK and UAC will be disabled.
2. Disable UAC through Registry tweaks
Also you can disable UAC by using Registry Editor.
1. Open Registry Editor by pressing Windows + R key combination to open the Run window, then enter regedit there and press Enter. If UAC appears on the screen, click Yes to continue.
2. On the UAC window, navigate to the key:
HKEY_LOCAL_MACHINESOFTWAREMicrosoftWindowsCurrentVersionPoliciesSystem
If there is no specific Registry key in the path above, you can create that Registry key.
3. In the right pane, edit the DWORD EnableLUA value and set the value to 0:
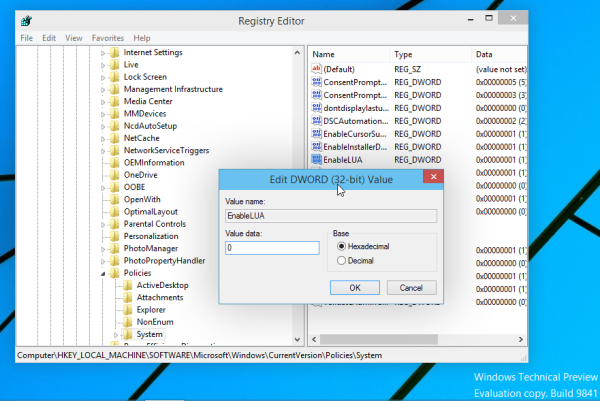
If there is no DWORD value you can proceed to create that value.
4. Restart your computer.
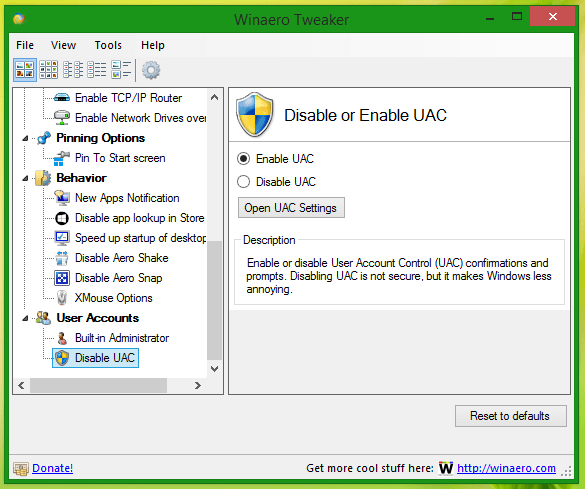
If you don't want to tweak Registry Editor, you can use Winaero Tweaker to disable UAC.
- Download Winaero Tweaker to your phone and install it here.
After installation is complete, access User Accounts => Disable UAC :
Refer to some of the following articles:
- Here's how to completely disable Windows Defender on Windows 10, 7 and Windows Vista
- Automatic timer to turn on Wifi after 1 hour, 4 hours or 1 day on Windows 10
- Complete how to use all backup and restore tools on Windows 10
Good luck!