Table of Contents
Disable All Live Tile at the Same Time on Windows 10 Start Menu is easier to understand when the core ideas are paired with practical examples. The sections below explain the topic clearly, highlight useful steps, and point out details that can prevent common errors.
Live Tile is a very useful feature on Windows 8 / 8.1 and Windows 10. However, the limitation of this feature is to take up Internet bandwidth to update the preview and notifications. Sometimes in some cases Live Tile also makes users feel annoying.
By default, to disable Live Tile options on Windows 10 Start Menu, just right-click on the application and select More => Turn live title off to finish.

1. Disable all Live Tile at the same time on Windows 10 Start Menu
To disable all Live Tile at the same time on Windows 10 Start Menu, follow the steps below:
1. Press the Windows + R key combination to open the Run command window.
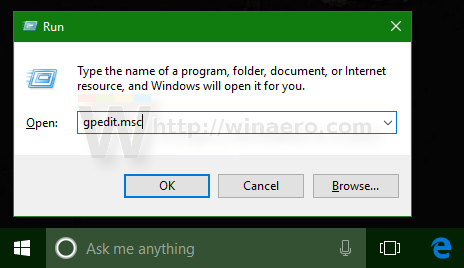
At the Run command window, enter gpedit.msc there and press Enter to open the Group Policy Editor.
2. Now on the screen that appears the Group Policy Editor window.
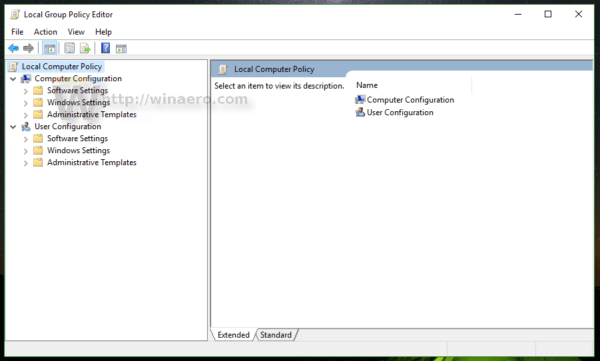
3. Here you navigate by key:
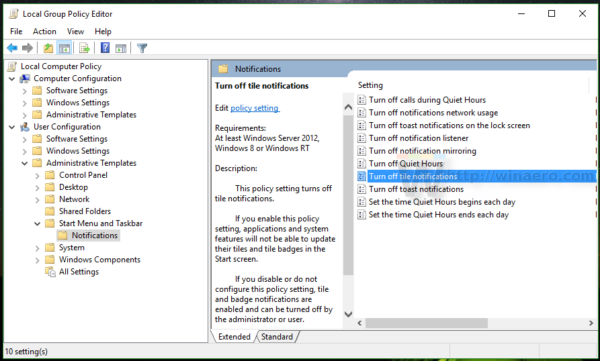
Local Computer Policy => User Configuration => Administrative Templates => Start Menu and Taskbar => Notifications
4. Next, find and double-click the option Turn off tile notifications .
5. Now on the screen the Turn off tile notifications dialog box appears, here you click the Enable option then click OK , close the Turn off tile notifications window again.
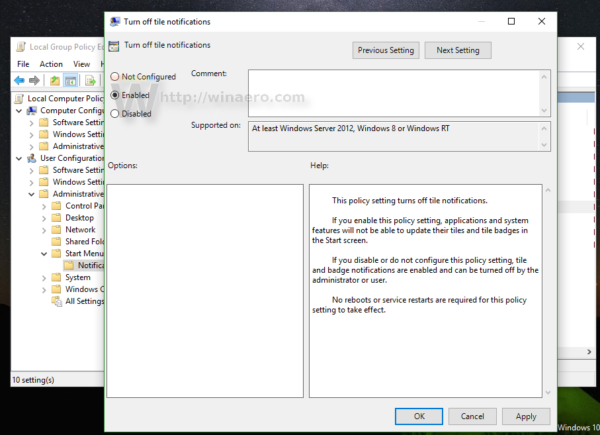
6. Finally log off your Windows 10 computer and log back in to check for changes.
Before:
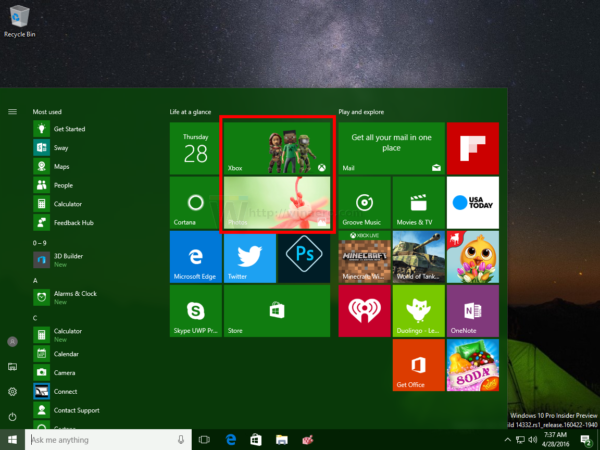
After:
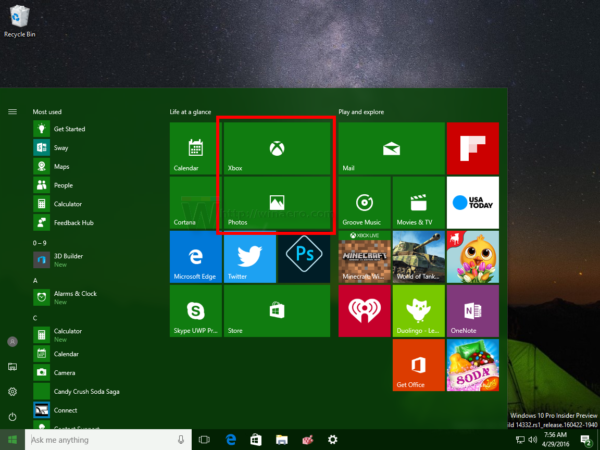
2. On Windows 10 versions, there is no Group Policy Editor
With versions of Windows 10 without the Group Policy Editor, users can disable all Live Tile with the Registry.
1. Open Registry Editor.
2. In the Registry Editor window, navigate to the key:
HKEY_CURRENT_USERSOFTWAREPoliciesMicrosoftWindowsCurrentVersionPushNotifications
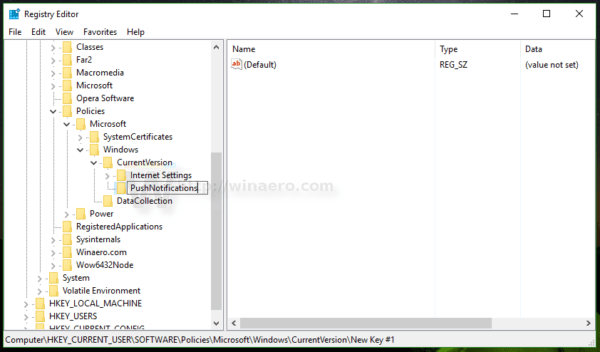
Note:
If you can't find a key, you can create those keys.
3. In the right pane, you create a new 320-bit DWORD value, name this value NoTileApplicationNotification and set the value in the Value data frame to 1 to disable all Live Tiles on the Windows 10 Start Menu..
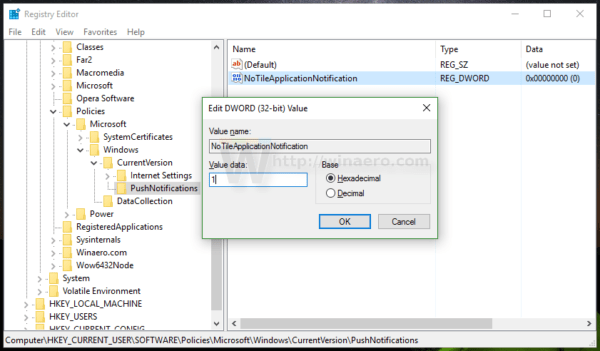
4. Finally log off your Windows 10 computer and log back in to check for changes.
If you want to restore everything by default, you only need to delete the NoTileApplicationNotification value that you created, then proceed to log off and then log in to Windows 10 again to check.
Refer to some of the following articles of Network Administrator:
- Instructions to mount the hard drive into a folder on Windows 10
- Steps to disable or completely remove the Onedrive application on Windows 10
- How to combine multiple hard drives into a Volume on Windows 10
Good luck!
FAQ
What should you know about 1. Disable all Live Tile at the same time on Windows 10 Start Menu?
To disable all Live Tile at the same time on Windows 10 Start Menu, follow the steps below:
What is Disable All Live Tile at the Same Time on Windows 10 Start Menu?
Live Tile is a very useful feature on Windows 8 / 8.1 and Windows 10.
Why is Disable All Live Tile at the Same Time on Windows 10 Start Menu important?
A clear understanding of Disable All Live Tile at the Same Time on Windows 10 Start Menu helps you make informed decisions, avoid common mistakes, and use the relevant tools or techniques more effectively.
Related Articles
 Fix the Loss of Tile Icons in Windows 10 Start Menu5 minutes read
 How to Add Tile Column on Windows Start Menu2 minutes read
 How to Create Custom Live Tiles with Better Startmenu6 minutes read
 Live Tiles Will Really Go into Oblivion If the Windows 10 20h14 minutes read
 Reveal the First Image of the Improved Start Menu, Remove Live3 minutes read
 Instructions on Disabling the Split Start Menu in Windows 113 minutes read
Reader Comments 0
Sign in with email or Google to join the discussion.