How to enable or disable Windows features on Windows 10
You need to turn on some programs and features that are included with Windows such as Internet Information Services to be able to use them. Some features are enabled by default, you can turn them off if not in use.
Turning off the feature does not mean uninstalling it from the PC or reducing the amount of hard disk space used. After turning off a feature, you can turn it on whenever you want. This article will show you how to enable or disable the Windows feature on Windows 10.
Note: You need to be logged in as an administrator to enable or disable Windows features.
If Windows Features are blank, check and make sure the Windows Modules Installer service is turned on and set to Automatic .
Instructions to enable and disable Windows features
- 1. Turn off or turn on the Windows feature from Windows Features
- 2. Turn on the Windows feature in PowerShell
- 3. Turn off the Windows feature in PowerShell
- 4. Turn on the Windows feature in the Command Prompt
- 5. Turn off the Windows feature in the Command Prompt
1. Turn off or turn on the Windows feature from Windows Features
Step 1 . Open Control Panel and click on Programs and Features icon.
Step 2 . Click the Turn Windows features on or off link on the left.
Note: This will open the C: WindowsSystem32OptionalFeatures.exe file.

Step 3 . If you receive a UAC message, click Yes .
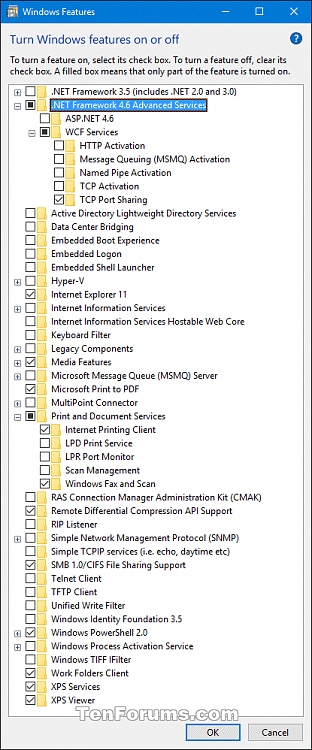
Step 4 . Turn on or off the Windows feature you want and click on OK when finished.
Note : Some Windows features are grouped together by folders and some folders contain subfolders with additional features.
When you see the square in the box, it means you turn on the feature in the main folder but not all the features in its subdirectory.
When you see a checkmark in the box, the feature in the main folder and all subfolders are enabled.

Step 5 . You will be notified to restart the computer to complete the turn off or turn on the feature.
2. Turn on the Windows feature in PowerShell
Step 1 . Open PowerShell as admin.
Step 2 . Type the command below you want to use into PowerShell and press Enter . Note FeatureName (for example, Internet-Explorer-Optional-amd64) for the disabled Windows feature that you want to enable.
Incomplete information:
Get-WindowsOptionalFeature –Online | Where-Object {$_.State –eq 'Disabled'} Or with full information:
Get-WindowsOptionalFeature -FeatureName * –Online | Where-Object {$_.State –eq 'Disabled'} 
Step 3 . Type the following command into PowerShell and press Enter .
Enable-WindowsOptionalFeature –FeatureName "FeatureName" -All -Online Note: Replace FeatureName in the above command with the actual FeatureName from Step 2.
For example:
Enable-WindowsOptionalFeature –FeatureName "Internet-Explorer-Optional-amd64" -All -Online Step 4 . If prompted to restart the computer, type Y and press Enter when ready.

3. Turn off the Windows feature in PowerShell
Step 1 . Open PowerShell as admin.
Step 2 . Type the following command into PowerShell and press Enter . Remember FeatureNam e for the enabled Windows feature you want to disable.
Incomplete information:
Get-WindowsOptionalFeature –Online | Where-Object {$_.State –eq 'Enabled'} Or full information:
Get-WindowsOptionalFeature -FeatureName * –Online | Where-Object {$_.State –eq 'Enabled'} 
Step 3 . Type the following command into PowerShell and press Enter .
Disable-WindowsOptionalFeature –FeatureName "FeatureName" -Online Note: Replace FeatureName in the above command with the actual FeatureName from Step 2 above.
For example:
Disable-WindowsOptionalFeature –FeatureName "Internet-Explorer-Optional-amd64" -Online Step 4. If prompted to restart the computer, type Y and press Enter .
4. Turn on the Windows feature in the Command Prompt
Step 1 . Open Command Prompt as admin.
Step 2 . Type the following command into the Command Prompt and press Enter . Record FeatureName for the disabled Windows feature that you want to reactivate.
DISM /online /get-features /format:table | find "Disabled" 
Step 3 . Type the following command into the Command Prompt and press Enter .
Dism /online /Enable-Feature /FeatureName:"FeatureName" -All Note: Replace FeatureName in the above command with the actual FeatureName from Step 2.
For example:
Dism /online /Enable-Feature /FeatureName:"Internet-Explorer-Optional-amd64" -All Step 4. Restart the computer when prompted, type Y.

5. Turn off the Windows feature in the Command Prompt
Step 1 . Open Command Prompt as admin.
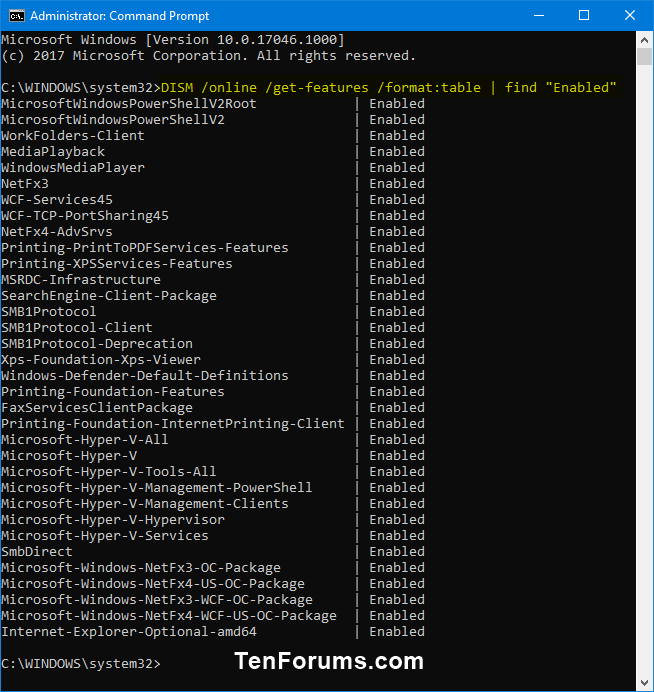
Step 2. Type the command below into the Command Prompt and press Enter . Note FeatureName for the Windows feature that you want to turn on.
DISM /online /get-features /format:table | find "Enabled" 
Step 3 . Type the following command into the Command Prompt and press Enter .
Dism /online /Disable-Feature /FeatureName:"FeatureName" Note: Replace FeatureName in the above command with the actual FeatureName from Step 2.
Step 4 . Restart the computer by typing Y.
I wish you successful implementation!
You should read it
- ★ How to shut down or restart a Windows 10X computer
- ★ 7 Windows 11 features that should be used more often
- ★ Instructions for activating or disabling SmartScreen filter on Windows
- ★ 8 new features users want to see in Windows 12
- ★ Windows 10 Redstone 4: New features and changes are waiting for you?