Instructions on how to install Windows 7, install Windows 7 with USB from A to Z extremely simple
Instructions on how to install Windows 7, install Windows 7 with USB from A to Z extremely simple. Many people wonder 'Without a DVD disc, can I install Windows 7?'. The answer is yes, even just a very familiar tool, that is USB. VĂN
Table of Contents
Released in 2009, Windows 7 is still one of the most successful versions of Windows so far. However, many people will be wondering, 'Without a DVD installation disc, can I install Windows 7?'. The answer is yes, even just a very familiar tool, that is USB. So how to install Windows 7 with USB, please follow the instructions from A to Z below of Thuthuatphanmem.vn offline.
* In all of this guide, I defaulted the Windows 7 installation drive as C drive (by most users). If your installation drive has a different name, it's the same.
1. Check your computer configuration to install Windows 7
If you want to run Windows 7, your computer should have at least:
- 32-bit (x86) or 64-bit (x64) processor clocked at 1 GHz or faster
- RAM 1 GB (for 32-bit version) or RAM 2 GB (for 64-bit version)
- Hard disk with 16 GB free space (for 32-bit versions) or 20 GB (for 64-bit versions)
- DirectX 9 graphics device with WDDM 1.0 or higher driver
2. Prepare
- A 4GB capacity USB or higher
- ISO file of Windows 7 installation; If your computer hard drive is GPT, then download the ISO file of Windows 7 64-bit (see the standard hard drive in Part 4. Create a USB boot - Step 1 )
- Rufus USB boot software (download here)
- Store important files in USB and C drive to another place, because the next process will delete all files in USB and this drive.
- Preloaded automatic driver installation tool (such as Easy DriverPack ), stored on a drive other than drive C. Need to do this step before because after installing Windows 7, the computer can not connect to Wifi so then Cannot load (unless you have network cable).
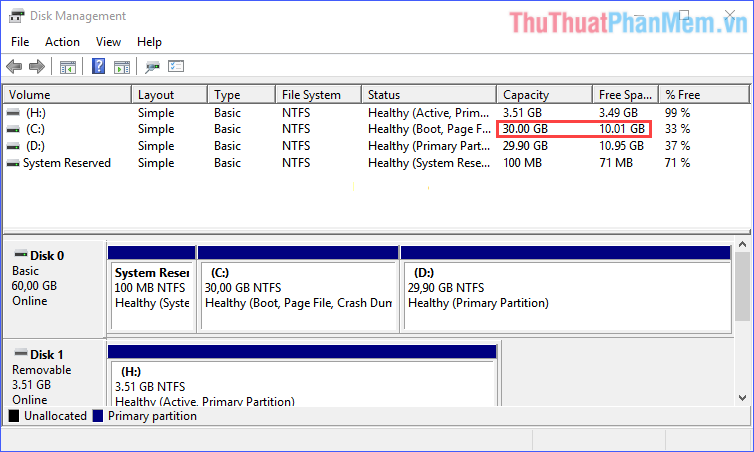
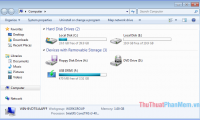
3. Determine drive capacity C
- Check the total capacity and free space of the C drive (helps later to recognize where is the C drive to install Windows). Remember these numbers carefully (it is best to record them).
This can be checked in one of two ways:
+ Method 1: Open My Computer (or This PC , depending on the operating system).
+ Method 2: Press the key combination Windows + R , on the Run window type 'diskmgmt.msc' and press Enter .
As shown below, drive C is the drive with a total capacity of 30 GB and free space of about 10 GB.
4. Create USB Boot
Step 1: Check the hard drive standard and BIOS standard
- Check the standard hard drive: press the key combination Windows + R , on the Run window type 'diskpart' and press Enter .

- On the DiskPart interface , type the command 'list disk', then press Enter . In Disk 0 , column Gpt , if there is an *, then the hard drive standard is GPT, if without the * then the hard drive standard is MBR. As shown below, there is no * so the hard drive follows the MBR standard.
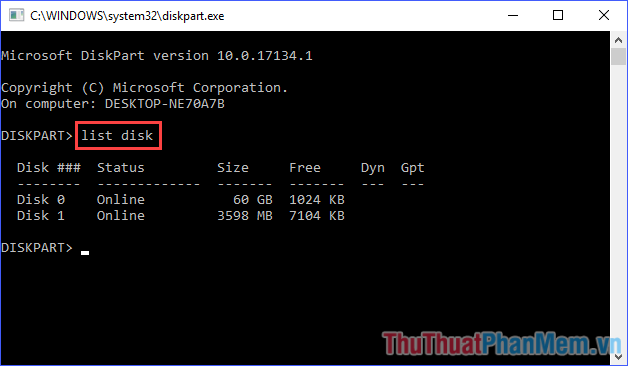
* Again, if your hard drive is GPT compliant, you can only install Windows 7 64-bit; At the same time skip the next tutorial in step 1 (to check the BIOS standard) because make sure your computer is in accordance with UEFI standard.
- Turn off Disk Part window . If the standard hard drive is MBR, next press Windows + R key combination , on the Run window type 'msinfo32' and press Enter .
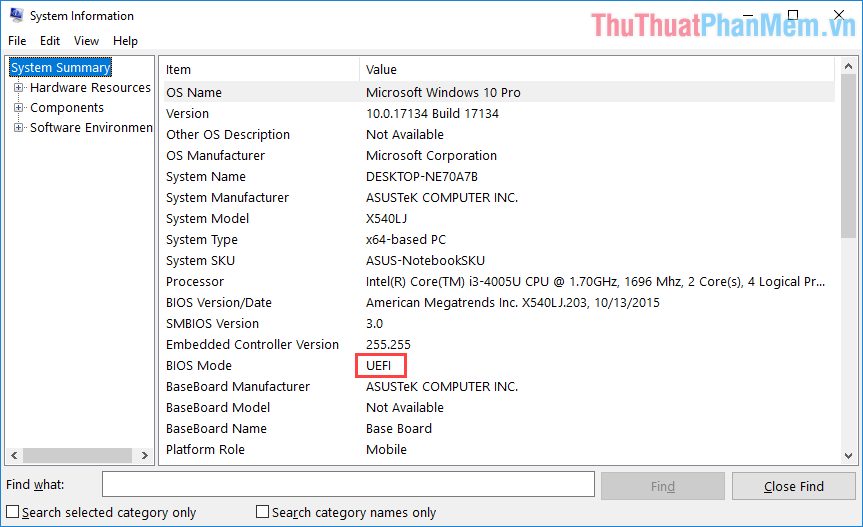
- Display the System Information window . See if the BIOS Mode line is UEFI or Legacy. As shown below is the UEFI standard.
Step 2: Create a Windows 7 bootable USB
* To continue, you need to turn off the active antivirus software (if any).
- Open the downloaded Rufus software in Part 2. Prepare (no installation required). Set up as follows:
+ Devide : Select USB boot.
+ Boot Selection : Click SELECT , navigate to the ISO file to install Windows 7.
+ Partition scheme : Standard hard drive, MBR or GPT .
+ Target system : Standard BIOS, depending on the results you have checked in step 1.
+ Volume label : USB drive name.
+ File system : Choose FAT32 if the drive is GPT, or NTFS if the drive is MBR.
- After setup, click on START to begin the process of creating USB boot.

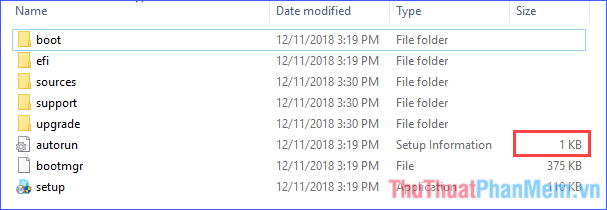
- After successfully creating a USB boot, open the USB, see the Size information of the autorun file , if equal to 1 KB is successful. If it is equal to 0 KB, check that the antivirus software is turned off, if not, then turn off and recreate the USB boot.
5. Install Windows 7 from USB boot
Step 1: Boot from USB
- Plug the USB into a computer that needs to have Windows 7 installed.
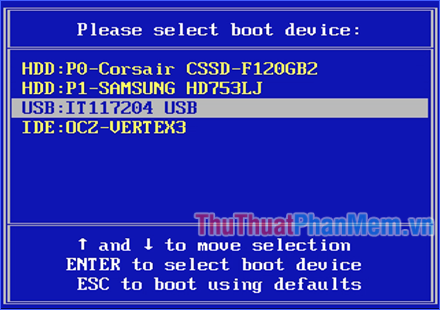
- Restart the computer to be installed. As soon as the machine starts to boot, press the shortcut key repeatedly on the Boot Menu . This key varies from computer to computer, and usually appears on the screen the moment Windows boots up, so you need to watch and press it quickly. Also you can refer to the shortcut menu for Boot Menu of some famous brands here.
- When the Boot Menu is displayed, use the up / down arrow keys to select the USB boot device, and then press Enter . Can easily identify which line is USB, usually will write the word 'USB' or your USB name.
- When booting into USB boot successfully, the screen will look like the following:
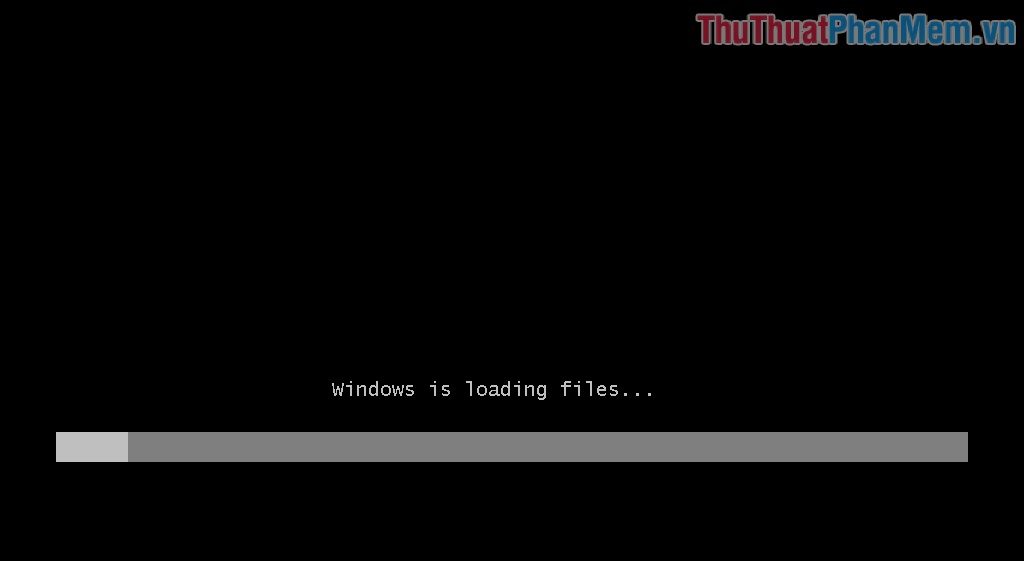
- Wait for the process above to finish.
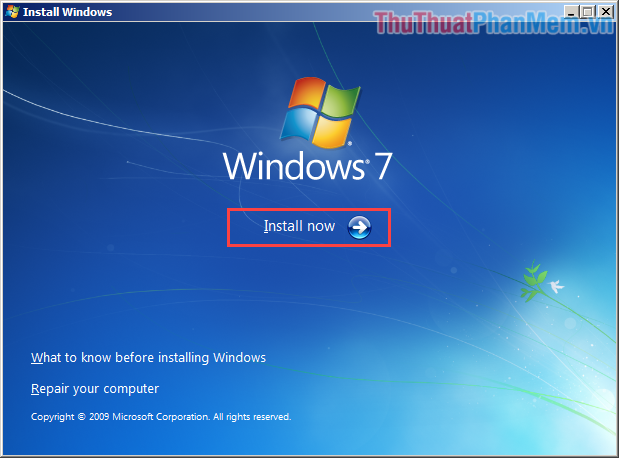
Step 2: Install Windows 7
- Set the language, time format, currency and keyboard - input method, then press Next .

- Click Install now .
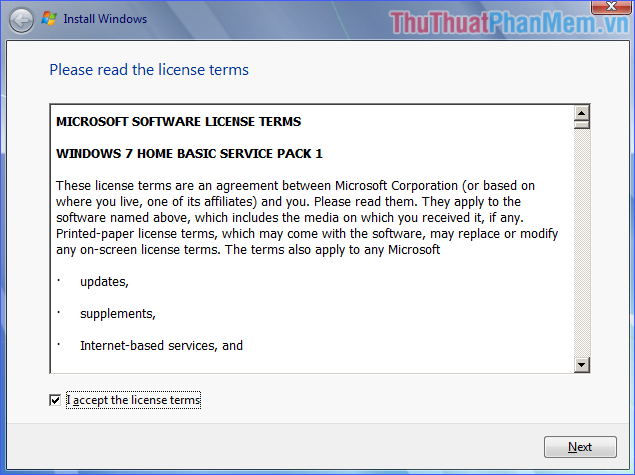
- Check the box I accept the license terms and then click Next .
- Choose the form of Custom (advanced) installation .

- Come here, manipulate carefully to install into drive C properly. Click on Drive options .
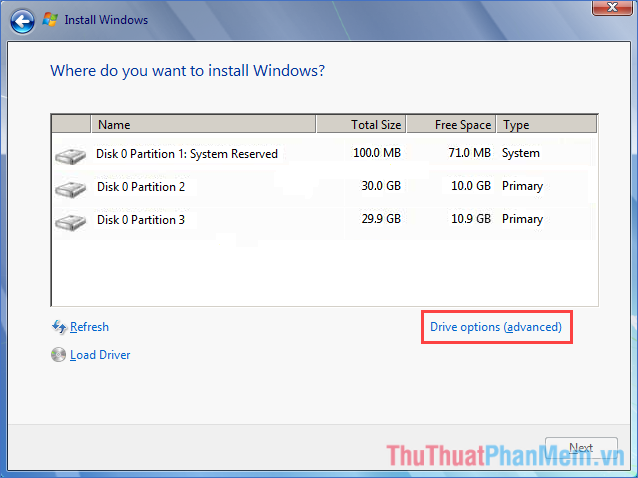
- Determine which partition is drive C contains the old operating system thanks to the information I've told you recorded in section 3. Determine the C drive capacity . As in this guide, drive C has a total capacity of 30 GB and free space of 10 GB, which is here it is Disk 0 Partition 2 .
- Click on the partition C has just identified, notice the bottom corner of the installation window with the error message Windows can't be installed on . (Show details) or not. If so, it is likely that you have created the wrong USB boot drive for the hard drive. Try recreating another standard.
- Next, after clicking on the C drive partition, click on Delete to delete. A message to delete data is displayed, click OK .
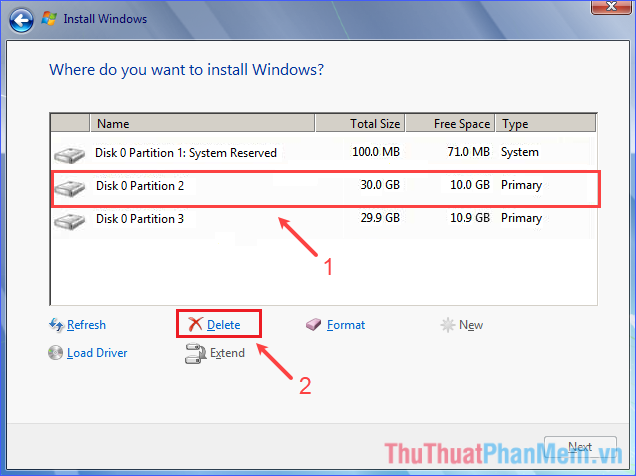
- Delete the System Reserved partition . This is a system-specific partition, used to encrypt BitLocker and restore Windows. If kept, it will cause error 0x80070057 when installing a new operating system.
- After deleting the C drive partition, the partition name becomes Unallocated Space . Select the partition, then click Next to begin installing Windows 7.

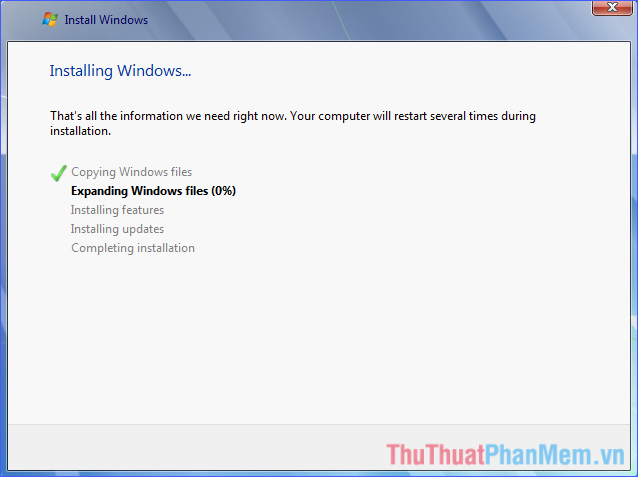
- Wait for the Windows 7 installation process to complete, usually takes a few dozen minutes. During the process, the system will reboot several times.
* If the installation error 0x80070057 appears during the installation, as mentioned above, you need to delete the System Reserved partition .
6. Set up for new Windows
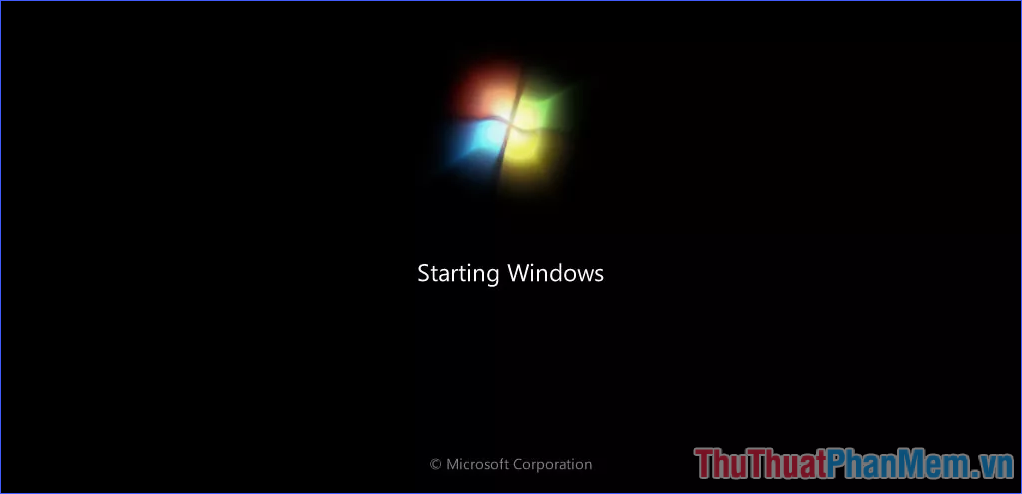
- Windows 7 start screen starts:
- Next, perform the steps to set the user name, computer name and password.

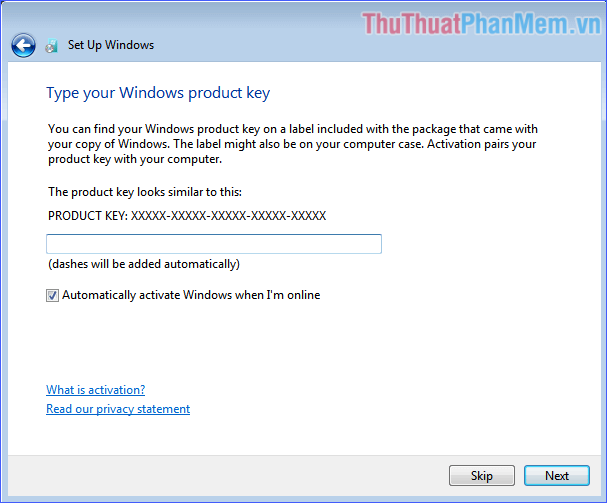
- Enter the Product Key (if you do not have a Key and want to try it out, uncheck the Automatically activate Windows when I'm online ) box and click Next .
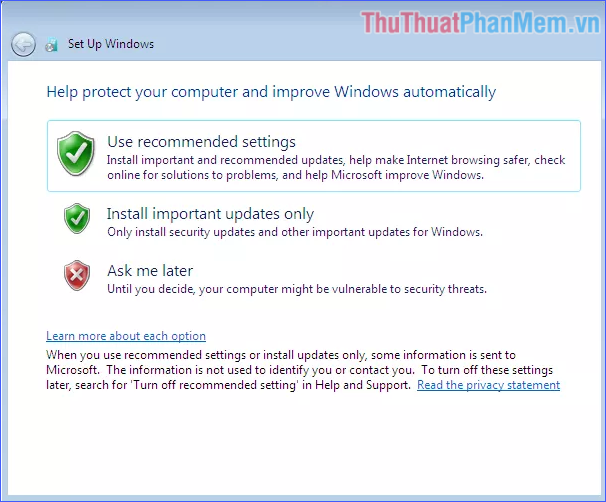
- Go to the Set Up Windows screen . Choose one of the settings:
+ Use the recommended settings
+ Only install important updates
+ Repeat after (may cause the computer to face many security threats)
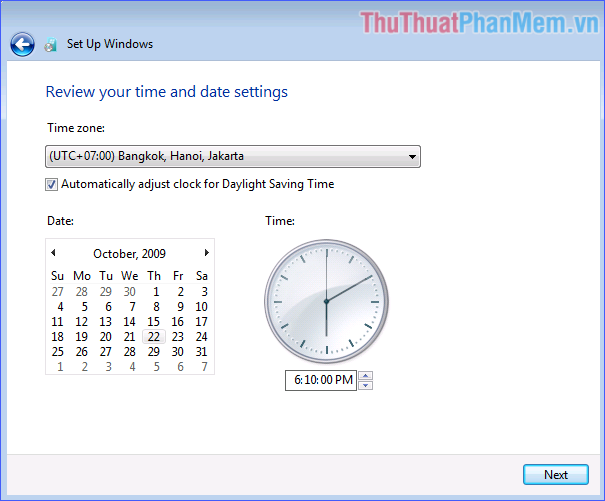
- Set time zone and time.
- And now, Windows 7 is ready for you to use.
7. Install the Drivers needed for Windows 7
Use the automatic driver installation software that you downloaded earlier (see section 2. Preparation ).
Finally, after a lot of work, now you can install Windows 7 with just a USB flash drive. If any errors arise during the installation process, please first go back to see if you got it right. Some common errors have been listed in the article, but if you still cannot fix, or encounter another problem, please refer to online. Wish you successfully installed Windows 7 with USB!
Was this article helpful?
Your feedback helps us improve.
Related Articles
 Instructions on how to install Windows 8, install Windows 8 with USB from A to Z extremely simple8 minutes read
 Instructions on how to create USB install Windows 1010 minutes read
 Instructions for installing and using Claude Offline on a computer.5 minutes read
 Instructions on how to create a Windows 10 USB install on macOS8 minutes read
 How to install Windows 8.1 from USB7 minutes read
 Create a Windows 10 USB install with Easy2Boot is extremely simple9 minutes read
Reader Comments 0
Sign in with email or Google to join the discussion.