How to insert text into images on Word
When editing images on a computer, we will think of software such as Microsoft Paint, Adobe Photoshop, . or use online photo editing programs.
However, if you only want to edit images at a basic level like inserting text into images on Word, then we can do it right in this editing tool without having to edit the previous image on Paint, or the Other photo editing programs. If you want to design greeting banners and cards in Word, you can insert text into images according to the instructions below.
- Insert audio into Word documents
- How to repeat the title bar in the Word list table
- Enter the serial number and the automatic initial character MS Word
Instructions for writing text on photos on Word
Step 1:
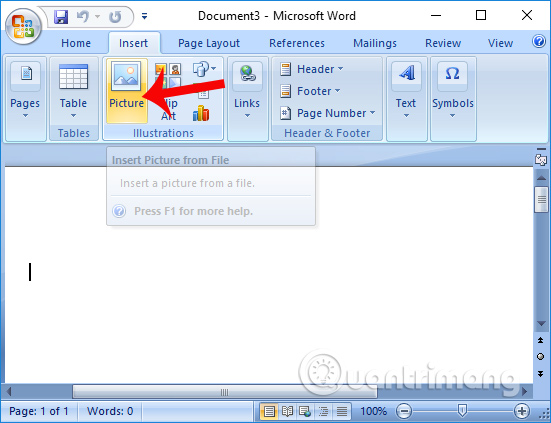
First we open the Word interface, then click on the Insert tab on the Ribbon, select the Picture section to get the image inserted into the Word interface.
Step 2:
A folder appears on the computer. Click the image you want to insert into the folder and then click Insert . Images in Word can vary in size or position according to each person's requirements.

Step 3:
To insert text into images on Word, we will use the Text box tool. Users click on Insert> Text box> Draw Text box .
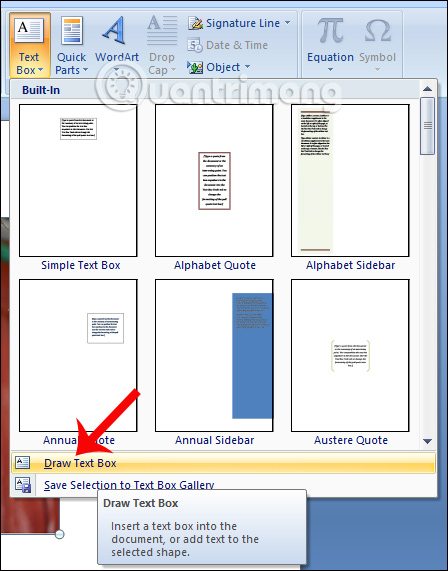
Or you can insert text into images by clicking Insert> Shapes> Text box as shown below.

Step 4:
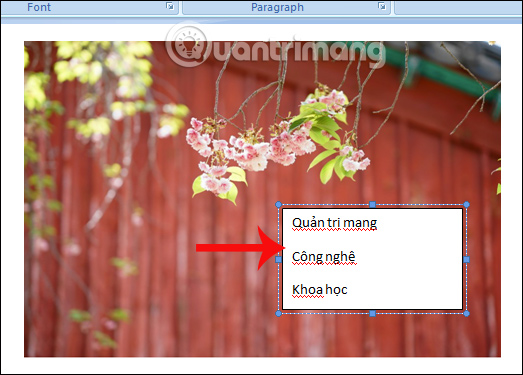
Then in the image you want to insert the text, select the position you want to insert and then click and drag the left mouse button to create the text input box. The text input box can enlarge or shrink the size, move the frame to any position you want.

The next thing is to enter the text in the frame.
Step 5:
Next will be the task of customizing the text, adding effects, reformatting the text if desired.
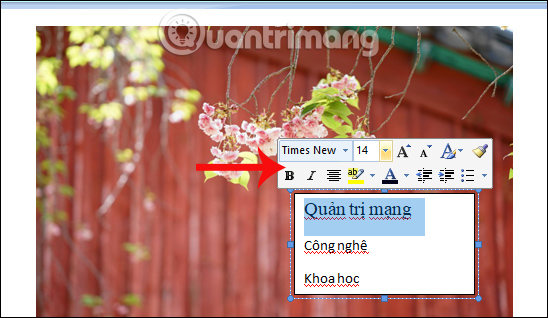
The first is to reformat the letter including the selection font, font style, font color if desired. Black out the entire text and right click to display the custom text panel.
After that, leave the background color of the text click on the Format tab and select Shape Fill and click No Fill . You will immediately see the white background in the frame disappear.

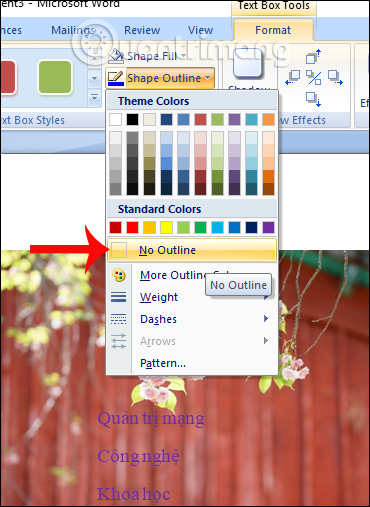
Next, to remove the border around the text input box , click the Format item and select Shape Outline and click No Outline . The border around the text input frame also disappears.
The end result will be the image with the words inserted as shown below. Text frames can still move and zoom in and out if desired. Users just need to click on the text area to appear surrounded by frames.
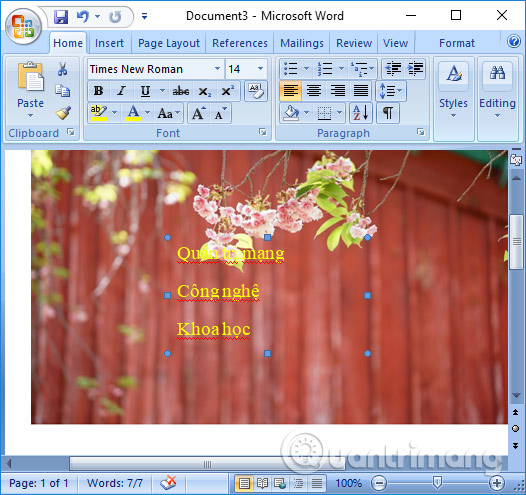
With this simple way, you can insert many words with different formats into the image. The text after inserting into the image can still change the color, font, size, . if desired. So you do not need to proceed to edit images on other image editing software, but you can insert text into images right on Word.
Video tutorial writing words on photos on Word
I wish you all success!