Table of Contents
This updated guide explains how to Inserting Pictures and Clip Art in PowerPoint through clear steps, practical examples, and important checks that help prevent common errors.
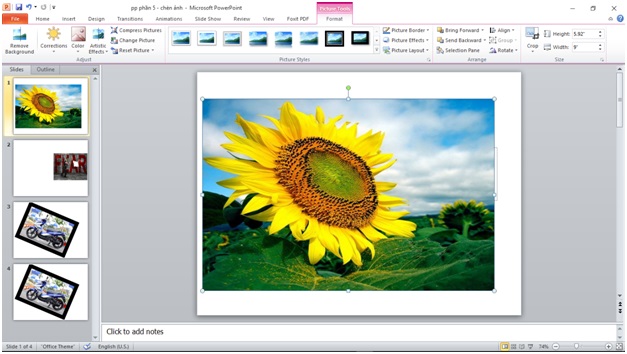
Instructions for Inserting Images and Clip Art in Power Point
Microsoft PowerPoint is a very popular software used for presentations through slides. Whatever your field is like accounting, information technology, education, office,., good use of Power Point will be very effective for your work and promotion. On each slide you create, you should emphasize the concise, concise content shown through images and Clip Art instead of boring text. In this lesson, TipsMake will help you understand how to insert images and Clip Art in Power Point specifically and clearly, which can be applied to different PowerPoint versions.
1. Insert picture
Images and Clip Arts can be inserted into the slide in two ways, one is to insert from the command menu on the Ribbon , the second way is by using the shortcuts that appear in Placeholders. Contains content that is present in content slides from the 2nd slide onwards - the first slide is the title slide).
1.1.Method 1: Insert images from the Ribbon
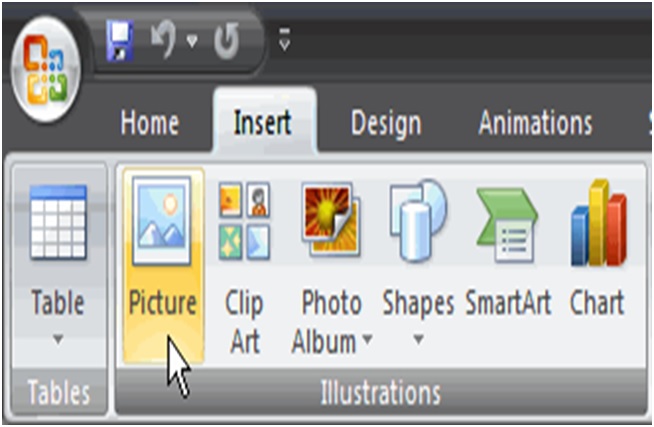
- Select the Insert tab.
- Click the Picture command in the Illustrations group, as shown in the image below. The Insert Picture dialog box will appear.
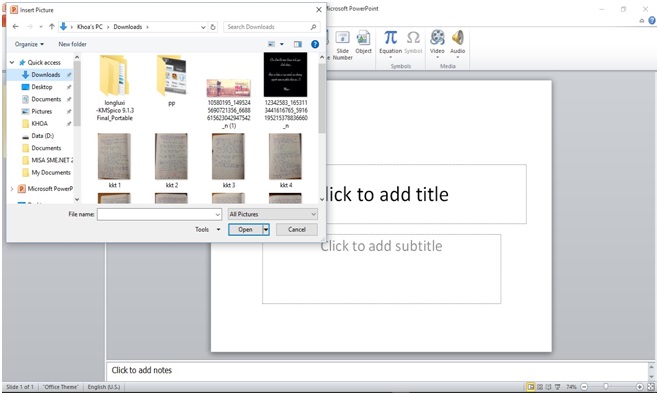
- Locate / save a photo in your computer and left click to select the image you may need to insert into the slide.
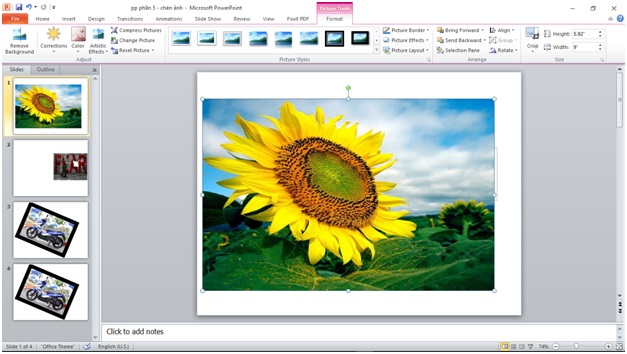
- Click Insert , and the image will immediately appear on your slide.
1.2.Option 2: insert images from a command in Placeholder:
- Click the Insert Picturefrom File icon in the Placeholder . The Insert Picture dialog box will appear.

- Locate and select the image you may need to use.
- Click Insert , and it will appear on your slide.
2. Insert Clip Art
Similar to inserting images, Clip Art can be inserted into slides in two ways:
2.1.Method 1: Insert Clip Art from the Ribbon
- Select the Insert tab .
- Click the Clip Art command in the Illustrations group. The Clip Art box will appear right next to the Picture icon.
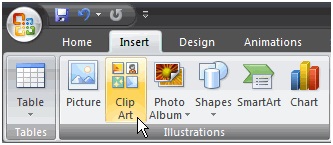
- Enter keywords related to the image you may need to insert, for example, if you may need to insert an image of your heart, then type 'heart' into the Search for section .
- Click the drop down arrow in the gallery.
- Select Everywhere in Search in to make sure PowerPoint searches on your computer.

- Click the dropdown arrow in All Media Types
- Deselect any file types you don't want to see. In this example, if you only want images ( Photographs ), then you will tick the Photographs section and uncheck the other options.
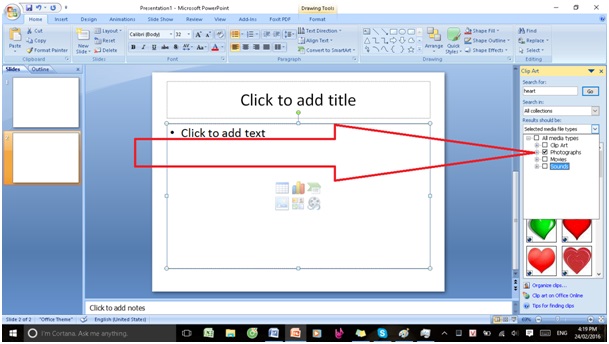
- Click Go . A list of clip art images related to the search terms shown in the image above is the heart.
- click any shape to insert it, or click the drop-down arrow next to the clip art and select Insert from the menu. The figures will appear on the slide.
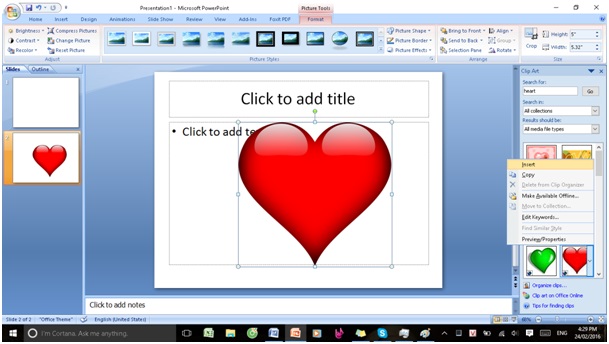
2.2.Method 2: Insert Clip Art from a Placeholder
- Click the Clip Art command in the Placeholder . The Clip Art box will appear to the right of the Placeholder as shown in the picture.
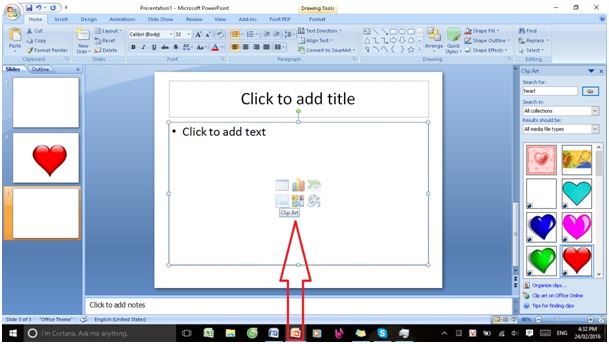
- The next steps do the same way one. If searching doesn't yield the results you need, try different keywords, or click the Clip art on Office Online link below to go to the Microsoft website, where you can search and download thousands of images. photo, clip art.
FAQ
What is the easiest way to Inserting Pictures and Clip Art in PowerPoint?
Start with the requirements in this guide, then follow each step in order. Check the result after every major change so problems are easier to identify.
Can beginners follow these instructions?
Yes. The process is organized into practical steps, and you can repeat any step before moving forward.
What should I check if the method does not work?
Confirm your software or device version, permissions, settings, file format, and internet connection when the task depends on online services.
Related Articles
 How to Add Clip Art to PowerPoint Easily3 minutes read
 PowerPoint 2019 (Part 16): Shapes: Explained7 minutes read
 PowerPoint 2019 (Part 14): Inserting Images: Explained7 minutes read
 How to Put a Picture Behind Text in PowerPoint8 minutes read
 PowerPoint 2019 (Part 19): Inserting Video: Explained8 minutes read
 PowerPoint 2019 (Part 29): Link: Explained7 minutes read
Reader Comments 0
Sign in with email or Google to join the discussion.