Table of Contents
Instructions for Deleting the Recently Opened File List in Word 2013 covers the essential facts behind the topic, including what changed, why it mattered, and how it affected users.
Instructions to Delete the Newly Opened List Overview
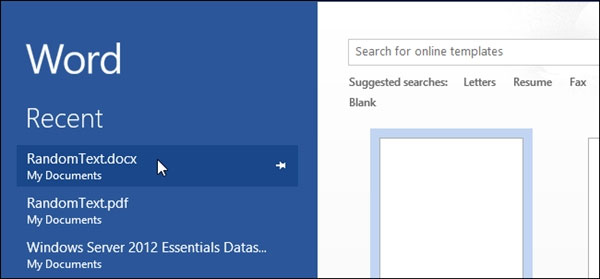
If you want to disable this feature, please refer to the following instructions:
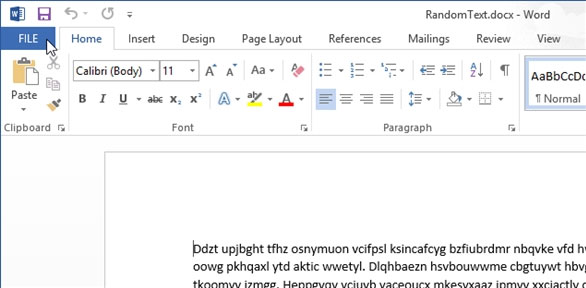
Step 1: Access the editing interface in Word 2013. Click the FILE tab
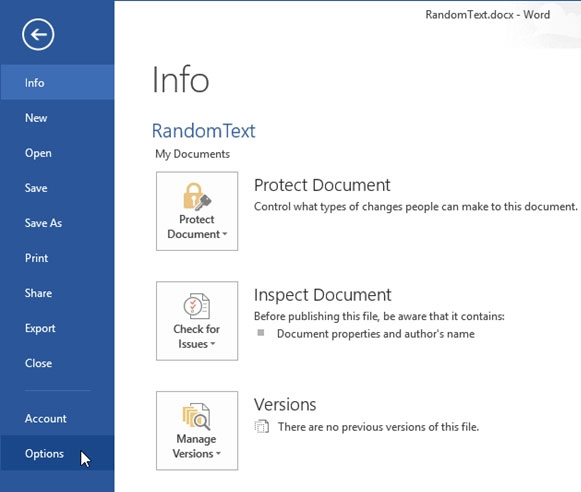
Step 2: Click on Options option
Step 3: In the Word Options settings dialog, click on the Advanced option

Step 4: In the Advanced settings screen, pay attention to the Display setup group. At the Show this number of Recent Documents LINE, enter 0 to turn off the recently opened file list. Then click OK to save.

And this is the result

This trick can be applied similarly on Word 2010. Wish you success.
FAQ
What is the main topic of Instructions for Deleting the Recently Opened File List in Word 2013?
Instructions for Deleting the Recently Opened File List in Word 2013 covers the essential facts behind the topic, including what changed, why it mattered, and how it affected users.
Why is Instructions to delete the newly opened list important?
Instructions to Delete the Newly Opened List Overview If you want to disable this feature, please refer to the following instructions: Step 1: Access the editing interface in Word 2013.
What should readers remember about Instructions to delete the newly opened list?
Click the FILE tab Step 2: Click on Options option Step 3: In the Word Options settings dialog, click on the Advanced option Step 4: In the Advanced settings screen, pay attention to the Display setup group.



Reader Comments 0
Sign in with email or Google to join the discussion.