Guide to delete files not to delete, fix errors when deleting files
Instructions for deleting files from deleting and fixing errors when deleting files - There are many cases when you want to delete a file, but even after turning off its operation, you still cannot delete it by normal deletion methods.
Table of Contents
There are many cases when you want to delete a file, but even after turning it off, it still cannot be deleted by normal deletion methods. You are not sure how to overcome that situation? You can use Any File Remover software to delete that data file.
Any File Remover is a small software that helps you remove any data file from your computer with just a few simple steps.
The following article guides how to prevent data file from being deleted on computer by the Any File Remover software.
Installation Instructions
Step 1: Download the installation file of Any File Remover to the computer.
Step 2: Open the downloaded file to install, first select the language to install and click OK .

Step 3: Click Next .

Step 4: Select I accept the agreement and click Next .

Step 5: You can change the folder containing the installation file by clicking Browse and selecting the file you want. Then click Next .

Step 6: Continue to select Next .
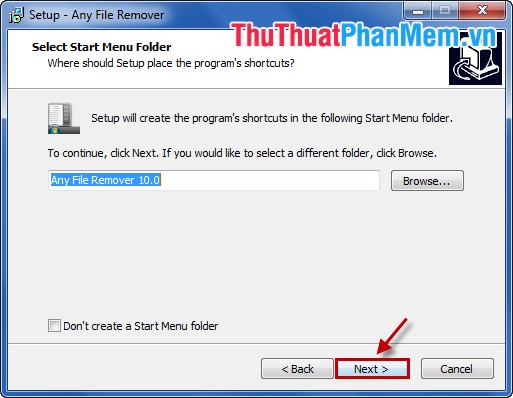
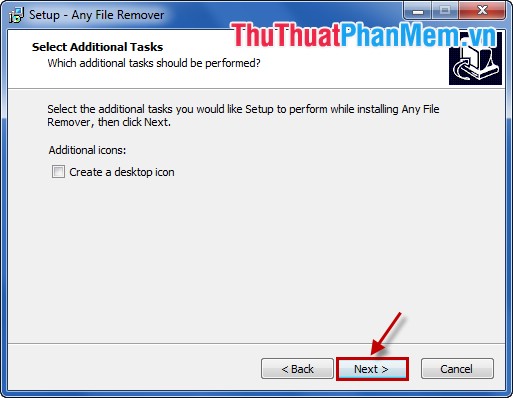
Step 7: If you want to create a software icon on the desktop, select the Create a desktop icon , otherwise leave it blank and select Next .
Step 8: Select Install to install.
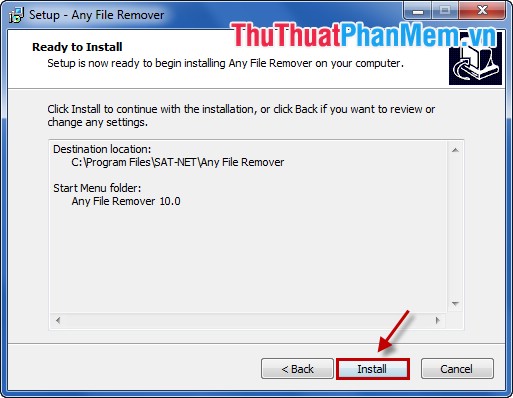
After installation is complete you click Finish to finish.
Use Any File Remover to delete the data files on the computer
Step 1: After the installation is complete, open Any File Remover .
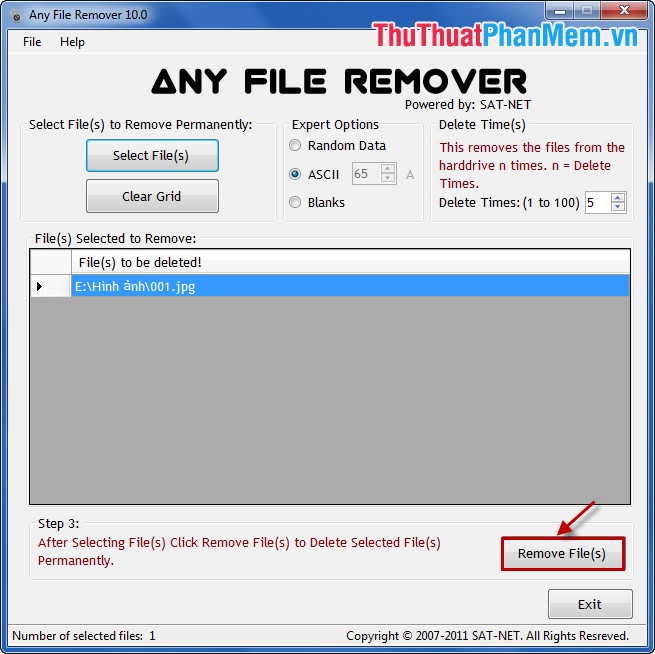
Step 2: Click Select file (s) and navigate to the file you want to delete.
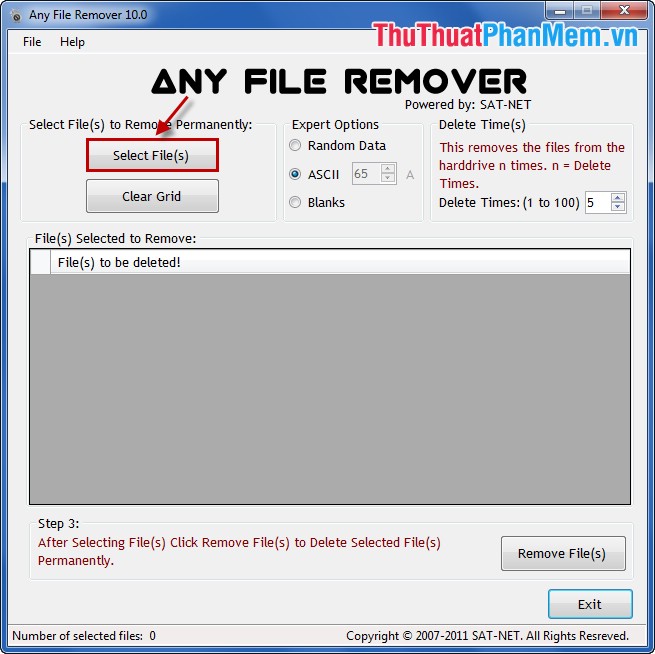
You can select multiple files to delete.
Step 3: Select Remove File (s) to delete the file.
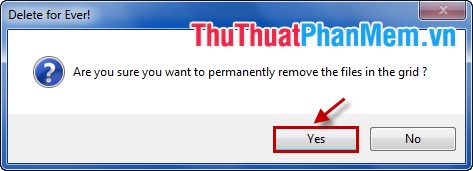
A dialog box appears, select Yes to delete.
Note: After deleting the file to be deleted, do not save in the trash .
So, with simple and quick steps, you can delete files that you cannot delete by normal deletion methods. Good luck!
Was this article helpful?
Your feedback helps us improve.
Related Articles
 How to fix errors cannot delete apps on iPhone and iPad3 minutes read
 Delete files that cannot be deleted on Windows using the following software6 minutes read
 Delete the most 'stubborn' files on Windows12 minutes read
 2 ways to permanently delete files on Windows2 minutes read
 How to Delete Undelete Files18 minutes read
 How to batch delete files on Windows 105 minutes read
Reader Comments 0
Sign in with email or Google to join the discussion.