How to use Spark application to manage email on iPhone
Spark is a smart and professional email management application on iPhone, with many useful features.
Table of Contents
There are many email management applications like Gmail or Apple Mail dedicated to Apple devices. But Apple Mail doesn't really meet the requirements of users. If so, you can use Spark application, email management application with many unique and professional features.
Spark will automatically categorize emails into separate items, making it easier for you to find emails. Especially on Spark also has an email sending timer feature, choosing the time to send without installing additional support applications. Offering basic email management features, Spark also has many other unique features. The following article will show you how to use Spark on iPhone.
- Good and handy email applications on iOS
- Instructions on how to manage email and mailboxes in the Mail application on iPhone / iPad
- How to set up Exchange Email, calendar and contacts on iPhone and iPad
Step 1:
Currently the Spark application is only available for Apple devices. Click on the link below to download.
- Download the Spark iOS app
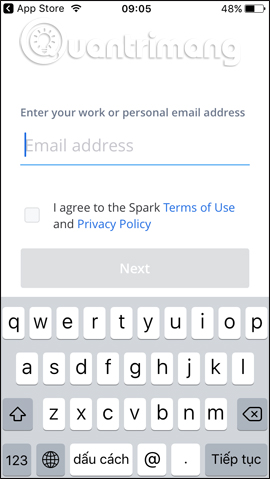
Step 2:
Next you start to use the application. In the first interface will be the content introduction feature of Spark, press Skip to skip. Then enter your email account to manage on Spark. Remember to check out I agree to the Spark . To agree to the manufacturer's terms.
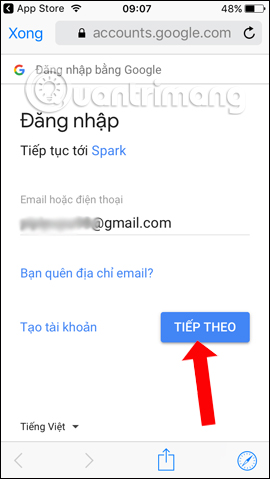
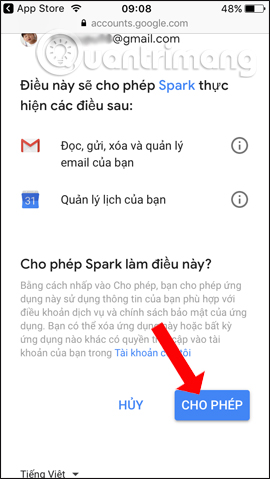
Step 3:
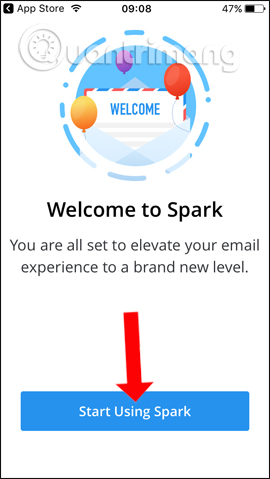
The application will need to ask the user for permission to access the email address. Click Next . Enter the account password and then click Allow . Finally wait for Spark to verify your personal email account, then click Start Using Spark to start using.
On Spark, there are email management features similar to other email managers. Some outstanding features will be written in detail below.
1. Managing email on iPhone
Step 1:
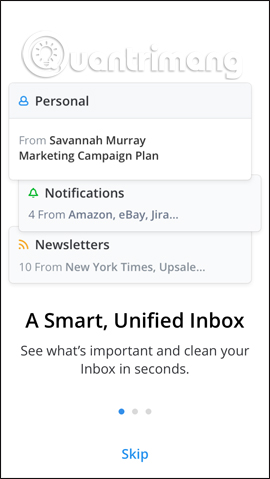
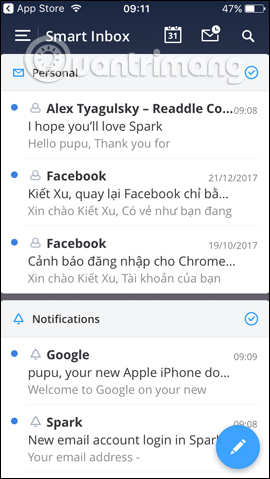
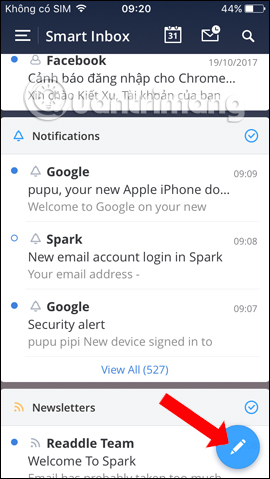
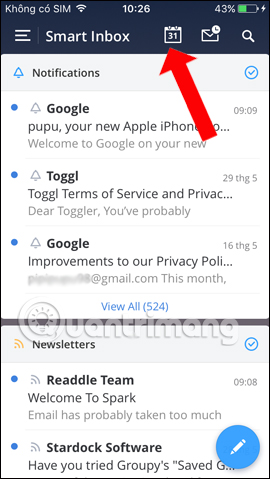
The first interface on the Spark is Smart Inbox , displaying emails on the mailbox sorted by different content.
- Personal: New emails sent by individual users.
- Notifications: Email notifications.
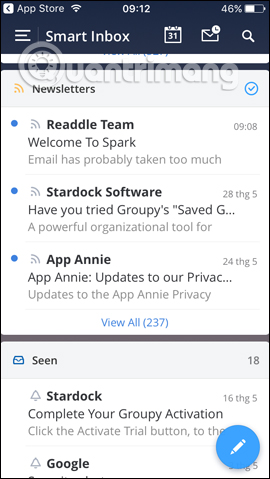
- Newsletters: Emails sent from organizations, forums, .
- Pin: Pinned emails.
- Seen: Read emails will be displayed here.
So you just need to follow the above items to quickly find the email sent.
Step 2:
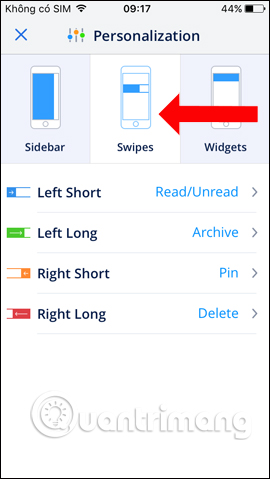
When you click on the 3 dash icon , a list of management items of the Spark application will appear. Clicking on the external circle icon on the screen will see the Personalization interface to change the usage.
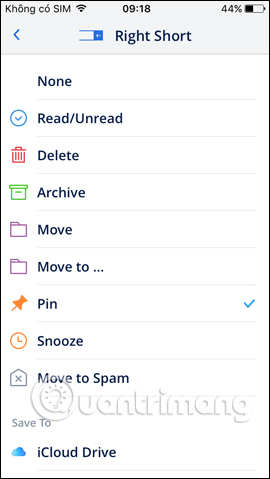
Clicking on the Swipes item will be swiping with the content including:
- Short swipe from left: Mark read / unread email.
- Long swipe from left: Store this email.
- Short swipe from right through: Email this email.
- Swipe from right to left: Delete this email.
If you want to change this operation, just click on the action, then select the content to perform for the operation.

2. Schedule email on Spark
Step 1:
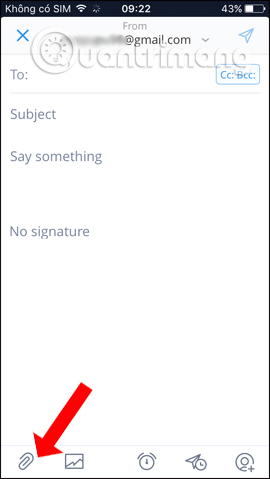
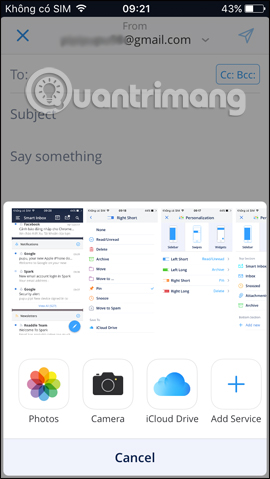
Go back to the Smart Inbox interface on the app and click on the pen icon . Write the content of the email sent as usual. Enter the sender, the title, the body of the message, insert the signature. Spark supports attachments available in the device and cloud services.
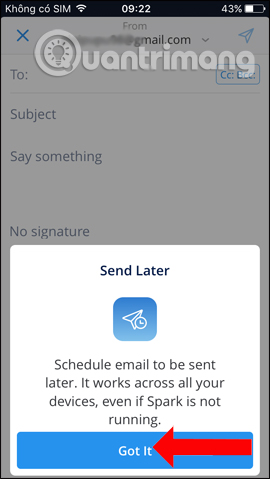
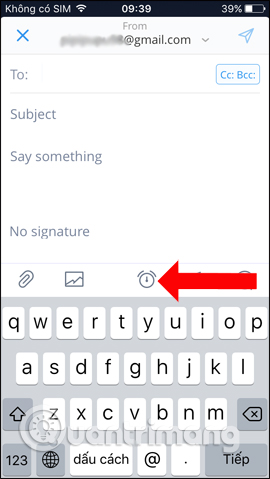
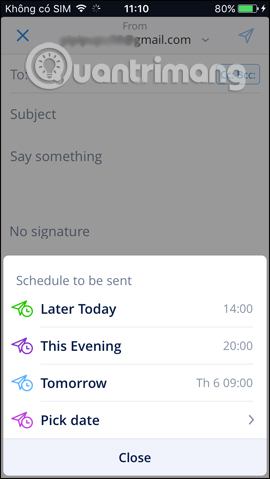
Step 2:
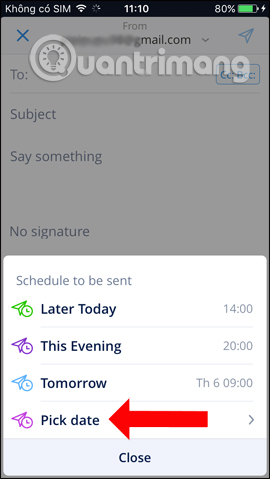
Next click on the clock icon with the Send (Send later) button and press Got it. Users will select the time they want to send mail including Later Today, This Evening, Tomorrow, and the time to edit.
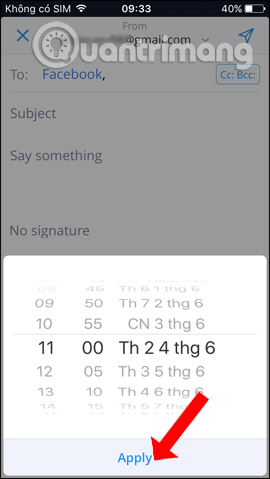
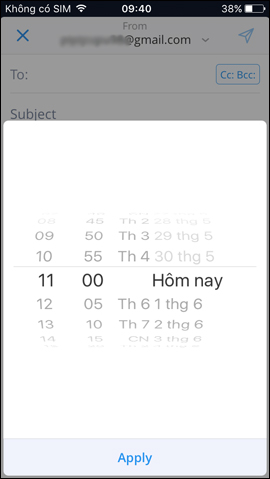
If you want to customize another time, select Pick date to select it. Click Apply to set the selected calendar.
Step 3:
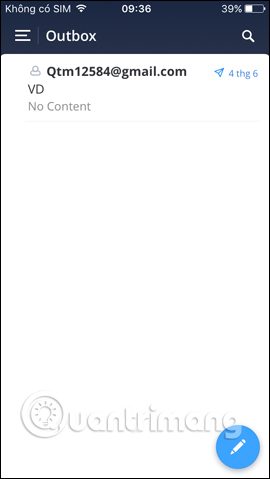
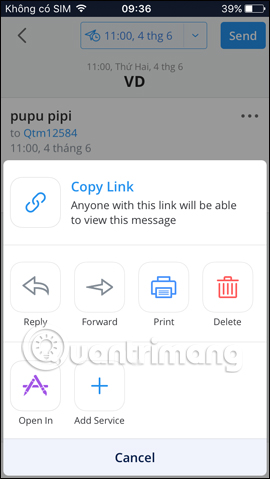
Finally press the Send button to send the email. The email will be retained in the Outbox section in the Spark menu. Here you can edit the content or email immediately without waiting for the time to set. Click on the 3 dots icon to display the email sending options.
3. Notification when no reply email has been received
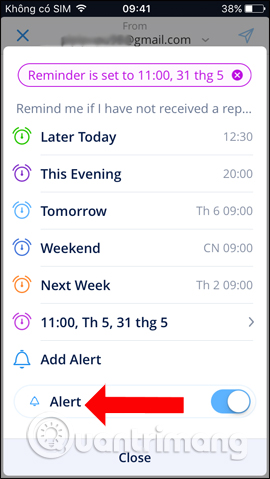
In case you need immediate feedback about an email sent, you can use this feature. The message will prompt you if you have not received a response email.
In the compose message interface, select the standby clock icon , then select the time you want to receive reminder notifications.

Click Pick date if you want to choose a different time.Alert alerts can be enabled to increase the importance of reminder notifications.
4. Chat with friends on Spark
If your friends are also using Spark, you can exchange information and discuss with each other right on the compose interface.
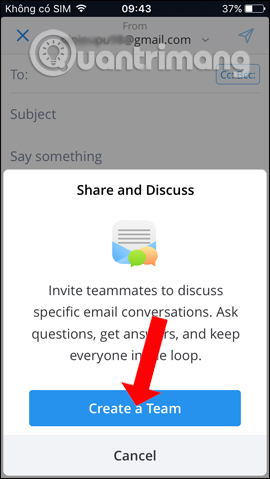
Step 1:
At the compose mail interface click on the account icon to the right of the interface, then click Create a Team .

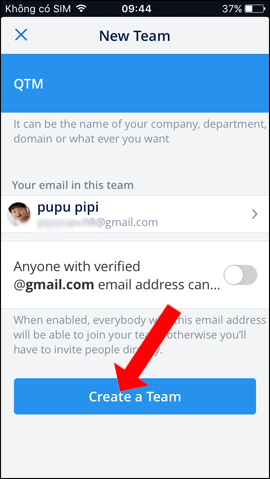
Step 2:
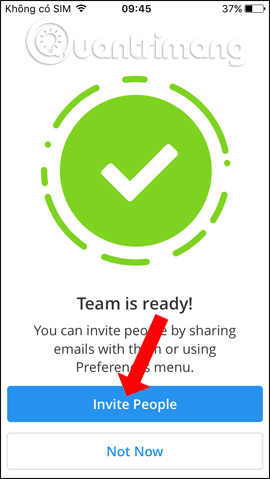
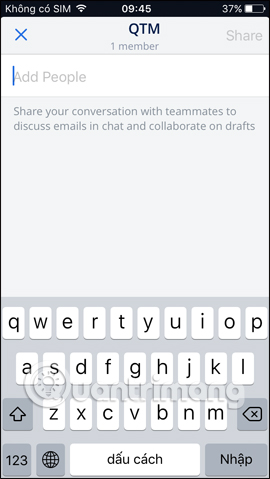
In the New Team interface name the group at the Name your Team and click Create a Team . Click the Invite People button to invite friends to join. Now enter your friend's email address and click the Invite button to invite them. Finally click the Share button .
With the free Spark version, users will only invite 1 participant.
5. Reply to a quick message on Spark
We can pre-compose email responses and send them when needed.
Step 1:
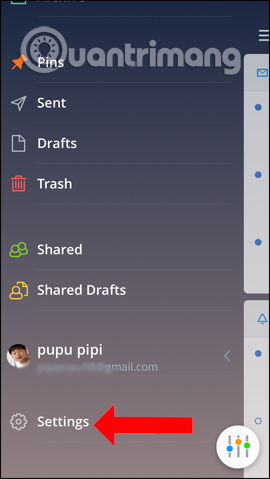
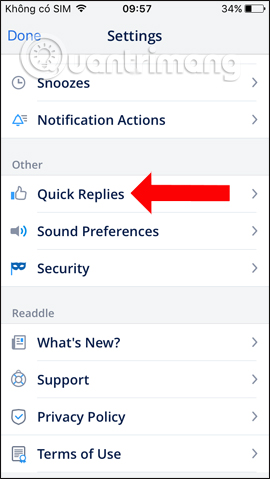
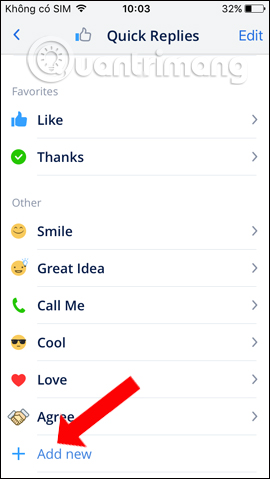
Click on the 3 dashes icon and then click the Settings button , then click Quick Replies .
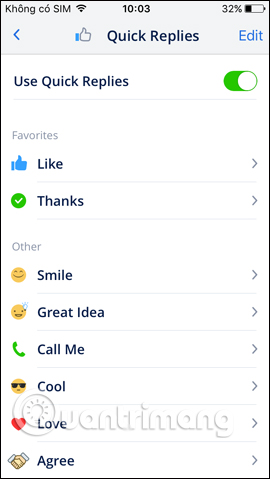
Step 2:
Switch to the new interface to enable Use Quick Replies. In this interface, you will see some of the available answers that Spark has prepared, you can change, edit, or delete them if you want.
Step 3:
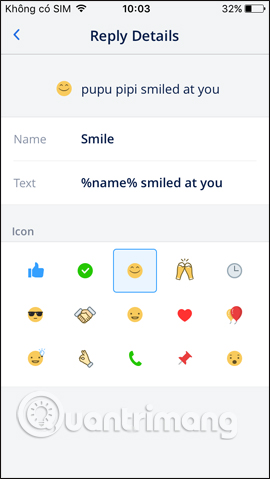
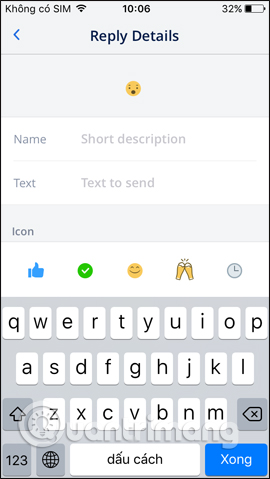
If you want to create a quick answer, click Add new . Enter the display name for the quick answer in Name, the text of the message in Text. Content of pre-created messages will automatically be saved to the interface.
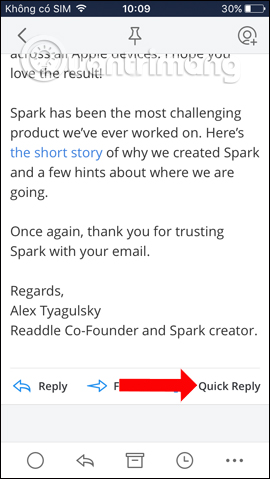
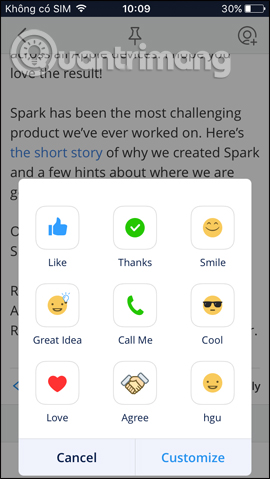
To reply to a message quickly when an email arrives, click Quick Reply and then click on the reply message form. If you want to create another answer click the Customize button.
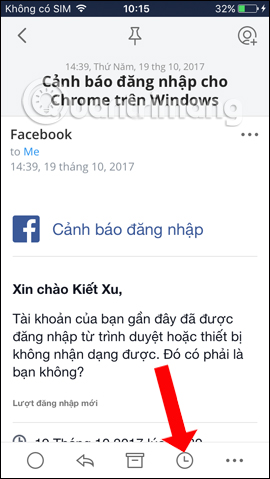
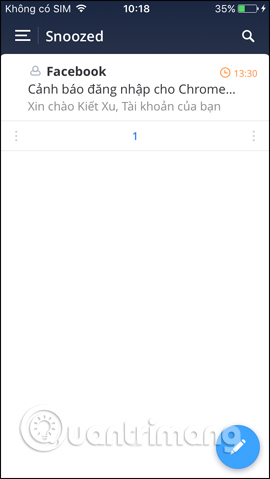
6. Remind email on Spark
Users can select any email to remind them to read the email again if necessary.
You open the email you want to review again and click the clock icon will see Snooze Email feature , press Got It to use.
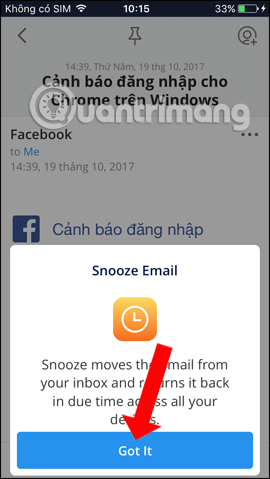
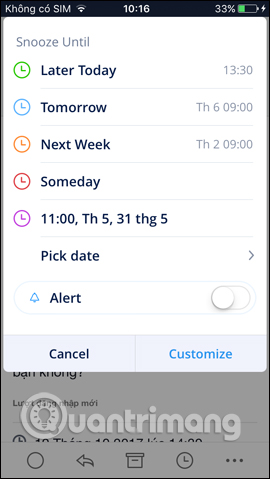
Then choose the time to review the email and add an alarm if necessary. The selected email will be hidden and displayed again on the main mailbox when it is time to schedule.
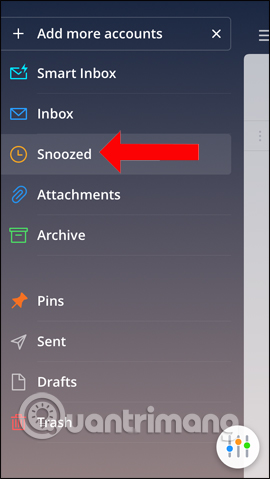
If you want to immediately see the hidden email without waiting for the selected time, click the 3 dashes icon and select the Snoozed item and see the following email here.
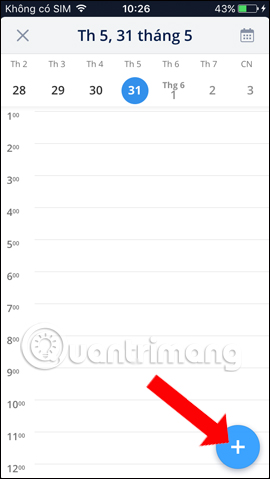
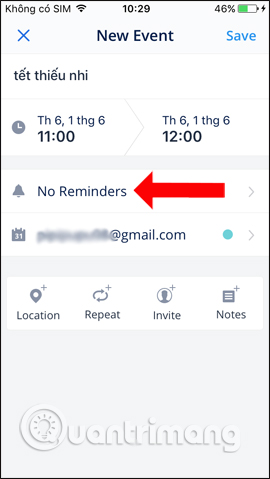
7. Schedule events on Spark
Spark has a notification feature, event reminders scheduled in the app.
At the Smart Inbox interface of the application click on the calendar icon and then select the date you want to create the event, then press the plus button .
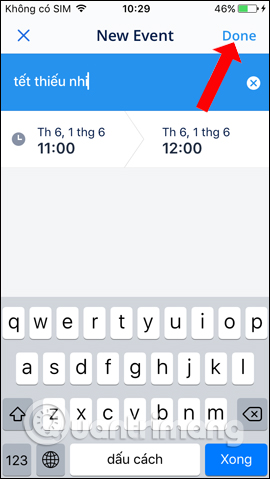
Then enter the content for the appointment and press the Done button to save it. Next select the notification time at No Reminders, add the appointment location, add notes if you want. Finally click the Save button to save.
Above is how to use the Spark application, manage email on iPhone. Email compilation features, emailing as well as other commonly used email readers. But Spark has some additional features like scheduling email, scheduling events, .
See more:
- How to use Inboxen to create unlimited temporary emails
- Instructions for deleting, changing, adding phone numbers in Gmail
- How to transfer, backup phone contacts from iPhone to Gmail
I wish you all success!
Was this article helpful?
Your feedback helps us improve.
Related Articles
 6 best email apps for Mac8 minutes read
 Learn About Smart Folders: Tips to Make Email the Best Part of Your Workday5 minutes read
 Reasons to use Spark Mail instead of Gmail4 minutes read
 Instructions on how to manage email and mailboxes in the Mail application on iPhone / iPad7 minutes read
 Instructions for setting up an email account on iPhone (SMTP / IMAP / POP3)4 minutes read
 Manage email on Android device5 minutes read
Reader Comments 0
Sign in with email or Google to join the discussion.