How to save email as PDF on iPhone
This only takes a few minutes but can save you a lot of time to go solving other problems. Below, I will show you how to save emails as PDF on phone.
How to save an email as a PDF on iPhone and iPad
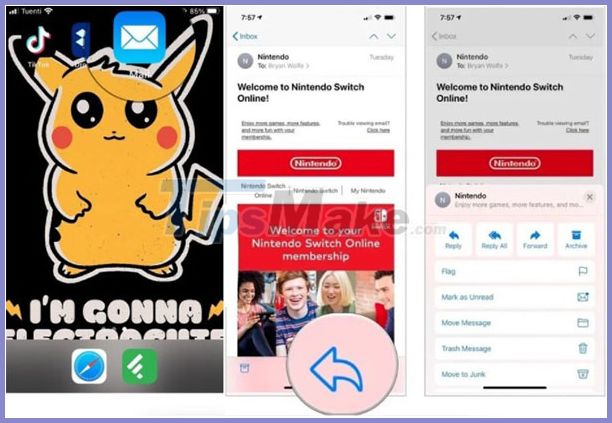
Step 1. Open the Mail app on your iPhone or iPad.
Step 2. Click on the email you want to save as PDF.
Step 3. Click the action button. This button looks like an email reply arrow (it's often used to reply to or forward an email).

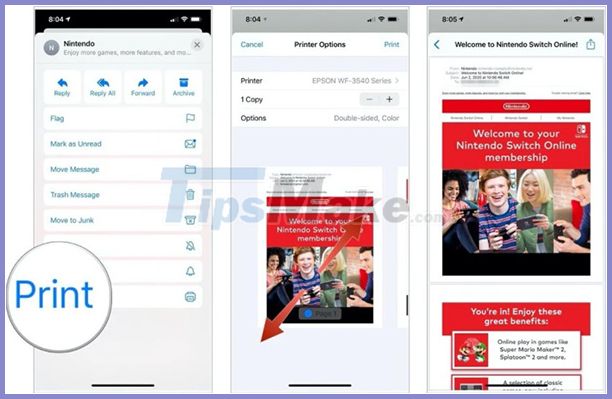
Step 4. Scroll down, select Print to open print options.
Step 5. Zoom in on the first page image of that email.

Step 6. Click the Share button at the top right corner of the screen.
Step 7. Select the application you want to save or share the PDF email with. For example, PDFs under photos can be saved to iCloud.

Thanks to the Mail app, saving emails as PDFs on iPhone and iPad has been a lot easier. In addition, Mail's in-app sharing feature can help you do a lot with PDF emails.
You can send it to nearby people via Dropbox, save it to the Notes app, copy it to the Books app, and more. Lots of third-party apps that support PDF email sharing and archiving include Dropbox, Messengers and Slack.
Good luck.