Make email management of email notifications using Outlook Express
For office workers today, effectively declaring and managing the company's email is an essential need. Microsoft with the built-in Outlook Express program gives you the convenience and professionalism when you need to manage your company's mail (you can manage both Gmail or Yahoo mail, .). We take an example here, email support@quantangang.com, if you declare by the company's email address, you must change it to ten_email @ ten_mien_cty and replace mail.quantrimang.com to mail.ten_mien_cty
I. Start email creation in Outlook
1. Go to Tools
2. Select Accounts .
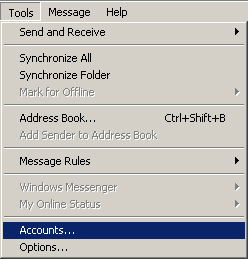
3. Export the Interent Accounts dialog box. Choose AddMail .

4. The Internet connection Wizard dialog box appears
5. Enter the name you want to display in the Display name box.

6. Select the Next button to continue the report
7. Enter your email address in the E-mail address box .
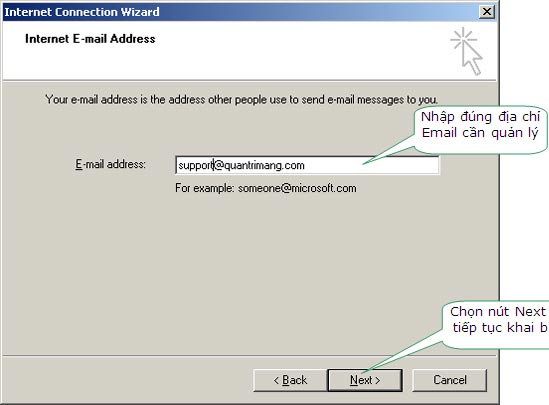
8. Select the Next button to continue the declaration
9. Declare the E-mail name initialized on the Server

10. Select the Next button to continue the report
11. Declare your Email account when logging into Outlook
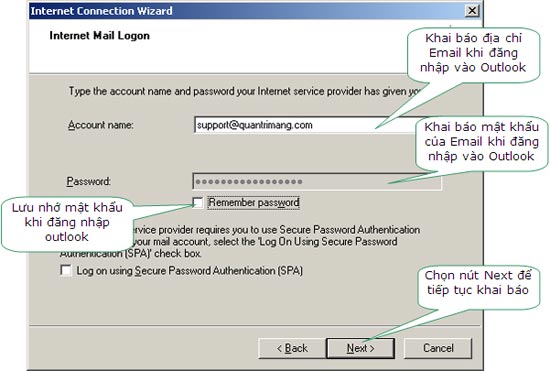
Note : If you want to remember the password so that the next time you do not have to log in to Outlook, enter the correct password in the Password box and check the Remember password (if it is a personal machine). If your computer has the same users, you should not save and remember the password here to secure your mail.
13. Select the Next button
14. Select Finish 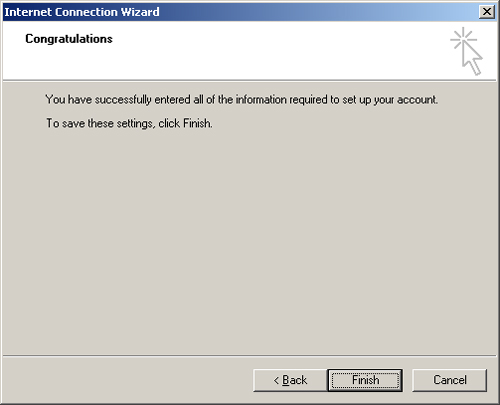
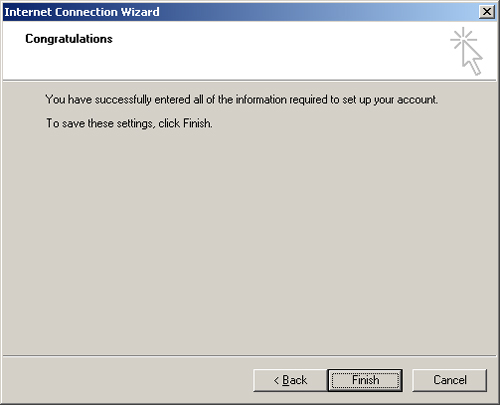
II. Check the information declared Email in Outlook Express
When the email creation report in Outlook Express still does not have all the necessary parameters to ensure that incoming and outgoing mail is securely secured, please see and fill in some more information.
Compare and fill the email properties with the following steps:
1. Go to Tools
2. Select Accounts .
3. The Internet Accounts dialog box appears 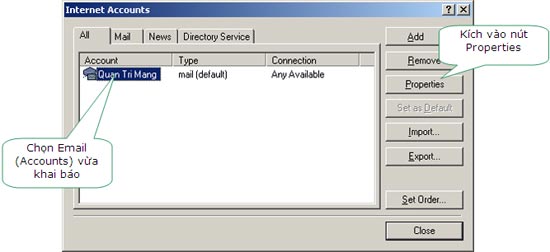
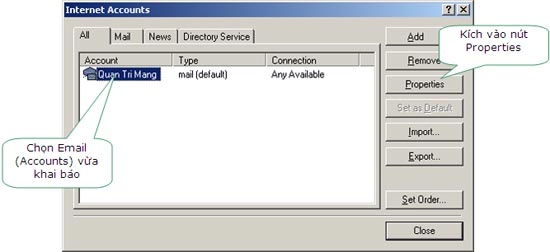
4. Select Accounts just declared
5. Select the Properties button
6. Compare the General tab 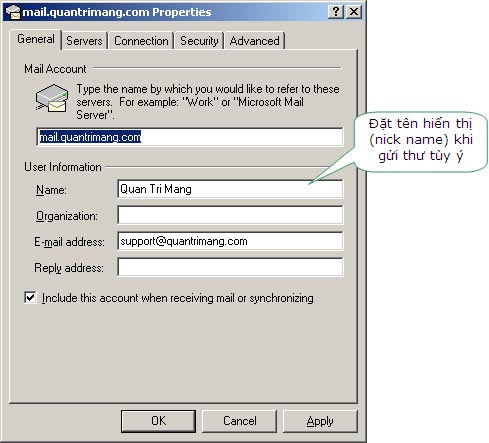
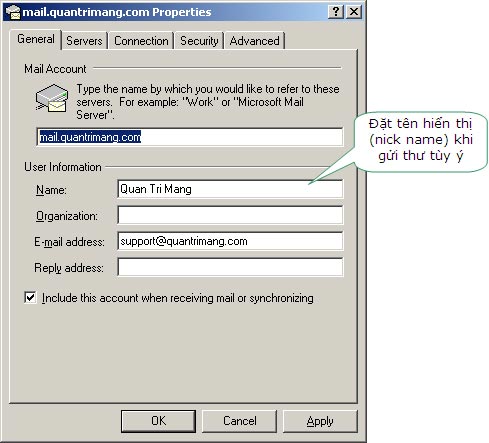
7. Compare Server card 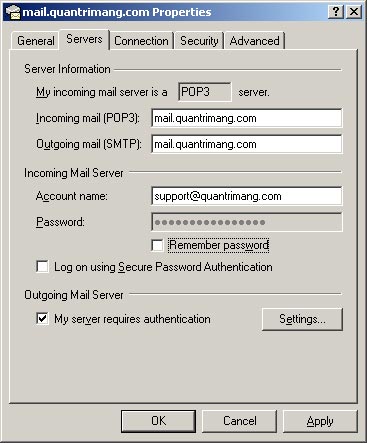
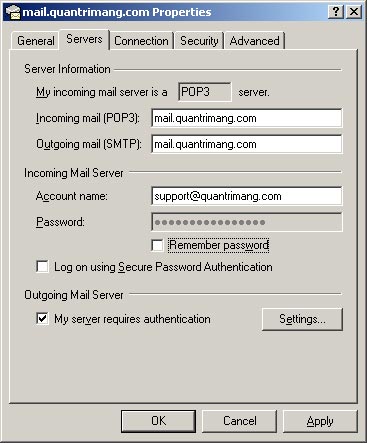
8. Please select My server to require authentication . Select Settings button . to declare Email and password when sending mail. 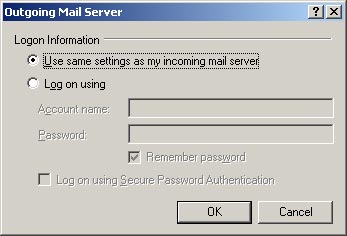
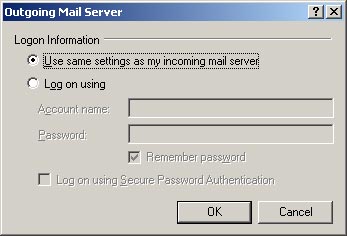
Select Use same settings as my incoming mail server to use the same Email and password of the declared mail.
9. Connection Card 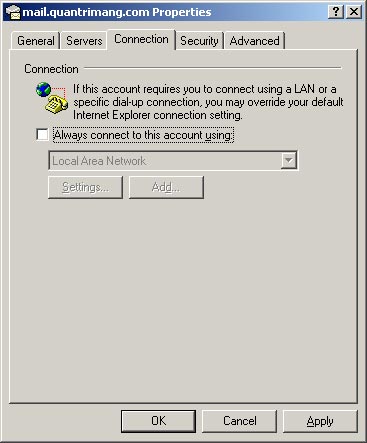
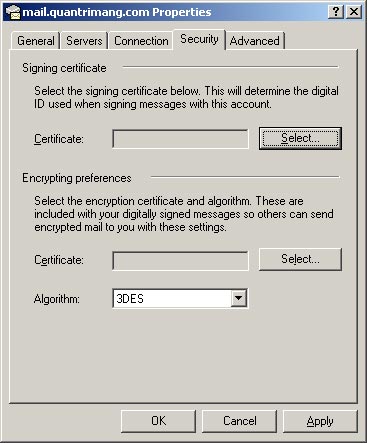
10. Security Card
11. Advanced card
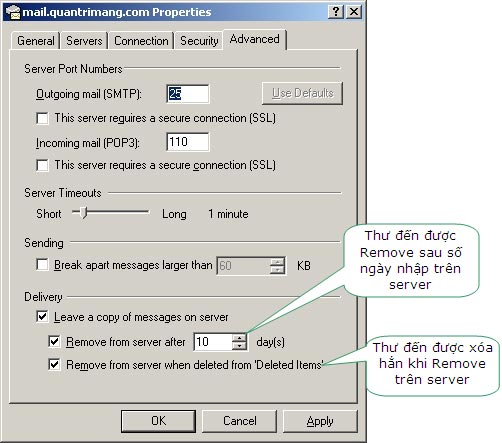
Finally click OK to save the selected changes.