Instructions for setting up an email account on iPhone (SMTP / IMAP / POP3)
Email is an extremely useful form of information exchange for people. Catching this strong point, mobile phone manufacturers have set up an email application so that users can easily check the mail of companies, friends and partners .... anywhere Mobile phones only need to connect to the Internet.
Table of Contents
Email is an extremely useful form of information exchange for people. Catching this strong point, mobile phone manufacturers have set up an email application so that users can easily check the mail of companies, friends and partners . anywhere Mobile phones only need to connect to the Internet.
In the article below, Network Administrator will guide you how to set up sending and receiving Email on your iPhone phone.
Step 1:

Go to Setting .
Step 2:

Select Mail, Contacts, Calendars (mail, contact, calendar).

Then select Add Account (add account).
Step 3:

The Add Acount dialog box appears, at the dialog box showing the mail service providers.
You select Other if you don't use Apple's default services like Gmail, Yahoo, .
Step 4:
Select Add Mail Account.
In the New Account menu, you fill in the information:
- Name : your name.
- Address: your full email address (section name and extension).
- Descriptions (descriptions): so you can easily distinguish them from other messages on your device.
- Password (password): password to login email.
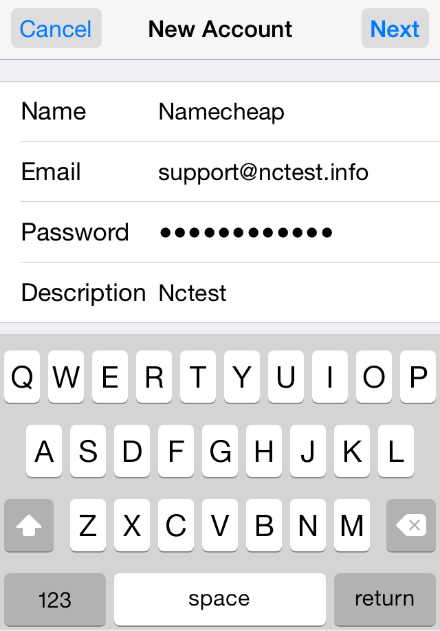
Click Next to continue.
Step 5:
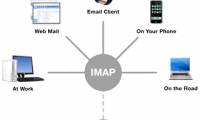
Select mail browsing protocol: IMAP or POP3.
Step 6:
Set up on IMAP or POP3:
Name, Address and Description (name, address and description): you just filled in above.
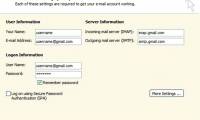
Host Name : quantrimang.vsmail.vn (or imap.tenmiencuaban.com).
Username : your email address.
Password (password): your email login password.
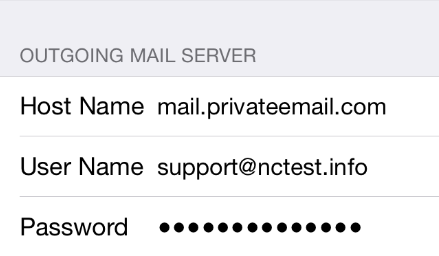
In the Incoming Mail Server section and Outgoing Mail Server, fill in the information.
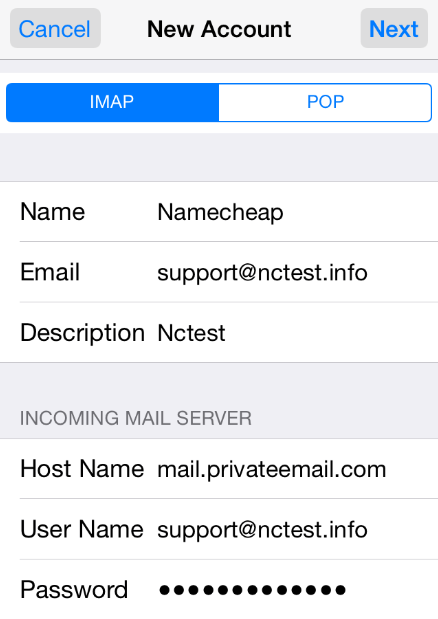
Then select Next.
Step 7:
If you use IMAP , you can activate mail as shown below:
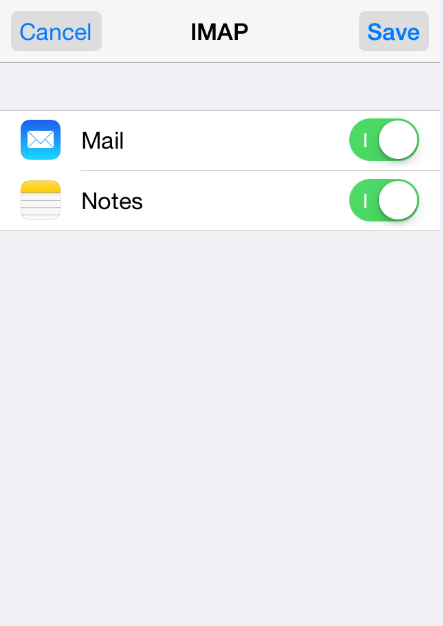
Then click Save and wait a few seconds for the system to complete the checkout process if necessary.
Step 8:
After the test is complete, redirect the interface to Mail, Contacts, Calendars . Select the account you just created.

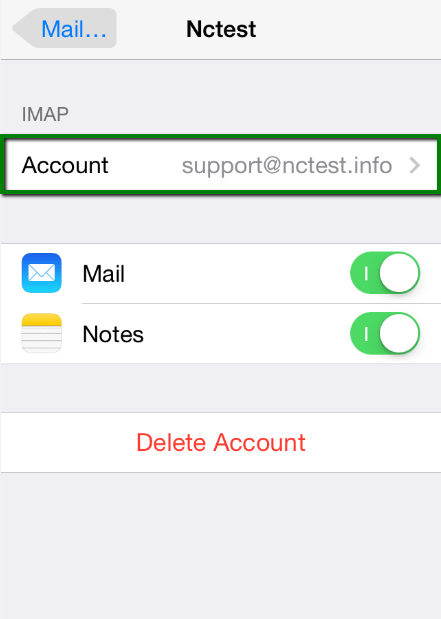
Step 9:
Scroll down to select Advanced.
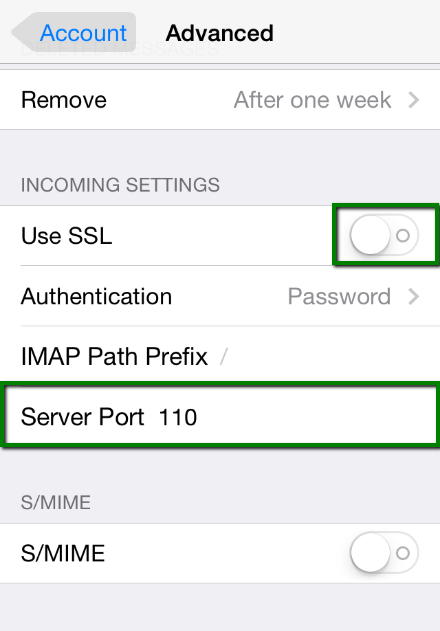
Step 10:
Here you choose to install additional IMAP or POP3 .
If you have an IMAP connection installed, use port 993 (with SSL).
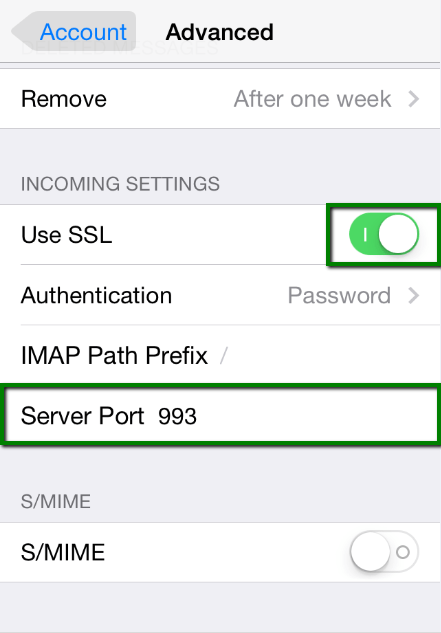
Or port 143 (no SSL).
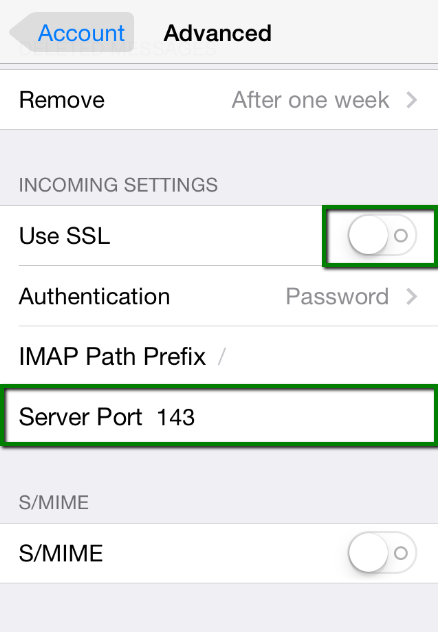
Then set up IMAP Path Prefix to Inbox.
If you choose POP3 , you use port 995 (with SSL).

Or port 110 (no SSL).
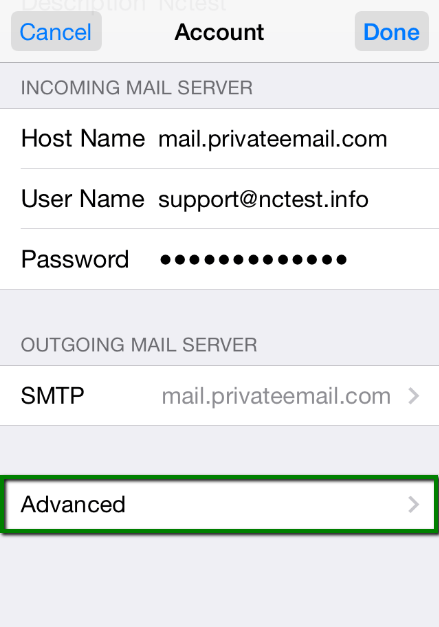
Step 11:
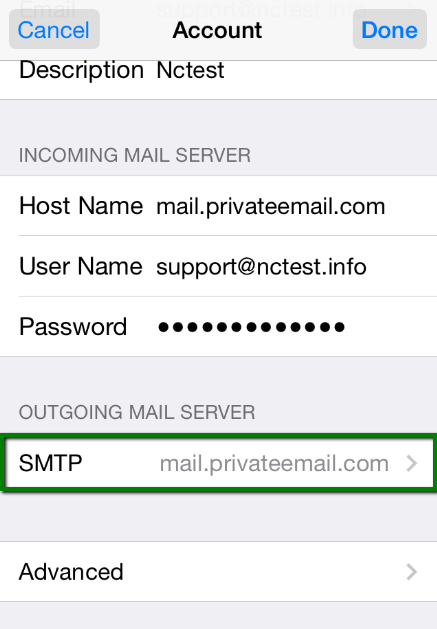
To set up additional settings for outgoing mail server (Outgoing Mail Server), you must return to the previous menu, then access the outgoing mail server (Outgoing Mail Server) by touching the server name:
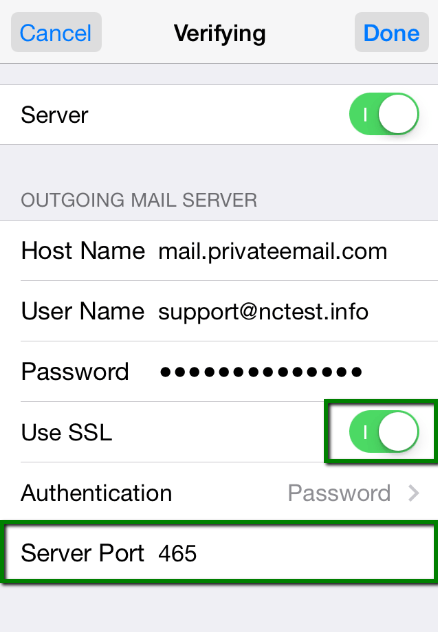
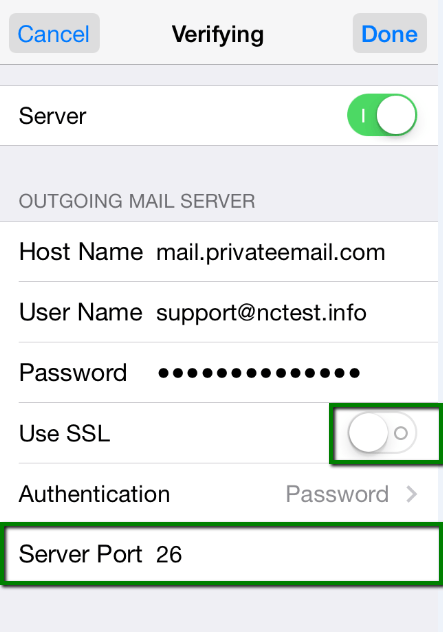
Step 12:
In the outgoing server, select port 465 (with SSL).
Or port 26 (no SSL).
After installation is complete, your email account will be activated for use.
To check your new email account, go to Message and try sending an email.
You can refer to some of the following articles:
-
How to receive Gmail notifications on Desktop screen?
-
Tips for using the iPhone for a long time do not run out of battery
-
Tips to fix iPhone 5 error turn off and don't restart
Good luck!
Was this article helpful?
Your feedback helps us improve.
Related Articles
 4 reasons to use IMAP service5 minutes read
 Move mailboxes between IMAP servers with IMAP TOOLS8 minutes read
 How to set up IMAP / POP, CalDAV or CardDAV accounts on iPhone or iPad2 minutes read
 What are POP3, IMAP and Exchange and what is the difference between them?11 minutes read
 Email: Differences between POP3, IMAP and Exchange8 minutes read
 How to distinguish between POP and IMAP when setting up Gmail and Outlook.5 minutes read
Reader Comments 0
Sign in with email or Google to join the discussion.