How to Fix a Black Login Screen on Windows 7
Method 1 of 3:
Running Explorer
-
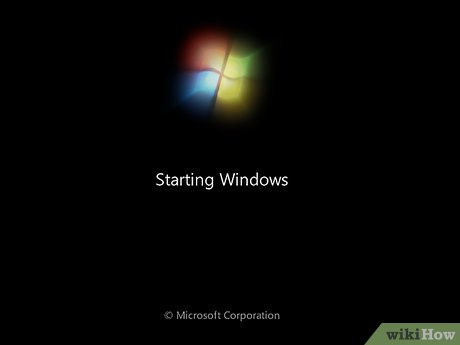
 Boot Windows until you get to the black screen. You may be able to force Windows Explorer to load, which will then allow you to scan for malware and remove the problem.
 -
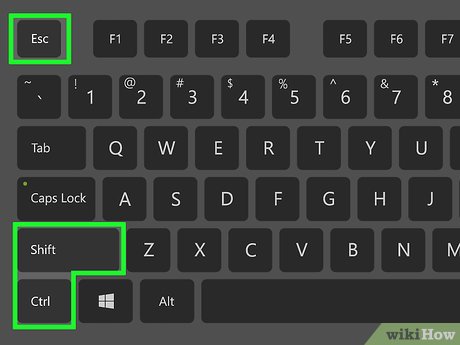
 Press Ctrl+⇧ Shift+Esc. This should open the Task Manager.
- If you aren't able to open Task Manager, try performing a Startup Repair.
-
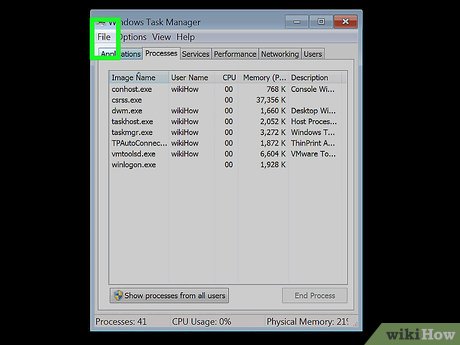
 Click the File menu.
 -
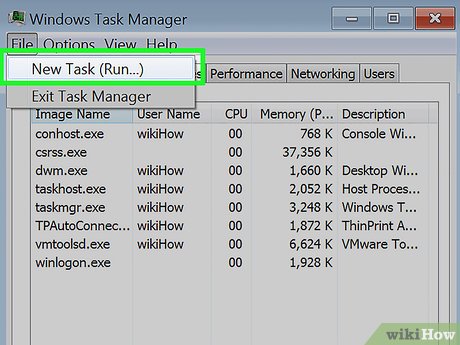
 Click New Task.
 -
 Type explorer.exe and press ↵ Enter. In many cases, your Windows interface will load after a moment.[1]
- If it's been several minutes and Windows still hasn't loaded, try disabling your video drivers.
-
 Open your web browser. If you are now back in Windows, you'll want to scan for the problem that caused the black screen. The quickest way to do this is with a free program called Malwarebytes.
 -
 Visit malwarebytes.org.
 -
 Click the Free Download button. The free version of Malwarebytes has all the features you need for this method.
 -
 Run the installer after downloading.
 -
 Follow the prompts to install Malwarebytes. You can leave the settings at their defaults during installation.
 -
 Start Malwarebytes after installation. It will typically start automatically after installation, but you can also find a shortcut on your desktop or in your Start menu.
 -
 Click the Check for Updates button. The update check may take a few minutes to complete.
 -
 Click the Scan Now button.
 -
 Wait while the scan finishes. This can take about a half hour to complete.
 -
 Click the Quarantine button if anything is found. This will remove any malicious files that Malwarebytes has found, which should help prevent the black screen issue from appearing again.
- If anything is found, reboot your computer and run the scan again after quarantining the items.
Method 2 of 3:
Disabling Your Video Drivers
-
 Reboot your computer. Your video card drivers may be causing problems when Windows loads. Removing them will allow you to boot normally and then install the latest working drivers.
 -
 Rapidly tap F8. This will open the Advanced Boot Options menu if you are quick. If Windows tries to load, you'll need to reboot and try again.
 -
 Highlight Safe Mode and press ↵ Enter. This will load Windows in Safe Mode, which will usually work even if Windows normally shows a black screen.
- If Safe Mode will not work, try a Startup Repair.
-
 Press ⊞ Win+R after Windows boots into Safe Mode.
 -
 Type devmgmt.msc and press ↵ Enter.
 -
 Expand the Display adapters category.
 -
 Right-click the first item in the list. You may have one or more display adapters listed here.
 -
 Click Uninstall.
 -
 Check the Delete driver software box and click OK.
 -
 Repeat for any other Display adapter items.
 -
 Restart your computer and allow it to boot normally. If the video drivers were causing the problem, Windows should now boot normally, though at a lower resolution than you may normally use.
 -
 Install the latest drivers for your video card if you can boot. If removing the old display drivers fixed your problem, you'll want to install the latest available drivers to get your display capabilities back:
- Open your web browser.
- Visit the driver download page for your graphics adapter. You're likely using either Intel, AMD, or NVIDIA. If you aren't sure, just try the auto-detection software for each one.
- Run the auto detection tool on the driver site to scan your computer and retrieve the proper files.
Method 3 of 3:
Performing a Startup Repair
-
 Reboot your computer. A Startup repair will reinstall essential system files that Windows uses to boot. This could fix the black screen problem you're experiencing.
 -
 Rapidly tap F8. If you time this correctly, you'll enter the Advanced Boot Options menu. If Windows tries to load, you'll have to reboot and try again.
- If you can't open this menu, you can boot from a Windows 7 installation DVD or USB installation drive and select "Repair computer" from the Setup menu.
-
 Highlight Repair Your Computer and press ↵ Enter.
 -
 Select your keyboard type. Your regular keyboard should be selected by default.
 -
 Select the user you want to log in as. Logging in as an administrator will give you access to the Command Prompt as well as the other repair options.
 -
 Click the Startup Repair option.
 -
 Wait while Startup Repair scans your computer.
 -
 Follow any prompts for repairing problems. Depending on what errors Startup Repair encounters, you may be given different options. In many cases, Startup Repair will fix problems without your intervention, and your computer will reboot one or more times.[2]
- If Startup Repair prompts you to perform a System Restore, click the Restore button and select the most recent restore point.
-
 Try logging into Windows. After Startup Repair has finished any of its repairs, try rebooting and loading Windows.[3]
- If you still are unable to boot into Windows, you may want to consider performing a clean installation. This will delete all of the data on the drive, so use Safe Mode to back up any important files first if possible.
4.5 ★ | 2 Vote
You should read it
- How to use the Startup Repair tool to fix problems in Windows 7
- How to Repair Windows 7
- Fast fix computer repair on Windows
- How to fix Automatic Repair error in Windows 10
- How to use Windows Repair to fix Windows errors
- How to Make Windows XP Startup Faster
- How to find the Windows 10 Startup folder
- How to manage startup programs with Windows?
May be interested
- How to fix Windows 11 black screen error
 after installing windows 11 or updating to build 22000.282 many people have encountered a black screen error that prevents the computer from working. therefore, in the article below tipsmake will guide you how to fix the windows 11 black screen error most effectively.
 - How to remove the Ease of Access button from the login screen in Windows 10
 as its name suggests, ease of access menu tries to make windows 10 system equally easy to use for all users. you can find ease of access options from the windows settings page as well as the user account login screen.
 - How to fix black screen error after adjusting display settings in Windows 10
 if you boot your computer and see the manufacturer's logo, then the screen goes dark when windows 10 starts up, then this could be a software issue, not a hardware issue.
 - How to fix black screen or black stripe in Nox App Player
 when using the above apps or playing games on nox app player, you may experience black or black screen problems. so what is the cause and how to fix it?
 - How to fix a computer with a black screen that cannot access Windows
 guide to fix the computer with black screen + mouse pointer, can not boot into windows. applies to windows 7, 8, 8.1 and windows 10 ...
 - How to fix, fix Windows 10 black screen error
 have you ever encountered the problem when turning on the computer, the screen is black and not showing the desktop screen or not. this is an uncommon error but it is not uncommon, most people who encounter this error are quite confused because they fear their computer will be corrupted.
 - Tips for opening apps from the Windows login screen
 accessing the apps and programs you want directly from the login screen can save time, and here's how to do it,
 - How to bypass Windows 10 login screen
 you feel uncomfortable and annoying every time you log in to the computer to enter the password. so how do i skip the windows 10 login step? how to turn on the computer directly to windows desktop. all will be tipsmake.com guide you through this article.
 - Change Windows 10 login wallpaper
 have you tired of the default login background image of windows 10 so i want to replace the windows login wallpaper with other nicer wallpapers. if you do not know how to change the login screen (lockscreen) of windows 10, you can refer to the article
 - How to fix black computer screen error on Windows 10
 the problem of a black screen on the computer is not common, but is one of the problems that makes it difficult and directly affects the needs of our computers. in each case we have different solutions below are some basic solutions.


 How to Burn a DVD in Windows 7
 How to Fix a Windows Computer that Hangs or Freezes
 How to Reboot Windows 7
 How to Clear Windows 7 Cache
 How to Reinstall Windows 7
 How to Find Your Windows 7 Product Key