Table of Contents
This updated guide examines Click: How to Clear Windows 7 Cache and organizes the essential facts, background, and practical takeaways in clear American English.
Method 1of 4:
Clearing General Caches
 Open Start
 . Click the multicolored Windows logo in the bottom-left corner of the screen.
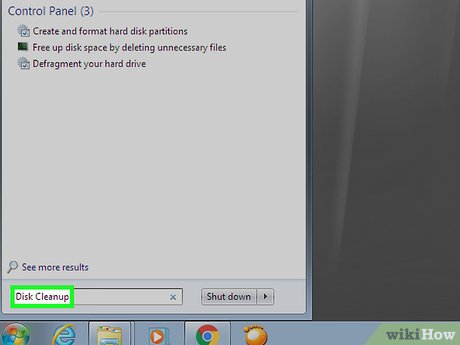 Typedisk cleanupinto Start. Doing so will search your computer for the Disk Cleanup program.
- If your mouse cursor doesn't appear in the text box at the bottom of Start when you open it, click the text box before typing.
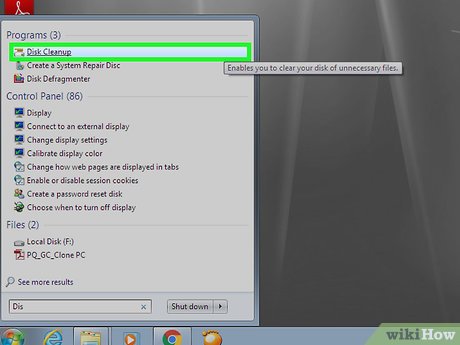 ClickDisk Cleanup. This program's icon, which resembles a flash drive with a brush on it, should be at the top of the Start menu. The Disk Cleanup program will open.
- You may have to click the Disk Cleanup icon once it appears at the bottom of the screen to open the Disk Cleanup window.
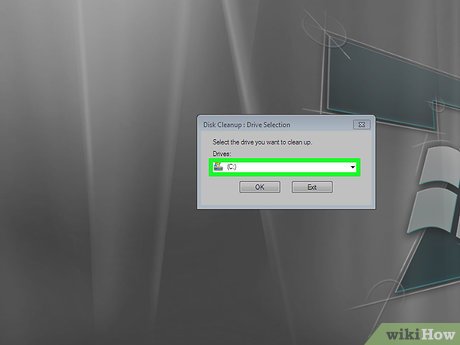 Check every box in the Disk Cleanup window. Click the checkbox to the left of each item in the Disk Cleanup window, scrolling down once you reach the bottom of the window to view more options if necessary.
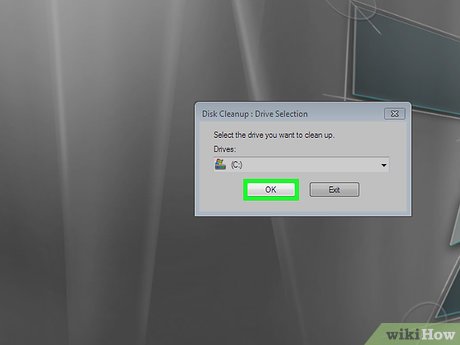 ClickOK. It's at the bottom of the window.
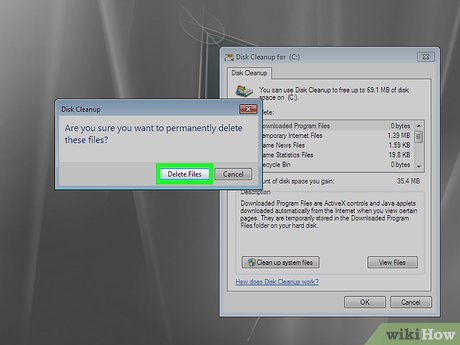 ClickDelete Fileswhen prompted. Disk Cleanup will begin deleting temporary files from places like the "Thumbnails" cache and the Recycle Bin cache.
- Once this process is complete, Disk Cleanup will close.
Method 2of 4:
Clearing App Data Files
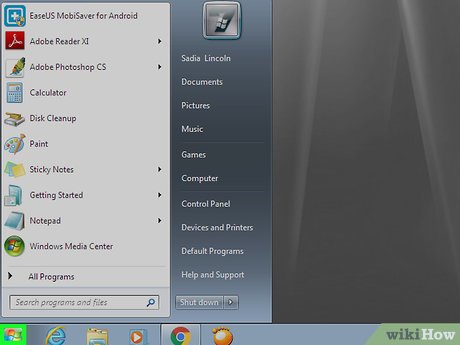 Open Start
 . Click the multicolored Windows logo in the bottom-left corner of the screen.
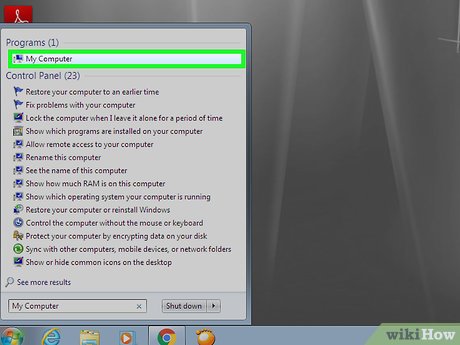 ClickMy Computer. It's a tab on the right side of the Start window. This will open the My Computer window.
- If you don't see the My Computer tab here, typemy computerinto Start, then click My Computer at the top of the Start window.
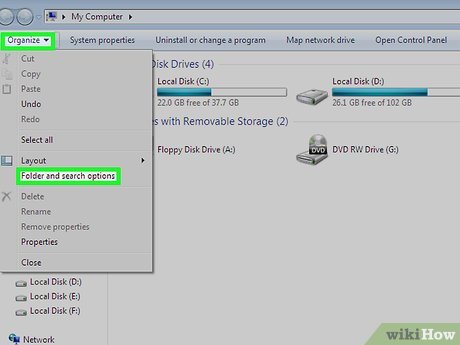 Enable viewing for hidden files and folders. To do so from the My Computer window:
- Click the Organize tab in the upper-left corner of the window.
- Click Folder and search options in the resulting drop-down menu.
- Click the View tab.
- Check the "Show hidden files, folders, and drives" box under the "Hidden files and folders" section of the "Files and folders" section.
- Click OK at the bottom of the window.
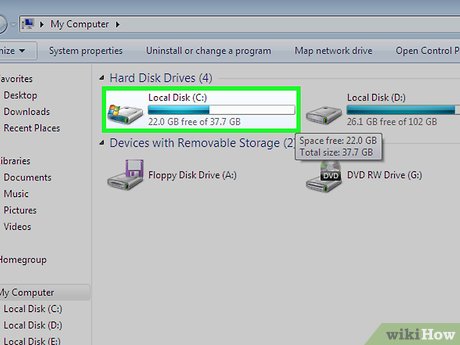 Double-click your hard drive's name. Below the "Hard Disk Drives" heading, double-click the Local Disk option.
- The hard drive's letter is usually "C", stylized as (C:) .
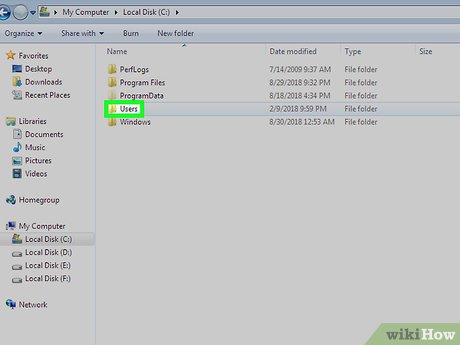 Double-click theUsersfolder. You'll find it near the top of the window.
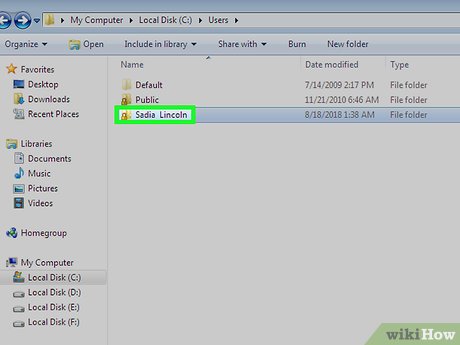 Double-click your user folder. This will usually be a folder with the first few letters of your name or Microsoft account address.
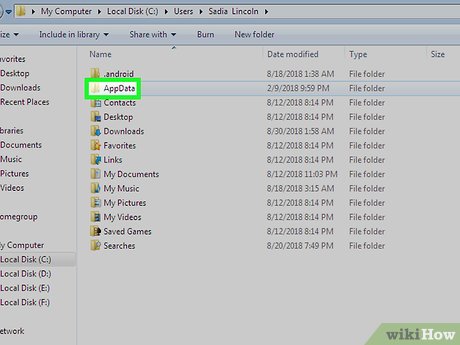 Double-click theAppDatafolder. It's in the middle of the window, though you may have to scroll down to find it if the window isn't in full-screen mode.
 Double-click theLocalfolder. You'll find this option near the top of the window.
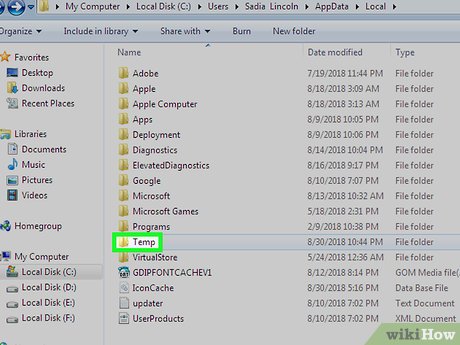 Scroll down and select theTempfolder. Click once this folder to select it.
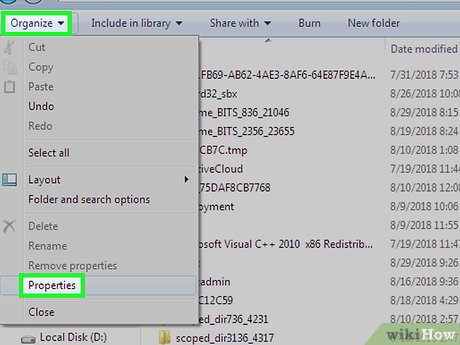 Remove the read-only protection from the folder. To do so:
- Click the Organize tab.
- Click Properties
- Uncheck the "Read-only" box.
- Click Apply
- Click OK when prompted.
- Click OK
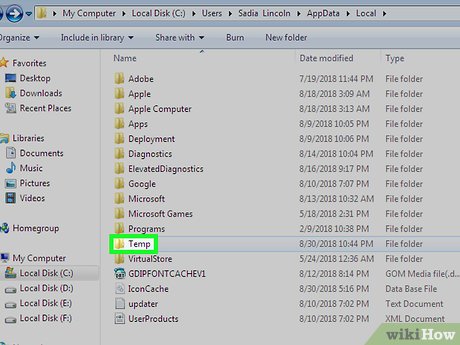 Double-click theTempfolder. It should open.
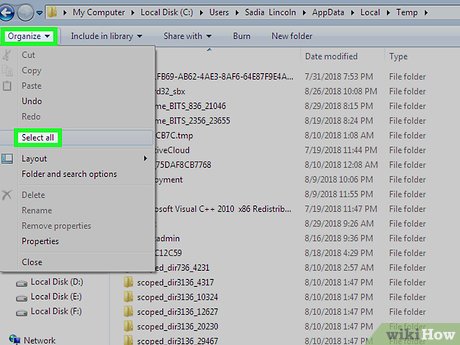 Select the folder's contents. Click one item in the folder, then pressCtrl+A. Alternatively, you can click Organize and then click Select all .
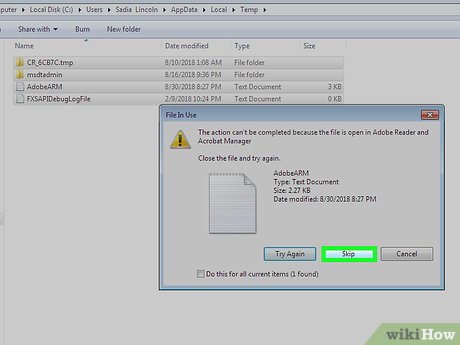 Delete the folder's contents. Press theDelkey on your keyboard.
- A few of the files in the Temp folder may be in use, or system files, meaning that you can't delete them. If prompted, check the "Do this for all current items" box and click Skip .
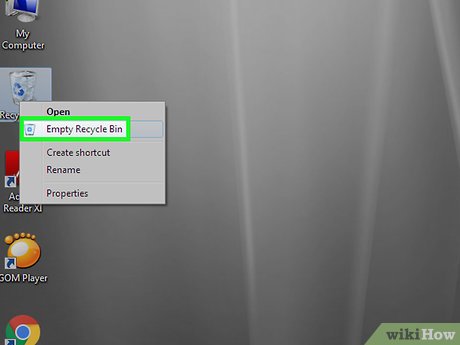 Empty the Recycle Bin. Doing so will completely remove the deleted files from your computer.
Method 3of 4:
Clearing Internet Explorer Files
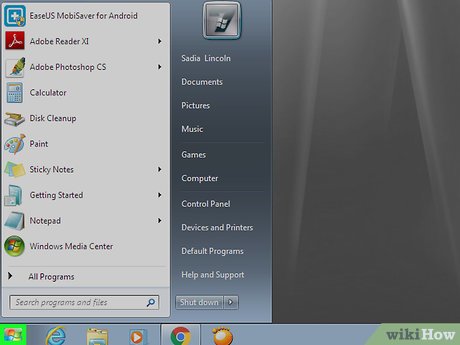 Open Start
 . Click the multicolored Windows logo in the bottom-left corner of the screen.
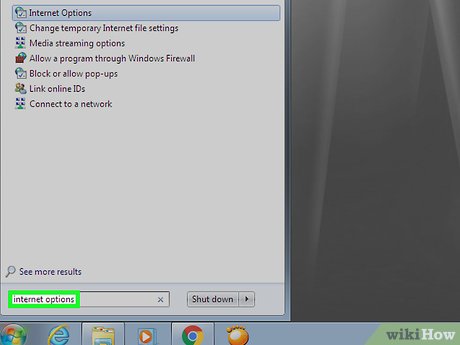 Type ininternet options. This will search your computer for the Internet Options program.
- If your mouse cursor doesn't appear in the text box at the bottom of Start when you open it, click the text box before typing.
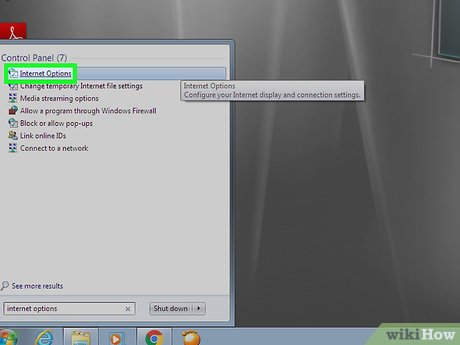 ClickInternet Options. It should be at the top of the Start menu. The Internet Options window will open.
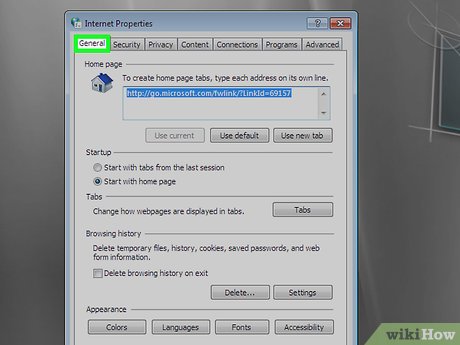 Click theGeneraltab. This is at the top of the window.
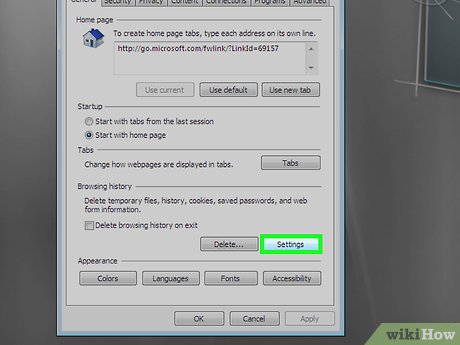 ClickSettings. It's in the lower-right side of the "Browsing history" section.
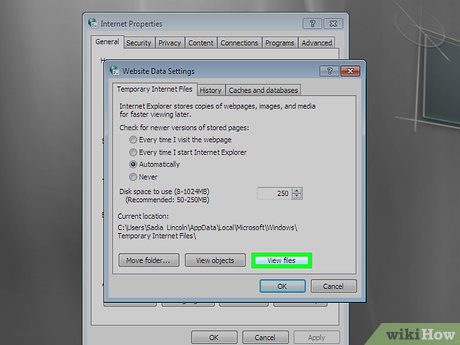 ClickView files. You'll find it near the bottom-right side of the window. A new window containing all of your Internet Explorer cached files will open.
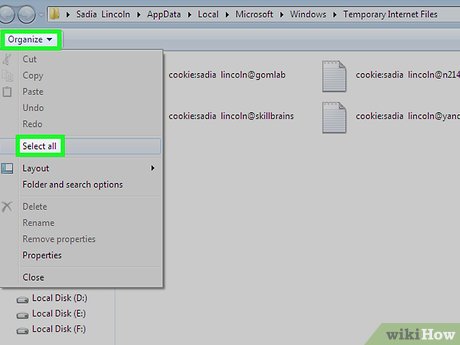 Select the folder's contents. Click one item in the folder, then pressCtrl+A. Alternatively, you can click Organize and then click Select all .
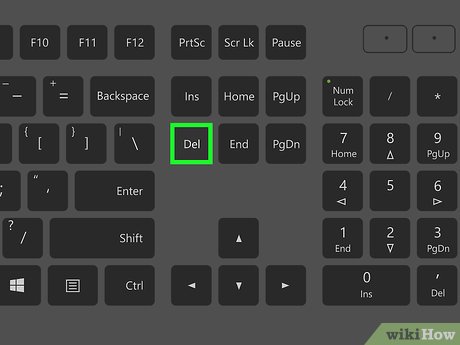 Delete the folder's contents. Press theDelkey on your keyboard.
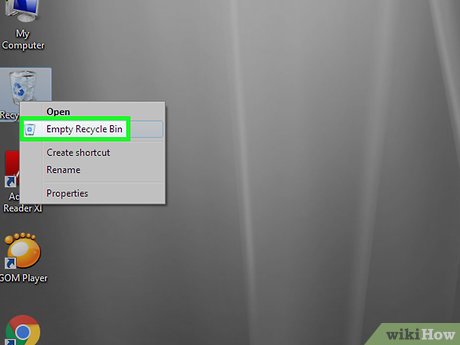 Empty the Recycle Bin. Doing so will completely remove the deleted files from your computer.
Method 4of 4:
Clearing the DNS Cache
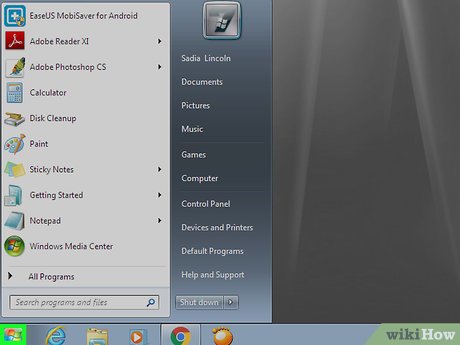 Open Start
 . Click the multicolored Windows logo in the bottom-left corner of the screen.
- Clearing the DNS cache solves problems with Internet connectivity, such as sites timing out.
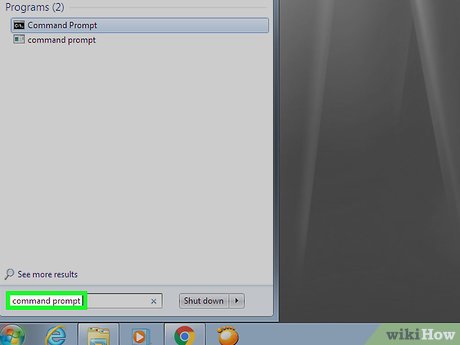 Typecommand promptinto Start. This will search your computer for the Command Prompt program.
- If your mouse cursor doesn't appear in the text box at the bottom of Start when you open it, click the text box before typing.
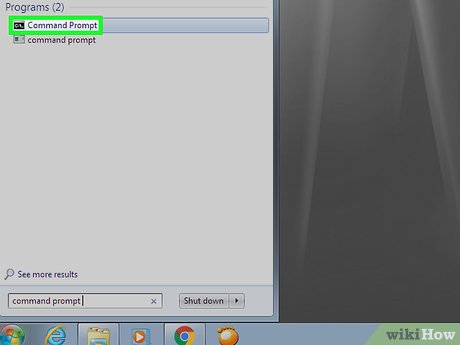 Right-click
 Command Prompt. It should be at the top of the Start menu. A drop-down menu will appear.
- If your mouse doesn't have a right-click button, click the right side of the mouse, or use two fingers to click the mouse.
- If your computer uses a trackpad instead of a mouse, use two fingers to tap the trackpad or press the bottom-right side of the trackpad.
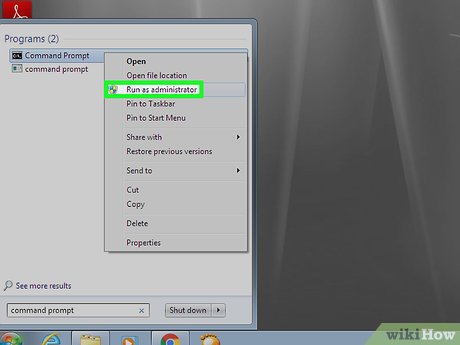 ClickRun as Administrator. It's an option in the drop-down menu. This will open Command Prompt with Administrator privileges.
- You can't do this if you aren't using an Administrator account on your computer.
- You may need to click Yes when prompted before you can continue.
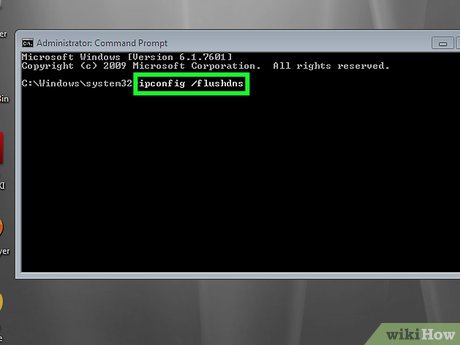 Enter the DNS flush command. Type inipconfig /flushdnsand press↵Enter.
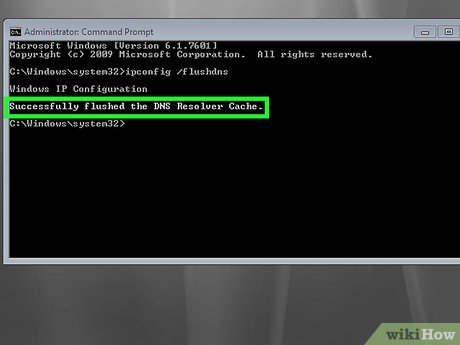 Wait for the confirmation command. You'll see a command saying "Successfully flushed the DNS Resolver Cache" appear if the flush is successful.
- You may need to restart your computer before you'll notice the changes to your Internet connection.
FAQ
What is Click: How to Clear Windows 7 Cache about?
It provides a structured overview of click, explains the main context, and highlights practical takeaways for readers.
Why does this topic matter?
Understanding the main concepts helps readers evaluate the issue, avoid common mistakes, and make better-informed decisions.
How should readers use this information?
Use the guidance as a practical starting point, confirm details that may have changed, and follow current product, safety, or security recommendations.



Reader Comments 0
Sign in with email or Google to join the discussion.