How to Install Windows NT 4.0 Workstation
Windows NT 4.0 (NT stands for New Technology) was a 32 bit closed source operating system released on 31st July 1996 orientated at business users. It had a similar interface to Windows 95. The operating system succeeded Windows NT 3.51 but...
Table of Contents
Part 1 of 3:
Preparing to Install
-
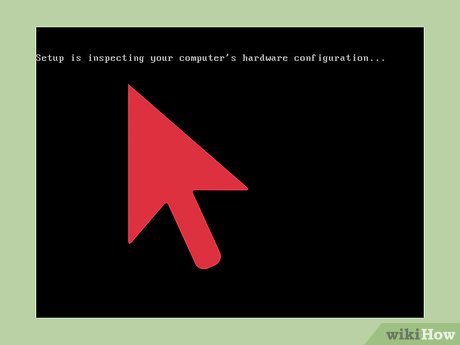 Enter the Windows NT 4.0 installation disc.
 -
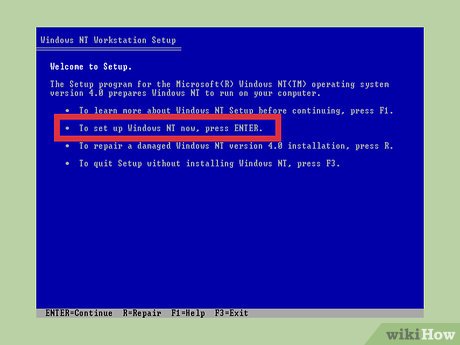 Press ↵ Enter to continue with the installation.
 -
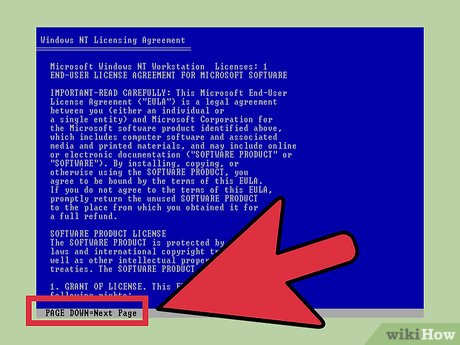 Press the ⇟ PgDn key until you get to the bottom.
- Lots of people don't bother to read the Terms and Conditions but it's advisable to read them so you know exactly what you're signing up for.
-
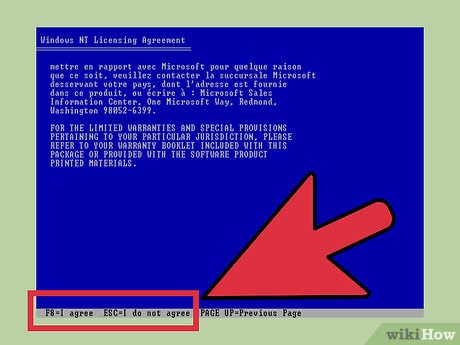 Press F8 to accept the terms and conditions.
 -
 Check to see that the above list matches the specifications of your computer.
 -
 Select the partitioning of your hard drive that you want to install Windows NT 4.0 on and press ↵ Enter. (The instructions will show you what to do on an unpartitioned hard drive).
 -
 Choose the file system you would like to partition your hard drive as. For this tutorial, NTFS was used.
- In general, NTFS is best if you use files larger than 4GB but cannot be used on floppy disks.
-
 Wait for the process to complete.
 -
 Choose where you want the operating system's main files to be stored and press ↵ Enter when that's done.
- (Often just leaving it where the system recommends in best).
-
 If all goes well you should see this screen. When you do press ↵ Enter.
- Make sure though to boot from your hard drive from the boot menu (sometimes the F12 key) and not the disk (or else it will repeat the installation).
Part 2 of 3:
Setting Your Preferences
-
 Wait for this screen to pop up. Click Next.
 -
 Choose the type of setup you want and click Next.
- It's a matter of personal preference but for this tutorial, we will be using the 'Typical' setup which is a Microsoft default setup.
-
 Type your name and/or your organisation and click Next.
 -
 Type in a name for your computer (can be anything) and click Next.
 -
 Add a password if desired. It's a good idea (but not essential) to come up with a password to your computer to prevent unauthorized access.
 -
 Consider adding an emergency repair disk which can be used to repair Windows NT 4.0 should something bad occur. For this tutorial, we won't be making one.
 -
 Choose your components preference. Again personal preference but for this tutorial we will 'Install the most common components'.
 -
 Click Next.
 -
 Pick your network preferences. Personal preference yet again.
- If you want to be able to connect to the internet (and you have the required equipment) choose 'This computer will participate on a network.' Otherwise choose 'Do not connect this computer to a network at this time.'
- You can connect to a network at anytime so for this tutorial, we will pick the latter option.
-
 Click Finish.
Part 3 of 3:
Checking Your Installation
-
 Make sure your date, time and time zone is correct and then click close.
 -
 Ensure your display settings are correct and click OK.
- Unless there is a real issue with the display, leave these settings alone.
-
 Remove all floppy disks and CDs and then click restart computer.
 -
 Press Ctrl+Alt+Delete keys in order.
 -
 Type in your password and press OK.
- The Administrator is the main account on the computer and can change critical settings of the computer. You can always create another account if you want to keep the Administrator account separate.
-
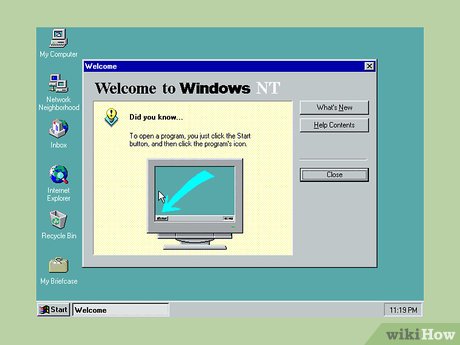 Once you are presented with this screen, Windows NT 4.0 has been fully installed!
Was this article helpful?
Your feedback helps us improve.
Related Articles
 Install Windows 10 in VMWare Workstation virtual machine for computer5 minutes read
 Compare VMware Workstation Pro and VMware Workstation Player5 minutes read
 What is a workstation? What is a Workstation workstation that is different from a regular computer?5 minutes read
 How to Install VMware Player6 minutes read
 VMware Workstation Player - Download VMware Workstation Player3 minutes read
 What is a workstation laptop? How is a workstation laptop different from a regular laptop?3 minutes read
Reader Comments 0
Sign in with email or Google to join the discussion.