How to try it, Windows 10 test right on the real computer, using the available VHD file of Microsoft
You want to test Windows features without wanting to install it on your real computer, or simply try it out. For example, do you want to know if Windows 10 is compatible with your current computer?
Table of Contents
You want to test Windows features without wanting to install it on your real computer, or simply try it out. For example, do you want to know if Windows 10 is compatible with your current computer? Can the software you are working with or studying on Windows 10 run? Let's TipsMake.com find out how to try Windows 10 on real computers!
Whether many people notice or not, Microsoft has provided standardized virtualization files of operating systems for users to download and use on real machines to check compatibility. These are VHD files - Virtual Hard Disk is created by Microsoft itself, all you need to do is download the VHD file as required, extract, install and test. Details of how to invite you to read the next part of the article.
Watch tutorial video:
Step 01: download the VHD file
Here, you need access to Microsoft 's prepared VHD file path:
- https://developer.microsoft.com/en-us/microsoft-edge/tools/vms/
Select the version of Windows 10 with the Build you want to test, choose the platform - the virtualization platform here is VirualBox, for example:
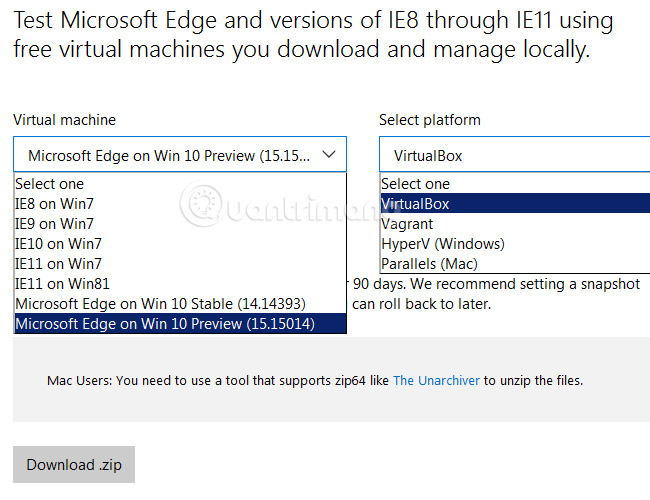
Then download the VHD file as a compressed file to your computer. Note that the virtual drive file of the operating system should be quite large, about 5GB, you need to make sure you are using a stable Internet speed.
See more:
- How to check Internet speed!
- Download VirtualBox virtual software.
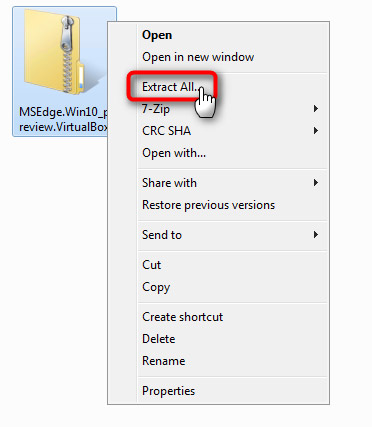
Step 02: extract VHD file
After successfully downloading the compressed file in step 1 to your computer, you use WinRAR or 7-zip to extract the file:
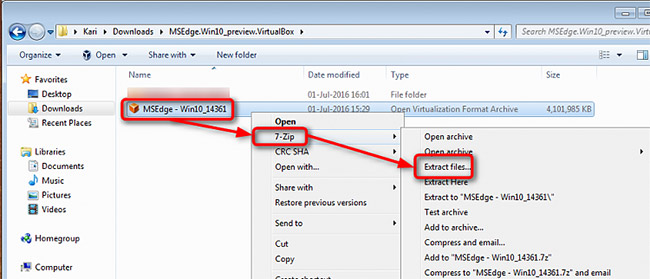
After unpacking, we will continue to do that operation again. That is, go to the unzipped folder, right-click the OVA (Open Virtualization Format Archive) file OVA (Open Virtualization Format Archive) MSEdge - Win10_XXXXX.ova , select 7-Zip and Extract files as shown below:
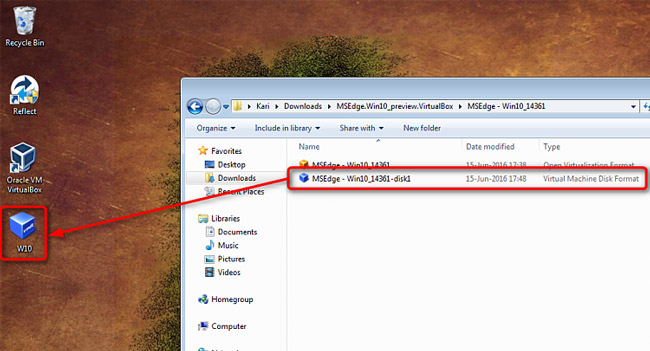
We will have the directory after extracting complete like this:
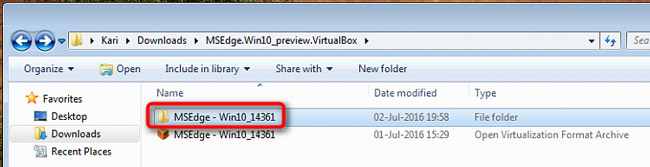
Here, you will see the file * .VMDK (Virtual Machine Disk Format) with a capacity of about 4GB , named MSEdge - Win10_XXXXX-disk1.vmdk . In this article, the author copies this file * .VMDK to the Desktop and renames it to W10, and you can leave it anywhere:
Step 03: convert VMDK file into VHD file (Virtual Hard Disk):
Next, open command - cmd under Admin and move the cursor position to Desktop, then type the following command correctly:
- "C: Program FilesOracleVirtualboxVBoxManage" clonehd --format VHD SourceFileName.vmdk TargetFileName.vhd
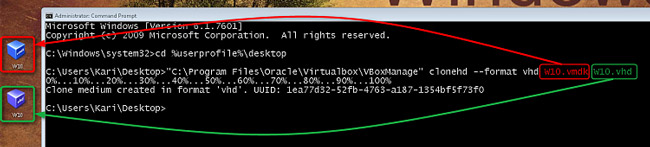
With the author's W10.VMDK file, the exact statement will be:
- "C: Program FilesOracleVirtualboxVBoxManage" clonehd --format vhd W10.vmdk W10.vhd

And when the file conversion process is successful, we will have 2 files like this:
Step 04: Add VHD to the Boot menu
Since this VHD file is in dynamically expanding disk format, it is recommended that you install the free disk space of at least 40GB when installing. Continue with the following steps.
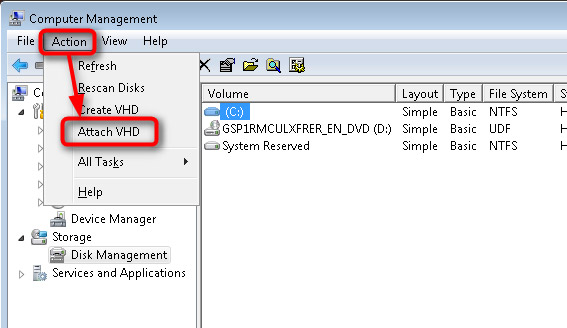
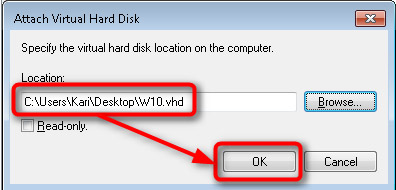
Open Disk Management feature, select Action then Attach VHD as shown below. and point to the VHD file on the Desktop:
We will have one more hard drive partition like this:
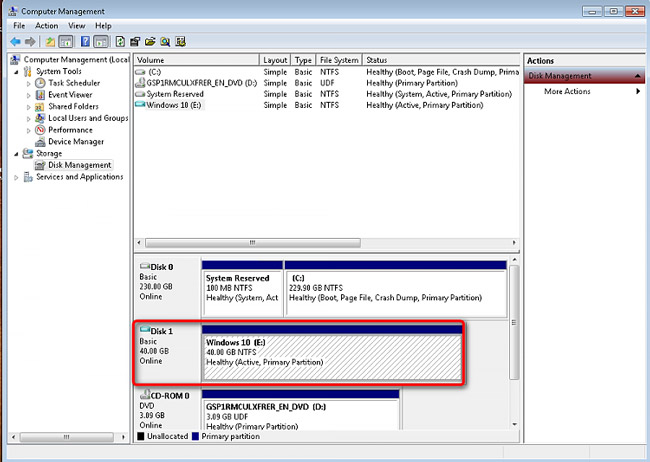
As here, we will have the E partition. You need to remember the wildcard, then open the command under Admin and use the command:
- bcdboot X: Windows
Replace X with the new partition character, which is E:
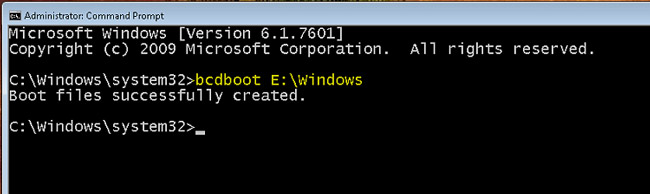
When the system displays the above message, it means that the process of creating boot components into the menu has been successful. Restart, and test Windows 10 only.
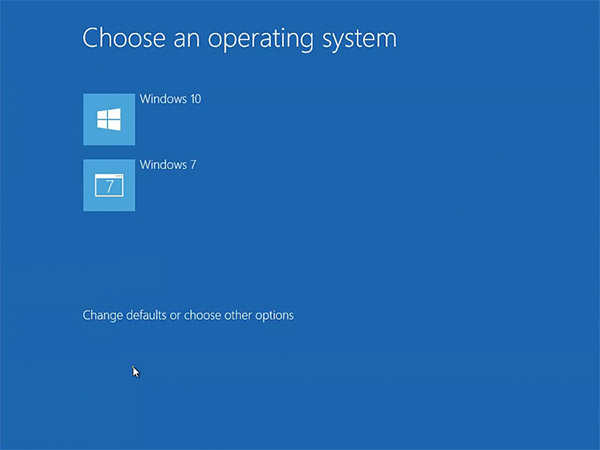
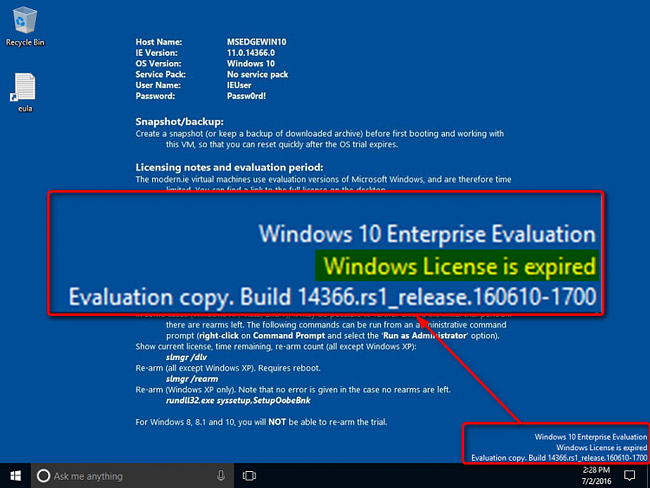
Step 05: test Windows 10
After restarting, we will see the dual boot menu of Windows 7 and Windows 10 as images:
Local User Account here is IEUser and password is Passw0rd!
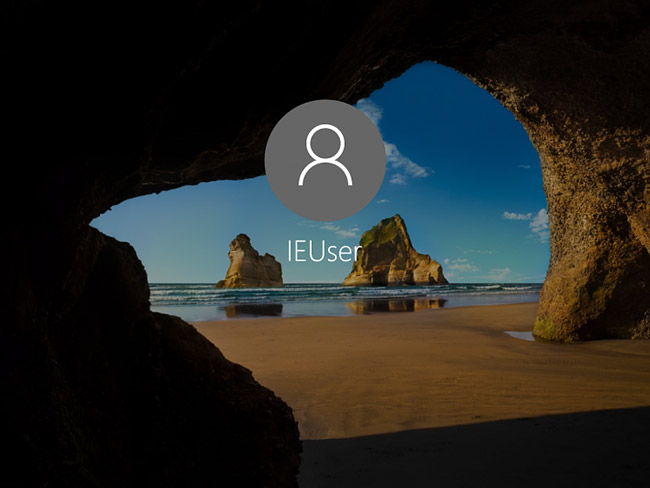
This is essentially a trial version, like Windows 7 Enterprise, so you will have a 90 day test period:
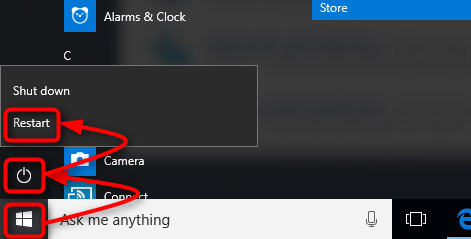
Although it is only trial, Windows 10 version still has quite the latest features. If you want to return to Windows 7, just Restart your computer, and select Windows 7 from the boot menu.
Note:
In case you create a menu that is unsuccessful, or for some reason that cannot perform dualboot, use Macrium Recovery. Download Macrium Recovery link here:
- https://www.macrium.com/reflectfree
After successfully downloading and installing Macrium Reflect Free , the program will have the following interface:
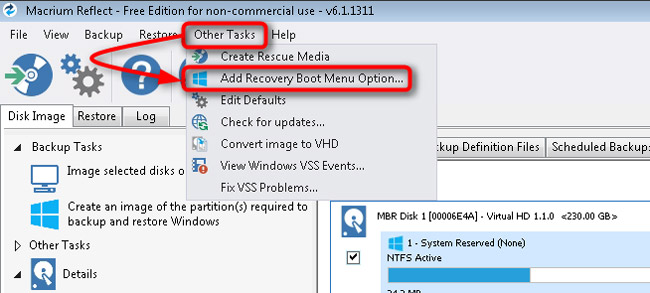
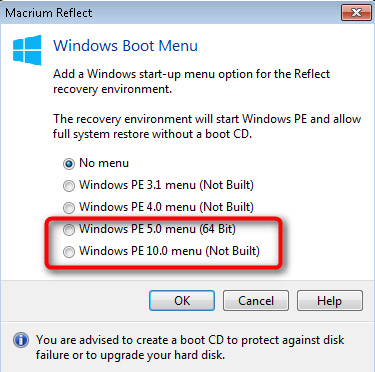
Select the Other Tasks menu and Add Recovery Boot Menu Option. Select Windows PE 5 or 10 as well, then click OK to get Macrium to download the necessary files:
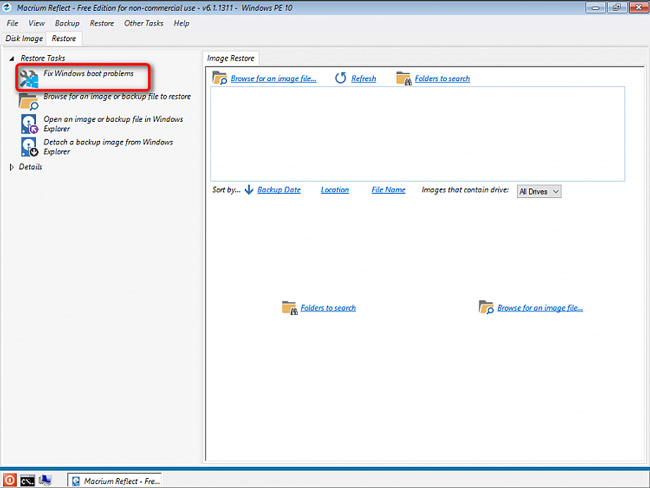
In the case of a boot error, reboot and select Macrium Reflect System Recovery from the boot menu:

And choose Next Fix Windows boot problems:
Just choose the default options, then OK> Finish:
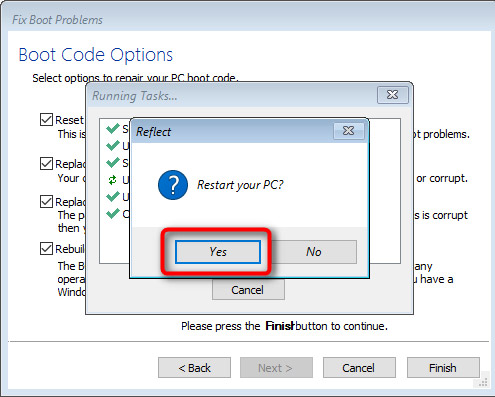
Reboot, and the normal Windows 7 menuboot will appear as before.
Was this article helpful?
Your feedback helps us improve.
Related Articles
 Finally, Microsoft also adds a tabbed interface to File Explorer on Windows 112 minutes read
 Microsoft officially released Windows 11 ISO file2 minutes read
 Microsoft is testing ads in WordPad on Windows 102 minutes read
 How to open, run the .jar file on a Windows computer?3 minutes read
 How to turn off real-time protection in Microsoft Defender on Windows 103 minutes read
 Microsoft Access test has the answer P13 minutes read
Reader Comments 0
Sign in with email or Google to join the discussion.