How to enable the auto-lock feature when users leave - Dynamic Lock on Windows 10

Dynamic Lock is one of the new features integrated on Windows 10 Creators Update version. This feature automatically locks the computer every time a user leaves his or her desk. It can be said that this is one of the extremely useful security features on Windows 10.

1. Enable Dynamic Lock on Windows 10

To enable Dynamic Lock on Windows 10, follow the steps below:

1. Open the Settings window by pressing the Windows + I key combination or open the Start Menu, then find and click the Settings icon in the bottom left corner of the window.

How to enable the auto-lock feature when users leave - Dynamic Lock on Windows 10 Picture 1

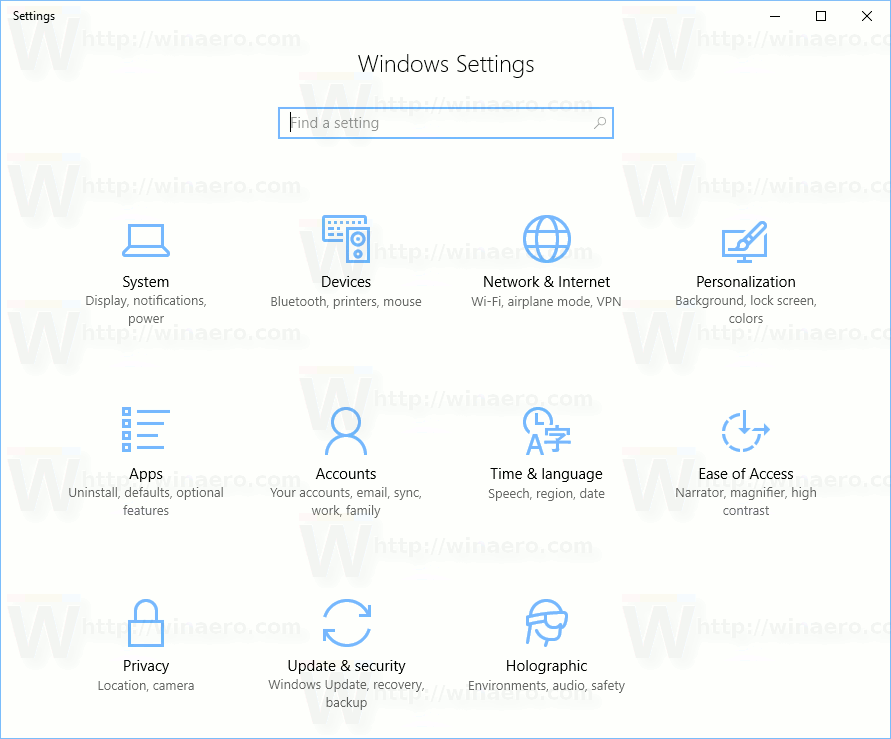
2. On the Settings window, find and click on Accounts => Sign-in options page .

3. In the right pane, find the option named Dynamic Lock and switch the option state to ON as shown below:

How to enable the auto-lock feature when users leave - Dynamic Lock on Windows 10 Picture 2

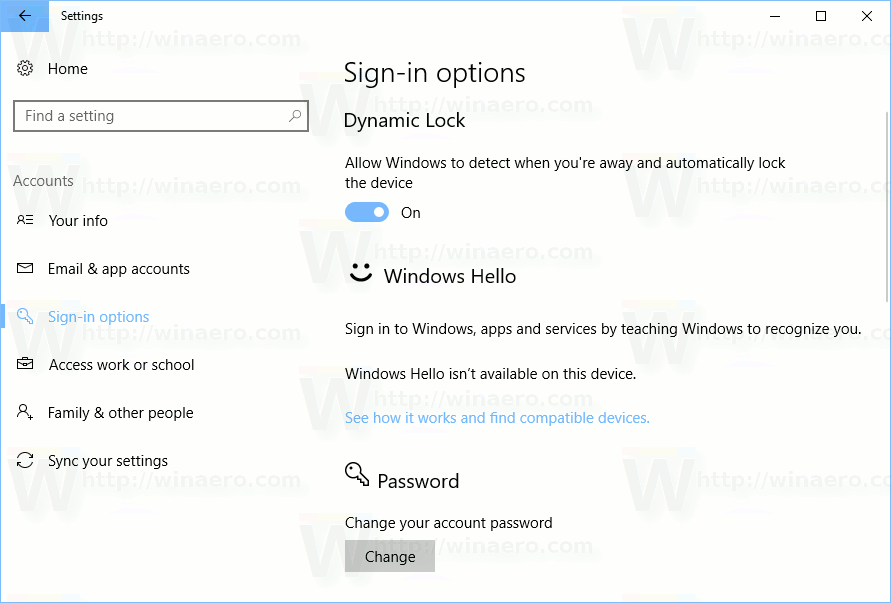
So you've finished activating Dynamic Lock on your Windows 10 computer.

From now on the operating system will automatically lock the computer every time you leave the workplace. The script will be: When Dynamic Lock is activated, Windows 10 will automatically lock the device after about 10 to 15 minutes when you leave.

2. Another way

In addition to the above, you can enable Dynamic Lock by tweaking the Registry.

1. Open the Windows Registry Editor window:

- Press Windows + R key combination to open the Run command window.

- On the Run command window, enter regedit there and press Enter .

2. In the Windows Registry Editor window, navigate to the following key:

HKEY_CURRENT_USERSoftwareMicrosoftWindows NTCurrentVersionWinlogon

3. Here, create a 32-bit value DWORD by right-clicking any space in the right pane, selecting New => DWORD 32-bit value . Name this new value EnableGoodbye .

How to enable the auto-lock feature when users leave - Dynamic Lock on Windows 10 Picture 3

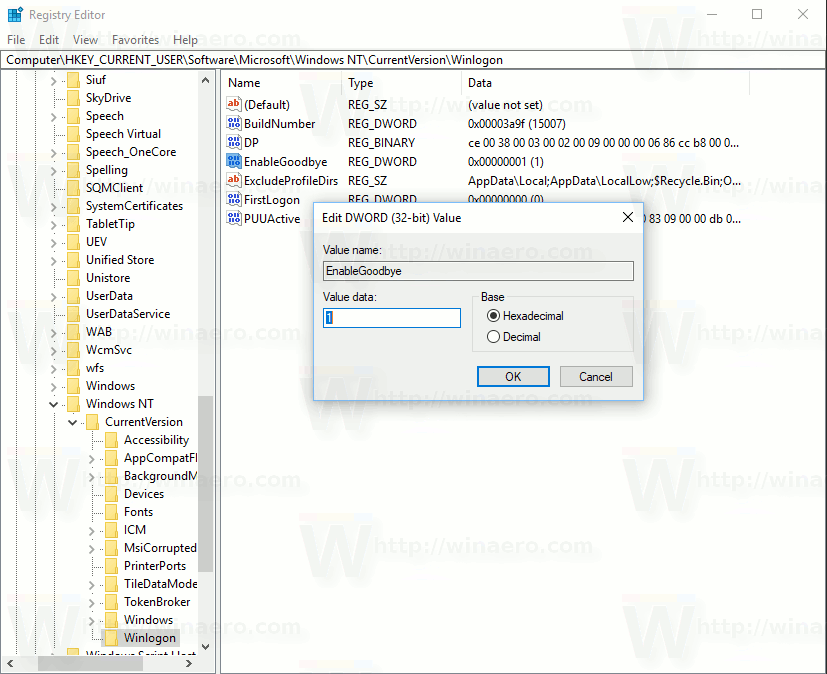
Double-click EnableGoodbye to open the value editing window, set the value in the Value Data frame to 1 to enable Dynamic Lock on Windows 10.

4. In case if you want to disable the Dynamic Lock feature, you can delete the value of EnableGoodbye that you just created or set the value in the Value Data frame to 0 .

On Windows team, Dynamic Lock feature is called Windows Goodbye. That's why the Registry parameter is named EnableGoodbye.

Also, if you don't want to manually edit the Registry, you can use the built-in Registry:

  1. Download Registry Files to your computer and install it here.

Refer to some of the following articles:

  1. How to login Windows 10 automatically without entering a password
  1. Clean up traces of Pagefile every time you turn off your Windows 10 computer
  1. Instructions for activating Keyboard Backlight on Windows 10

Good luck!

5 ★ | 1 Vote

May be interested

  • Instructions for activating Game Mode on Windows 10Photo of Instructions for activating Game Mode on Windows 10
    windows is constantly being integrated and improved with many features so that users can experience new features. on the creator updates update, which is about to be released, microsoft integrates game mode for gamers on the version. when you enable this mode, windows 10 will prioritize games and close other applications running on the operating system to reduce the load of resources on the computer.
  • How to enable High-DPI support for Windows 10 applicationsPhoto of How to enable High-DPI support for Windows 10 applications
    you may have faced problems such as fuzzy application interfaces, blurred or displayed text content related to similar problems on windows 10 computers. due to the increasing demand of users. , for a long time, microsoft tried to work, looking for ways to fix this problem. and now you no longer have to worry about this problem because microsoft has integrated high-dpi feature to support behavior for windows 10 applications.
  • Summary of some ways to fix black screen of Windows 10Photo of Summary of some ways to fix black screen of Windows 10
    windows 10 has proven to be a reliable operating system, but however like other versions, in the process of using windows 10, users may face many problems. one of the 'worst' problems that users often encounter is a black screen error.
  • Summary of several ways to quickly access the Settings application on Windows 10Photo of Summary of several ways to quickly access the Settings application on Windows 10
    on windows 10, microsoft integrated a new application called settings. this settings application is a metro application created by microsoft to replace the classic control panel application. the windows password change option is now no longer available on the control panel like in previous versions, and if you want to change the windows password you will have to manipulate via the settings application.
  • Add Take Ownership option to Right-click Menu on Windows 10Photo of Add Take Ownership option to Right-click Menu on Windows 10
    often, users must have ownership of a file on a windows operating system to edit, rename or delete protected files on the operating system. however on windows 10 mastering a file or folder is not as easy as on other versions.
  • Instructions for fixing errors: 'You Have Been Denied Permission To Access This Folder' on Windows 10Photo of Instructions for fixing errors: 'You Have Been Denied Permission To Access This Folder' on Windows 10
    lỗi 'bạn đã được phép phép phép phép truy cập này folder. to gain access to this folder you will need to use the security tab 'appear when you try to access a protected system folder on windows 10 or previous windows operating systems. for example, if you try to access the windowsapps folder, then you will receive an error message on the screen.