The Repeater function to activate the original wifi router is a very effective method when the wiring to expand the network or share the neighbors' wifi network is difficult or inconvenient. With repeater, we will not need to go around and still be able to use the Internet from the received wifi, which will make your house and your neighbors more aesthetic.
The most important thing is to set the wifi where to just be able to receive and broadcast the best. The following article will guide how to configure Repeater for TP-Link WR841N, help you solve the difficulties that you are facing. You can also apply to other modems / routers like WR702N, WR840N, WR941N, WR450H or even Nenda of Tenda.
1. Repeater function of Router
I will take the temporary diagram below to make an example for you to understand the Repeater function as follows:
First, from the source TL-WR720N router is transmitting wifi and has the IP address: 192.168.0.1 -> then, we will take a TL-WR841ND modem and configure the repeater with IP: 192.168.0.10 to receive the TL's signal -WR720N and playback to other devices such as laptops, PCs or phones can catch wifi.

Advantages and disadvantages of this function :
- Easy to configure and use.
- Can make reception for wifi source if weak.
- Help wifi source broadcast is farther.
- The Repeater function can be replaced for tidy wiring and the house will be more tidy.
- Avoid cable cuts caused by long-term or mouse bites.
- If your home has 5 floors, the repeater configuration will help improve the weak wifi signal when on the floors.
- But the downside is that the network will weaken if it's too far from the source router.
2. How to configure Repeater for TP-Link modem
Now you will configure the modem, to use this very convenient and useful repeater.
Step 1: You should use a short network cable about a few meters, usually when buying a new modem will be included. Then plug one end of the cord into your laptop or pc, the other end into the back lan port of the modem (Artwork).

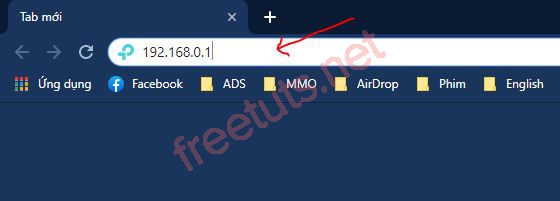
Step 2: Open the web browser, type the address 192.168.0.1 -> and then Enter . If you use a different modem, the homepage address will be different.
Step 3: Immediately you will go to the login page of the modem -> enter your account and password .

If you do not know the account, password and the address to access the admin page of the modem, you can see it on the back.

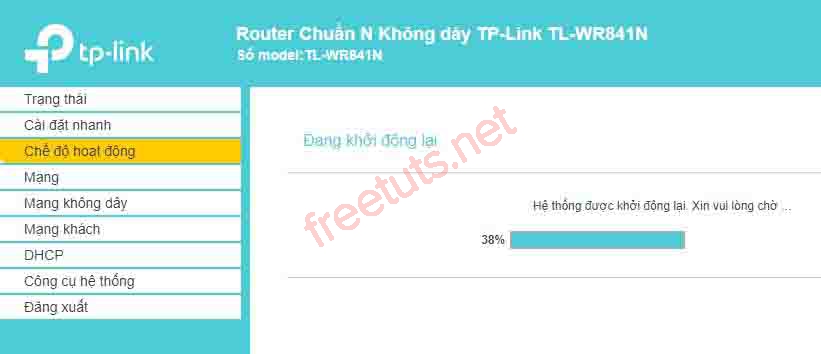
Step 4: Login successfully and now you will be redirected to the home page of the modem. You will see very complete information about the router -> then enter the Operating Mode to start the installation.

Step 5: In Operation mode -> select WISP to switch to repeater function. For other modems, this step may not be needed.

After that, wait for the system to reboot, it will be quite fast and take less than 2 minutes.
Step 6: Now you will go to Wireless network mode -> Basic settings -> select Scan to find wifi source that you want to repeater to extend the wave or share.

This will appear a list of all APs that the modem can scan -> find the wifi name you need to repeater -> remember the channel (1) -> select Connect (2) to start. For example, my name is HANG NGUYEN .
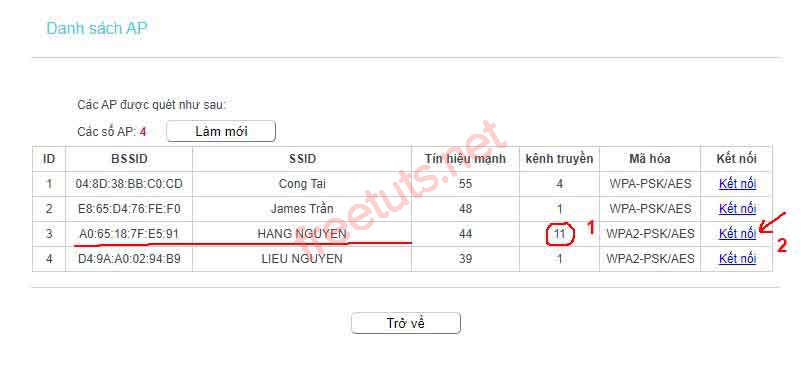
The parameters are as follows:
- ID: the serial number.
- BSSID: MAC address.
- SSID: The name of the wifi to connect.
- Strong signal : is the signal of wifi, the higher the number, the stronger.
- Channel: dyke connected to each other (remember to make a little comparison to be true).
- Encryption: is the security mode of wifi.
- The connection .
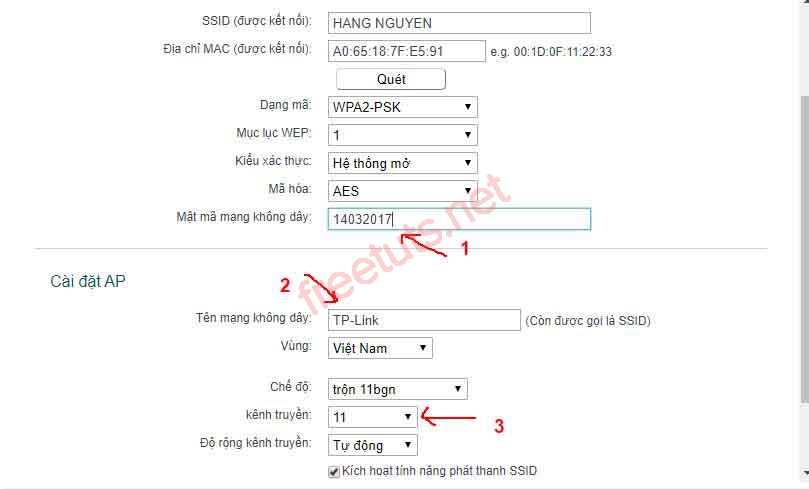
Step 7: After connecting, at this time you will have to enter the password (1) of the source wifi -> in AP Settings , set the Wireless network name (2) for the modem -> select Channel (3) that just now remember -> click Save to finish. Because if the channel is wrong then it will not be able to connect, but if it is set up properly then stop.
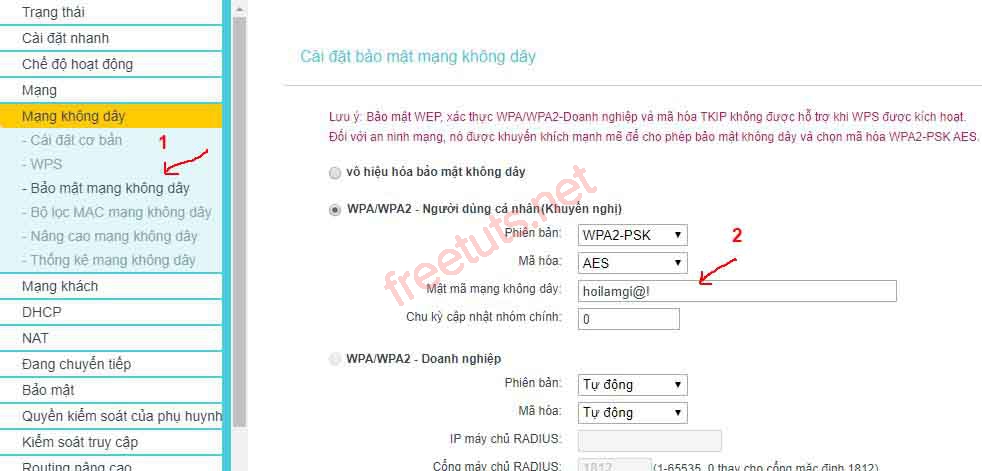
Step 8: In the Wireless Network section -> select Wireless security (1) -> set a password (2) for new wifi -> click Save to finish.
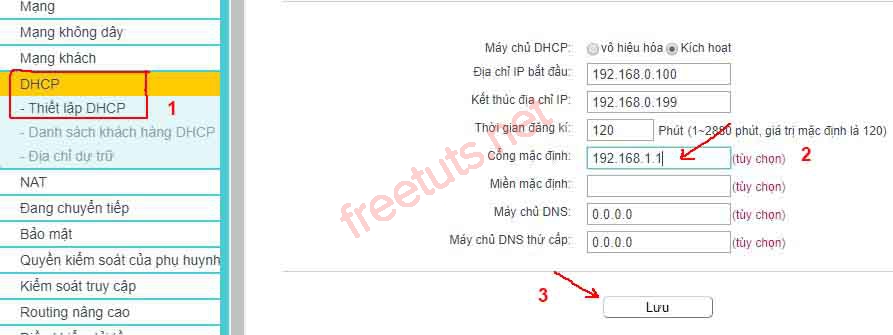
Step 9: You need to change the address to access the admin page to avoid duplication of the port with the source modem, because the repeater setting has chosen the same name as the source wifi. Go to DHCP -> DHCP Settings (1) -> change to 192.168.1.xxx -> Save (3) to finish. In particular, xxx is the number that can be changed from 1 to 256 as long as it does not coincide with the source modem.
Now, just take your phone or computer and test to see if the new network has access, if you cannot access the internet, you should review the steps carefully to understand better.
Note: You should put your transceiver closest to the source wifi for a strong signal, which helps to access the Internet better.
3. Conclusion
So I have completed instructions, how to configure TP-Link WR841N as a repeater to extend the wave or create a new wifi without using a network cable. Hopefully this article will help you in setting up a wifi modem at home. Good luck!