How to set an app password on Windows 10
For those who use the same computer, setting a password for the application is essential because they help improve security for the device. Windows 10 operating system today has a lot of applications that support super secure password.
Table of Contents
Applications that support locking and hiding applications on Windows 10 will help users improve security and ensure their personalities when lending to others. However, the applications that set password for apps on Windows 10 today are mostly paid and there is very little free software. In this article, Software Tips will guide you how to set the best and best application password on Windows 10 operating system.
1. Lock Windows 10 apps with Password Door
Password Door is a useful application lock software on Windows 10 and has a lot of choices because they are free. Besides, the Password Door tool also has strong security capabilities and cannot be passed by any software.
Download Password Door here
Step 1: Go to the homepage to download and install the software. During the installation, please note the password setting in the last step.
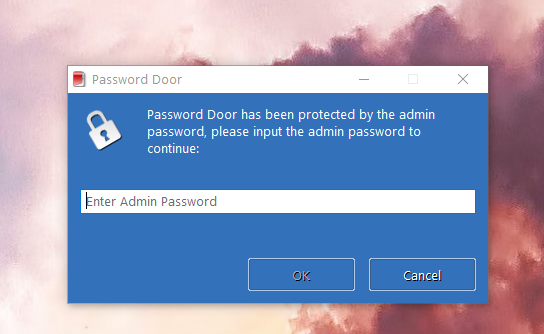
Step 2: After the installation is complete, open Password Door to use. At the main interface, you need to enter the password you created during the installation to open.
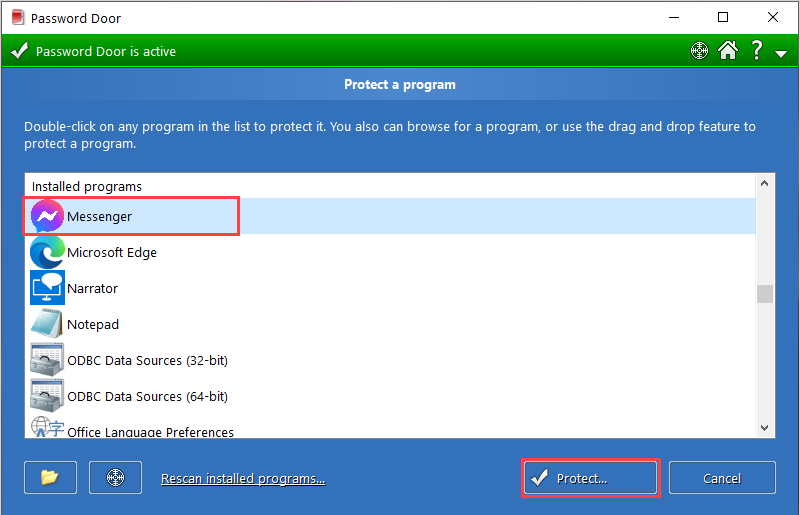
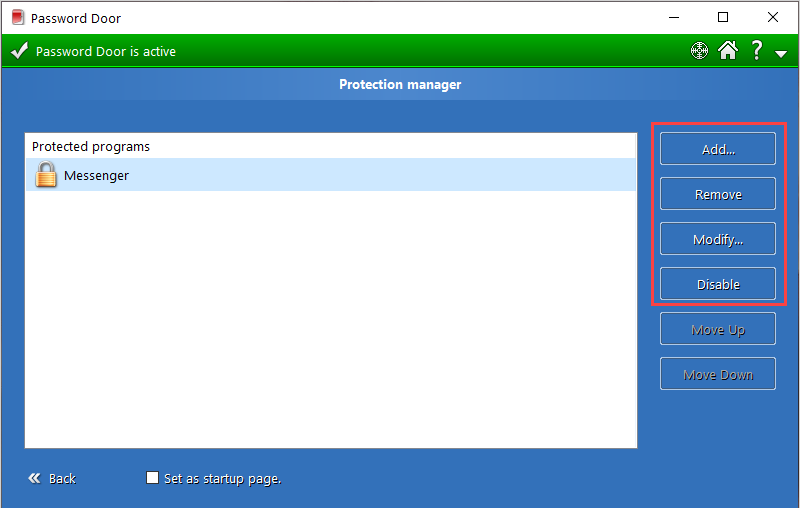
Step 3: At the main screen of Password Door, choose Protect a Program to select the apps that need to be locked.

Step 4: After that, you proceed to select the ones that need to be locked (select more by holding Ctrl) and choose Protect… to put in the key list.
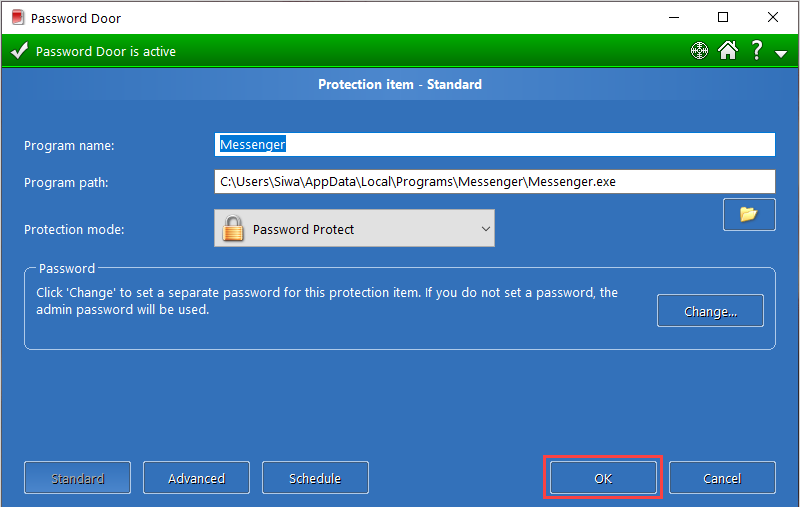
Step 5: In the next setup window, fill in the application name in the Program name and keep the rest of the settings.
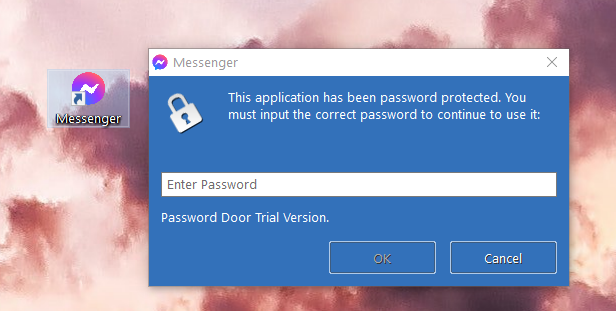
Step 6: So, you have finished locking the apps on Windows 10. From now on, when you open the applications in the lock list you will have to enter the password.
Step 7: In case you change your settings, just open Password Door and have the following items:
- Add…: Add the application to the lock list
- Remove: Remove the application from the lock list
- Modify: Change name, path, security .
- Disable: Disable application lock
2. Lock Windows 10 apps with My Lockbox
My Lockbox is a dedicated application to lock files, folders, documents on Windows 10 and they also have the ability to lock applications.
Download My Lockbox here
Step 1: You proceed to the home page to download and install the software.
Step 2: Then, open the software My Lockbox to use and here we have the following settings:
- Enter password: Application password
- Confirm password: Re-enter the app password
- Hint: Hint password
- E-mail address: Email address for recovery if password is forgotten

Step 3: After completing the setup, you will receive a message similar to the one below and you just need to click OK to finish.

Step 4: Next, choose Browse . to select the folder of the application to be locked (choose the installation directory - usually located in drive C: /)

Step 5: So, you have finished locking the application on your computer, at this time the application will be hidden from the computer screen.
To open the application, you open My Lockbox and enter the password to view locked applications.

Step 6: In the folder window, you can open all locked apps with My Lockbox.

In this article, TipsMake guided you how to lock apps on Windows 10 quickly and effectively. Have a nice day!
Was this article helpful?
Your feedback helps us improve.
Related Articles
 Use an 8-character Windows NTLM password? Congratulations, your password may be unlocked after only 2.5 hours6 minutes read
 How to crack Windows 10 password, how to break password on Windows 103 minutes read
 Instructions for changing Windows passwords without having to remember the old password2 minutes read
 How to set a Windows 11 computer password, set a Windows 11 password2 minutes read
 Set BIOS and UEFI password to protect data on your Windows 10 computer safely7 minutes read
 How to Change Your Password in Windows 82 minutes read
Reader Comments 0
Sign in with email or Google to join the discussion.