How to separate the date, month, and year columns into 3 different columns in Excel
To separate the date, month and year in Excel into separate values, we can do it with simple functions on Excel.
Table of Contents
When processing date data in Excel, you will often need to make a request to separate the date, month, year into three different columns, or move the date, month, year of birth from number to letter . To make love This bridge is very simple, we will use basic Excel functions such as YEAR function, DAY function and combining time functions to convert time into text. The following article will show you how to separate the day, month and year into 3 separate columns and turn the time into letters.
- How to convert a sequence of numbers into dates in Excel
- How to calculate the number of days in Excel
- How to separate thousands by commas in Excel
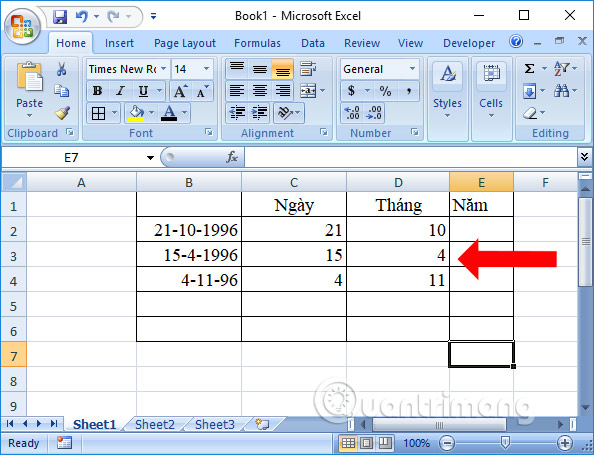
1. Separate Excel's day, month, and year into 3 separate columns
Step 1:
We enter dates into the Excel table. To separate the date into a separate column in the Date column, in cell C2, enter the formula = DAY (B2) and then press Enter.

Then we will get the result as separate date. Drag the results of the first cell to the remaining cells in the Date column to show the results.

Step 2:
In the Month column, enter the formula = MONTH (B2) and also press Enter to execute the formula.

The result in the first cell also pulls down the remaining cells to show the full Month column.
Step 3:
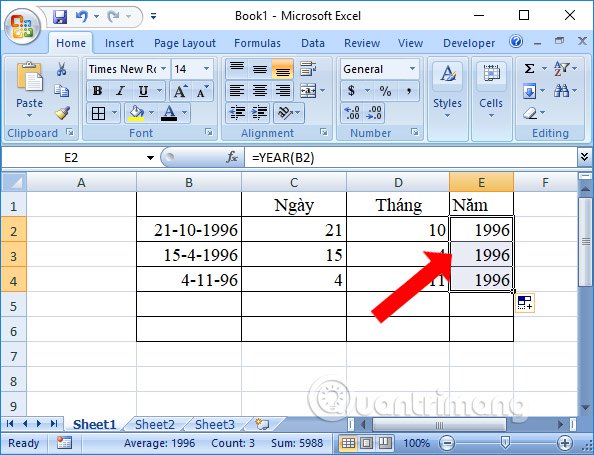
Next in the first cell of the column Enter the formula = YEAR (B2) and press Enter to proceed.
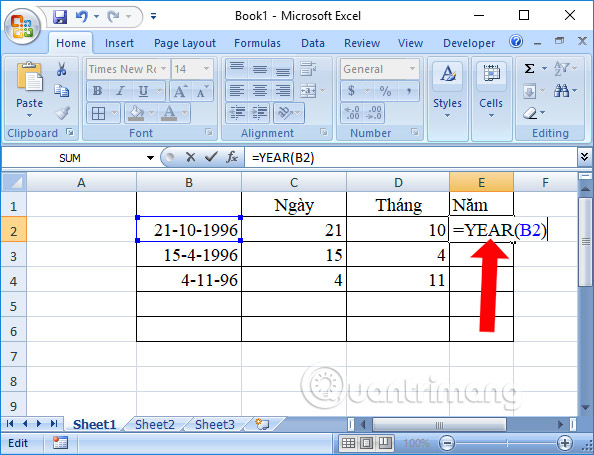
And the results will also be separated in the Year column as shown.
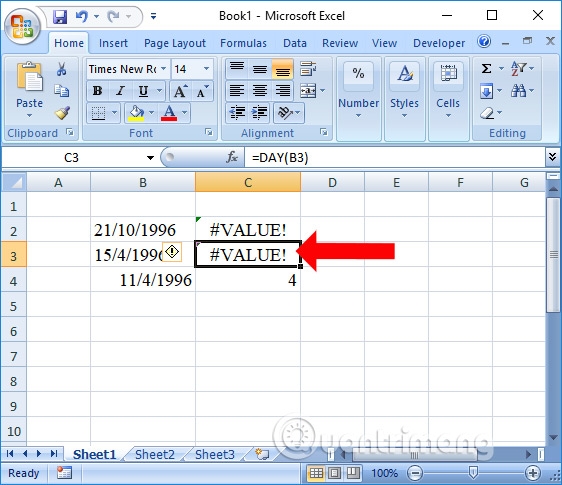
Note to the reader , in case you make the DAY function that says the #VALUE error is due to the date format on the computer being deviated from the date in Excel. Read the following article to fix errors.
- How to fix the date #VALUE error in Excel
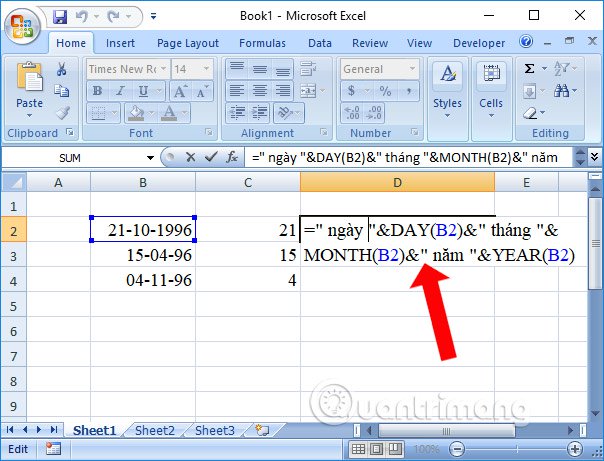
2. Convert date, month, and year from number to Excel
Step 1:
In the box you want to change the date, month, year from the number to the letter you enter the formula = 'date' & DAY (B2) & 'month' & MONTH (B2) & 'year' & YEAR (B2) as shown below, then press Enter.
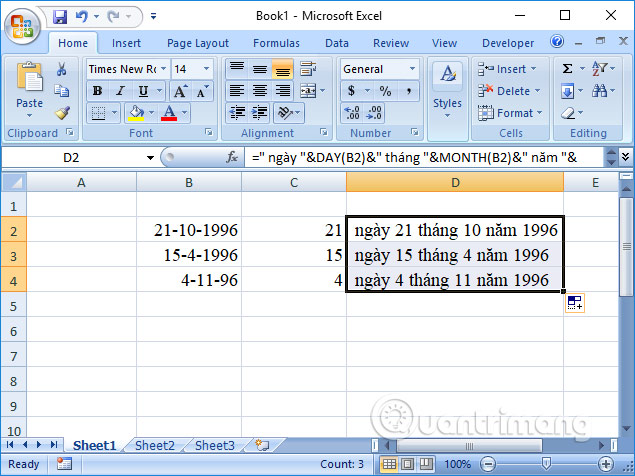
Step 2:
As a result, we will get the number of days in words as shown below.
The operation of separating time on Excel into separate columns is not difficult for users. You just need to enter the formula DAY, MONTH and YEAR for each column of time separately.
See more:
- Instructions on how to copy formulas in Excel
- Forgot password protected Excel file, what should you do?
- Instructions on how to translate languages on Excel spreadsheets
I wish you all success!
Was this article helpful?
Your feedback helps us improve.
Related Articles
 Instructions on how to fix reverse dates in Excel3 minutes read
 How to fix date auto-jump error in Excel4 minutes read
 Date functions in Excel, DAY, WEEKDAY, MONTH7 minutes read
 How to convert columns into rows and rows into columns in Excel2 minutes read
 How to fix columns in Excel3 minutes read
 The DAY function - The function returns the day of the day, month and year in Excel1 minutes read
Reader Comments 0
Sign in with email or Google to join the discussion.