Table of Contents
This article examines Excel tips and explains the main developments, practical implications, and context readers should understand.
Excel Tips Overview
When working on Excel, editing and reformatting data on days, months and years is often required. Excel supports users with rich features to reformat the date, month, and year in the data table, such as customizing the incremental or descending timeline depending on the table's requirements.
Adjusting the mode of increase or decrease the time in Excel can immediately use the built-in feature in the Data tab. And in the Data tab, users can choose from a variety of tools to reformat the time data according to their discretion. In the following article, Network Administrator will summarize the ways to arrange incremental time in Excel.
- Summary of expensive shortcuts in Microsoft Excel
- Instructions for printing two-sided paper in Word, PDF, Excel
- You want to print text, data in Microsoft Excel. Not as simple as Word or PDF! Read the following article!
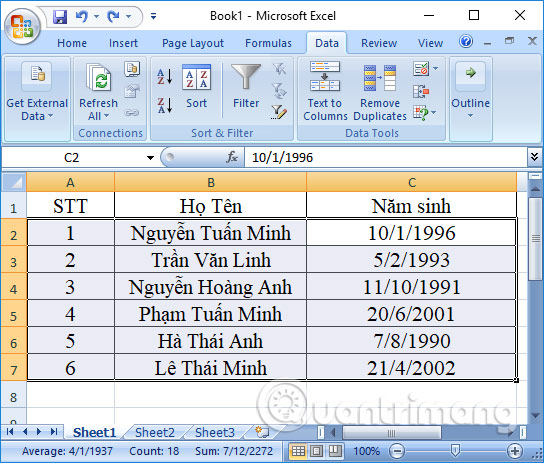
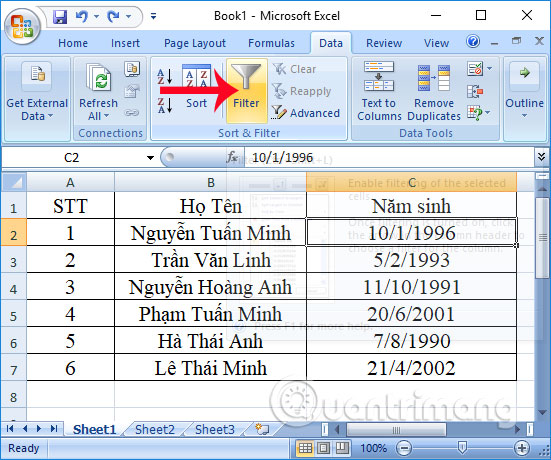
We will proceed to reformat the Year of Birth column in the Excel data table as shown below.
Method 1:
In this list, click on any location of the time column, here is the Year of Birth, then click on the Data tab and select the item A> Z.

Soon, we will see the data in the Year of Birth column arranged in ascending order based on the year of birth data in the column.

Method 2:
Step 1:
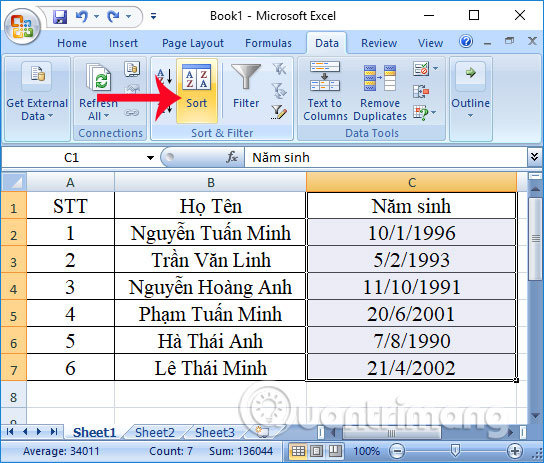
Also at this interface, we click on the Data tab and then click on the Sort feature on the interface.
Step 2:
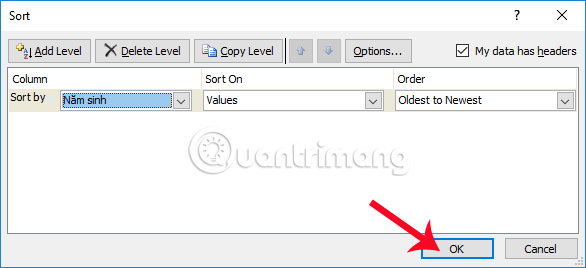
The interface of the Sort table appears. Here part Sort by we will enter the data to be processed as column Year of birth, Sort On is Values and Order section we will choose Oldest to Newest, to sort data on day, month, year on Excel. Then click OK below.
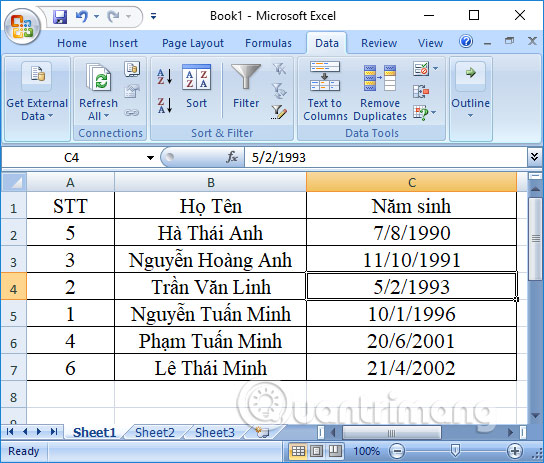
Soon the user will also get the results of the date, month and year data sorted in ascending order.
Method 3:
Step 1:
Also at the data table interface, we also click on the Data tab and then use the Filter feature to filter data on Excel.
Step 2:
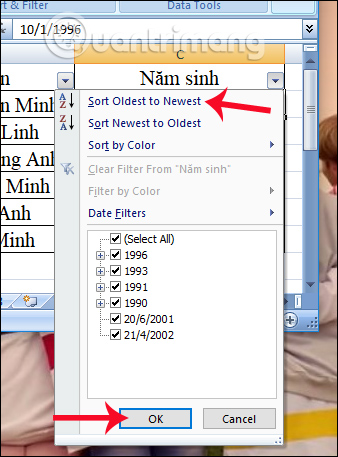
In the time data column, click on the triangle icon and select Sort Oldest to Newest in the list that appears.
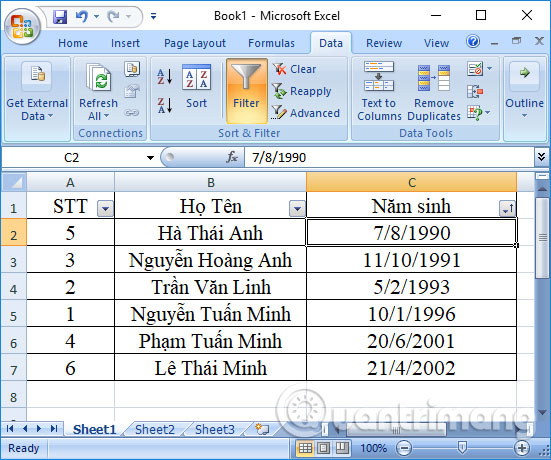
Finally we also get the Year of Birth column arranged in ascending order as shown in the table below.
Thus, in order to be able to reformat the date, month and year data in Excel in ascending order, you can use up to 3 different ways. The above methods also apply when the user needs to arrange the time in descending order, we just need to press Z> A with way 1 and select the Newest to Oldest for both way 2 and way 3. This is the basic and simple operation to perform, because you do not need the support of calculation functions, but immediately use the features available in Excel.
I wish you all success!
Frequently Asked Questions
How does Excel tips work?
This article examines Excel tips and explains the main developments, practical implications, and context readers should understand.
What should you prepare before using this method?
Excel Tips Overview When working on Excel, editing and reformatting data on days, months and years is often required.
What should you do if the process does not work as expected?
Excel supports users with rich features to reformat the date, month, and year in the data table, such as customizing the incremental or descending timeline depending on the table's requirements.
Was this article helpful?
Your feedback helps us improve.
Related Articles
 How to Format Dates in Excel: How to Format Excel Dates5 minutes read
 How to Subtract Dates, Months, and Years in Excel - Calculate the Distance4 minutes read
 How to Sort Dates in Ascending and Descending Ways in Excel3 minutes read
 Instructions on How to Fix Reverse Dates in Excel: Excel Tips3 minutes read
 Format Dates in Excel2 minutes read
 Share How to Fix Dates Being Converted to Numbers in Excel: Complete Overview6 minutes read
Reader Comments 0
Sign in with email or Google to join the discussion.