Table of Contents
Overview
This guide explains how to erase text on photos using Photoshop in clear, practical terms. It covers the key concepts, recommended steps, common limitations, and useful checks so you can make a better-informed decision.
One of the ways to mark copyright in images is to use tools to insert logos or signatures into photos. Surfing around the internet, you find a very beautiful photo and want to download it to use as a wallpaper or Facebook cover photo, but the text on the photo is not suitable for you. Don't worry too much, today this guide explains how to remove text in photos using Photoshop in the simplest way that anyone can do.
Erase text in images with little detail
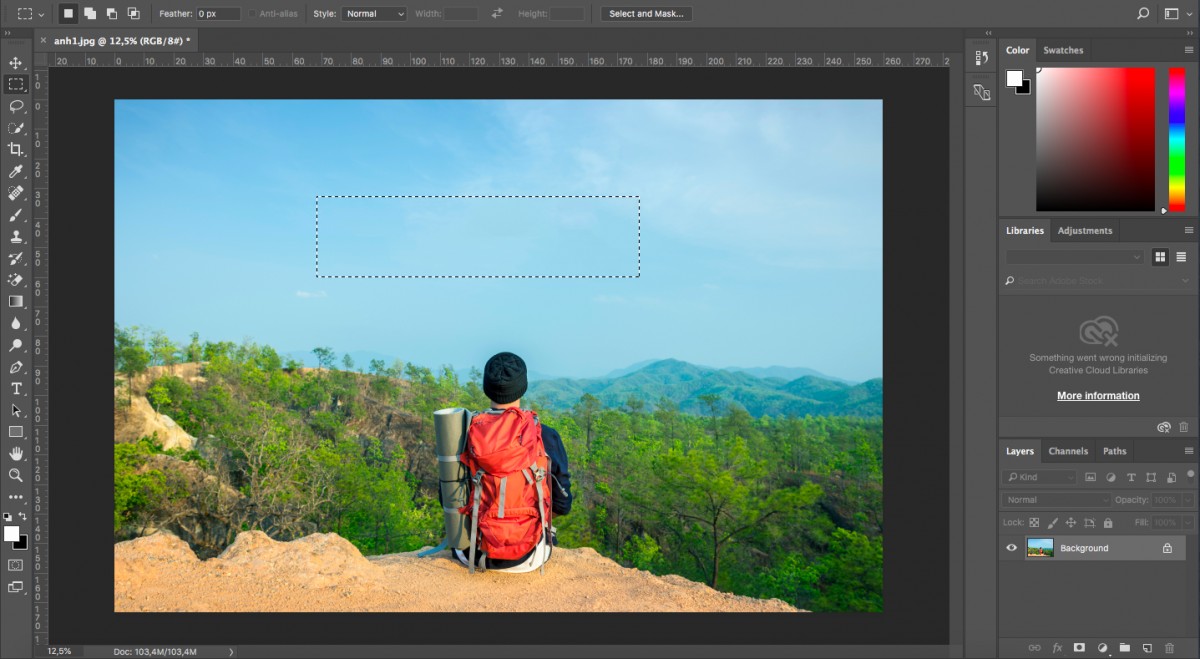
For photos with little detail, the text is placed on a monochrome background or on the sky of a landscape photo, this method will be extremely effective.
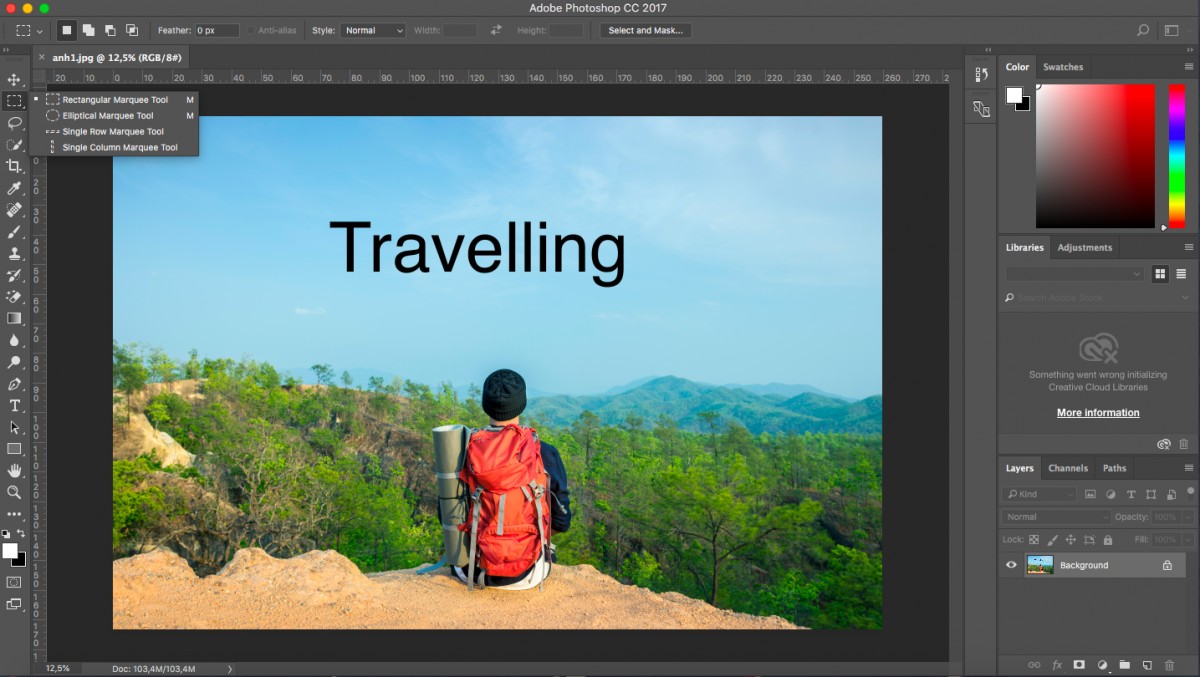
Step 1: First open Photoshop > open the photo you want to remove text from. On the toolbar on the left side of the screen, select the dashed square icon and select the Rectangular Marquee Tool or press the M key on the keyboard to select this tool.
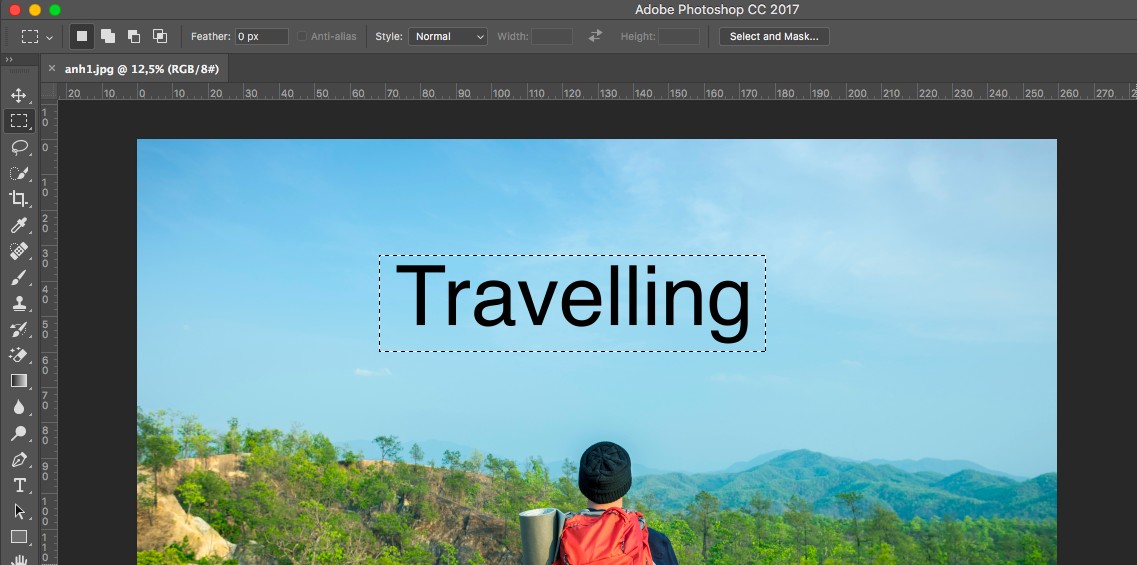
Step 2: Hold the left mouse button and drag to select the area with the text you want to delete on the photo.
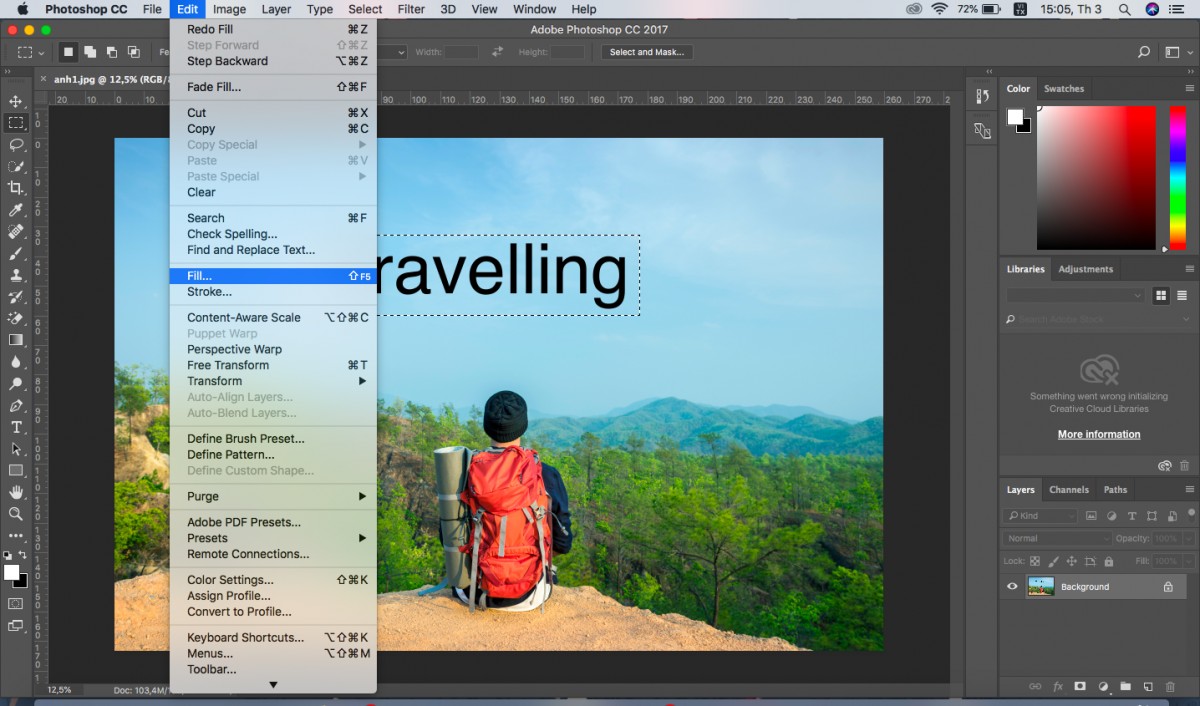
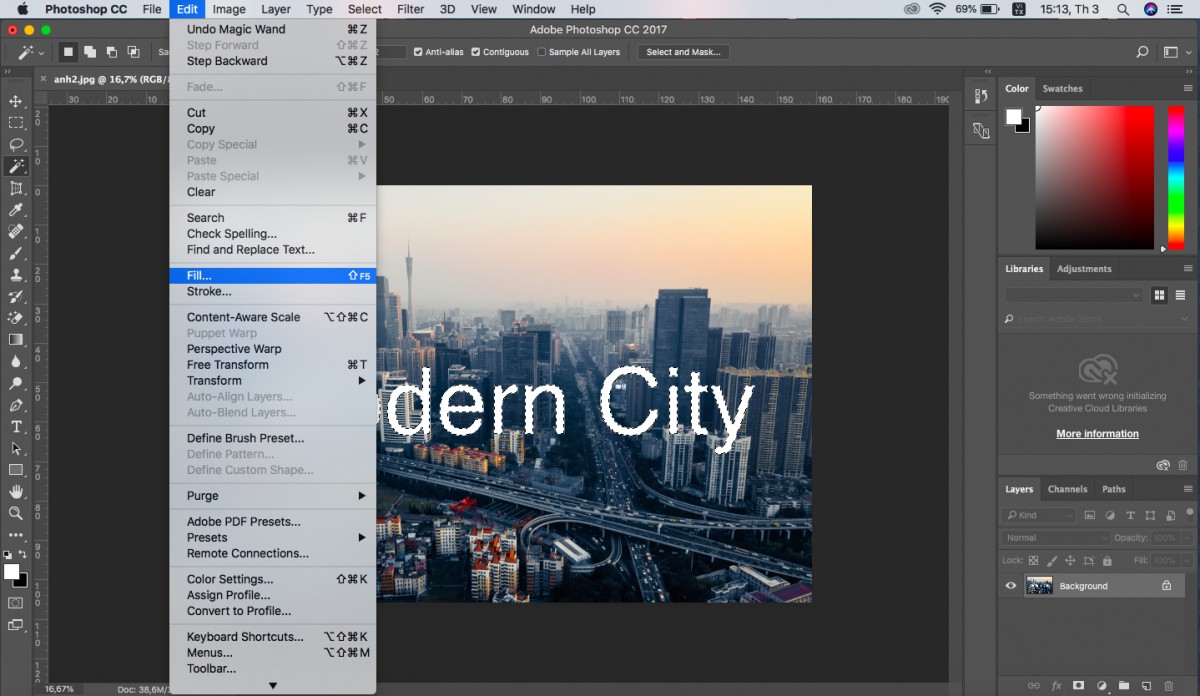
Step 3: In the Edit section on the toolbar, select Fill or press Shift+F5 to open the Fill panel.
Step 4: In the Fill menu, under Use, select Content-Aware.
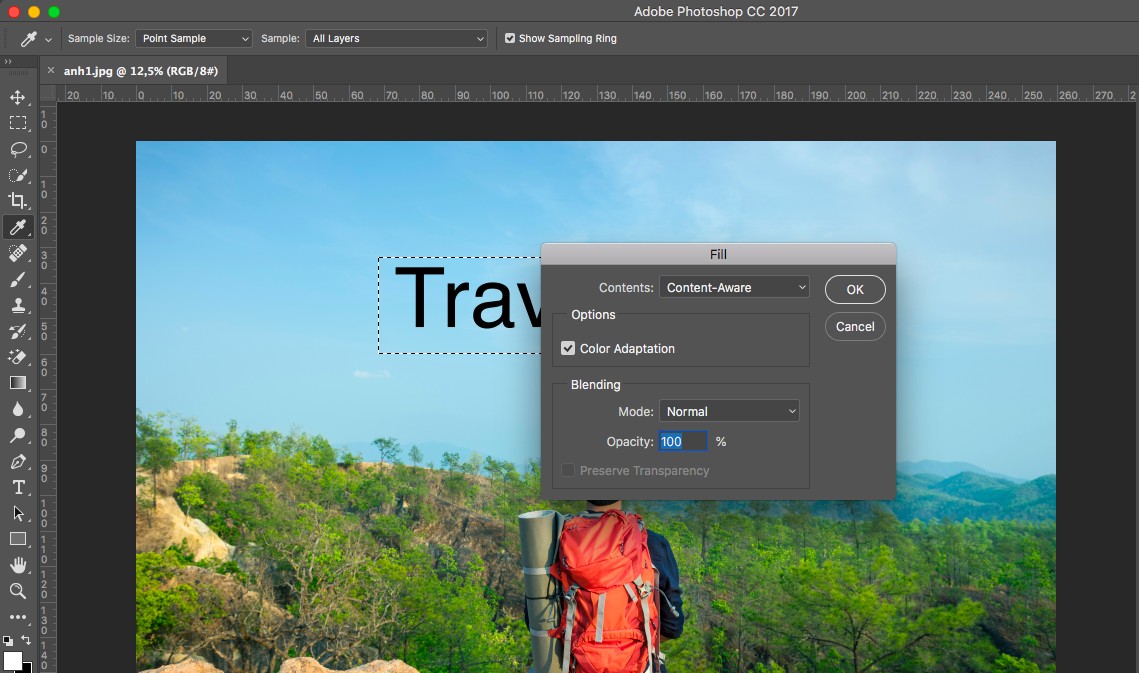
In the Blending section, set the Mode to Normal and Opacity to 100%.
Click OK to complete the selection.
Step 5: All the text you selected has been removed from the image. Press Ctrl+D to remove the dashed lines on the image.
Erase text on photo using Magic Wand Tool
Step 1: On the toolbar on the left side of the screen, select the Magic Wand Tool icon or press the W key on the keyboard
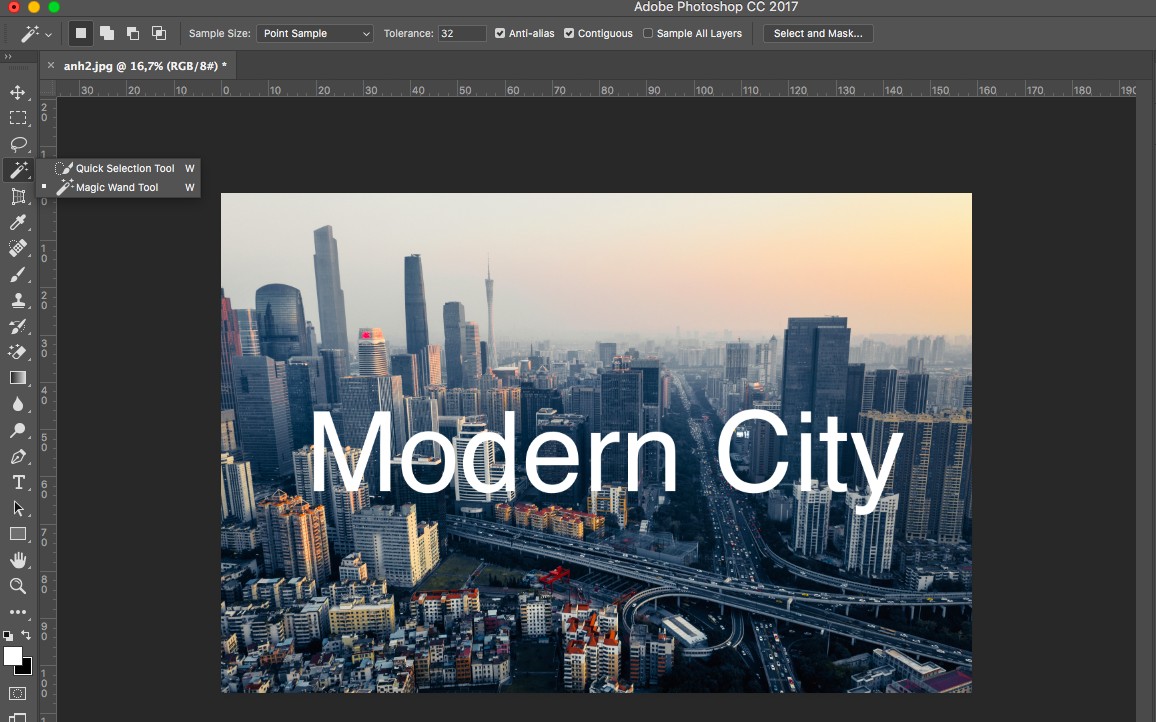
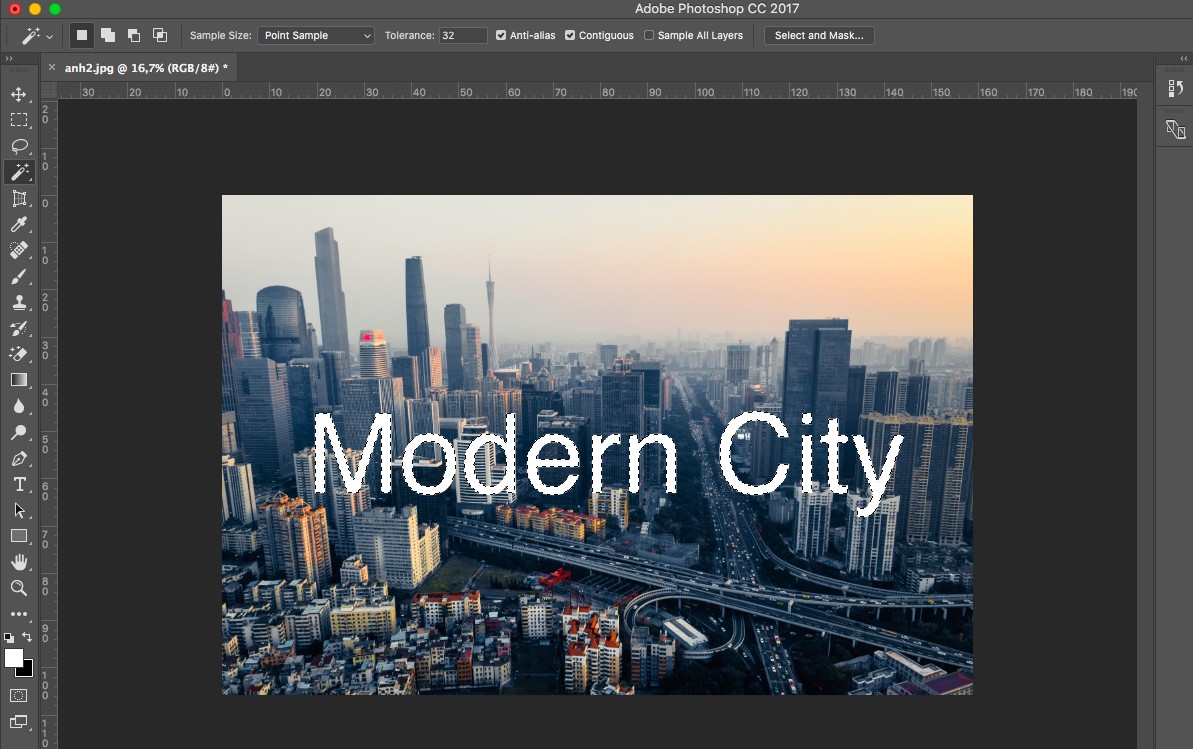
Step 2: Press the Shift key and select each letter you want to delete on the image. Remember to hold the Shift key until you select all the letters you want to delete and don't miss any strokes.
Step 3: Similar to method 1, go to Edit > Fill or press Shift + F5 to open the Fill panel.
Step 4: In the Fill panel, set the settings as in method 1 and click OK to finish.
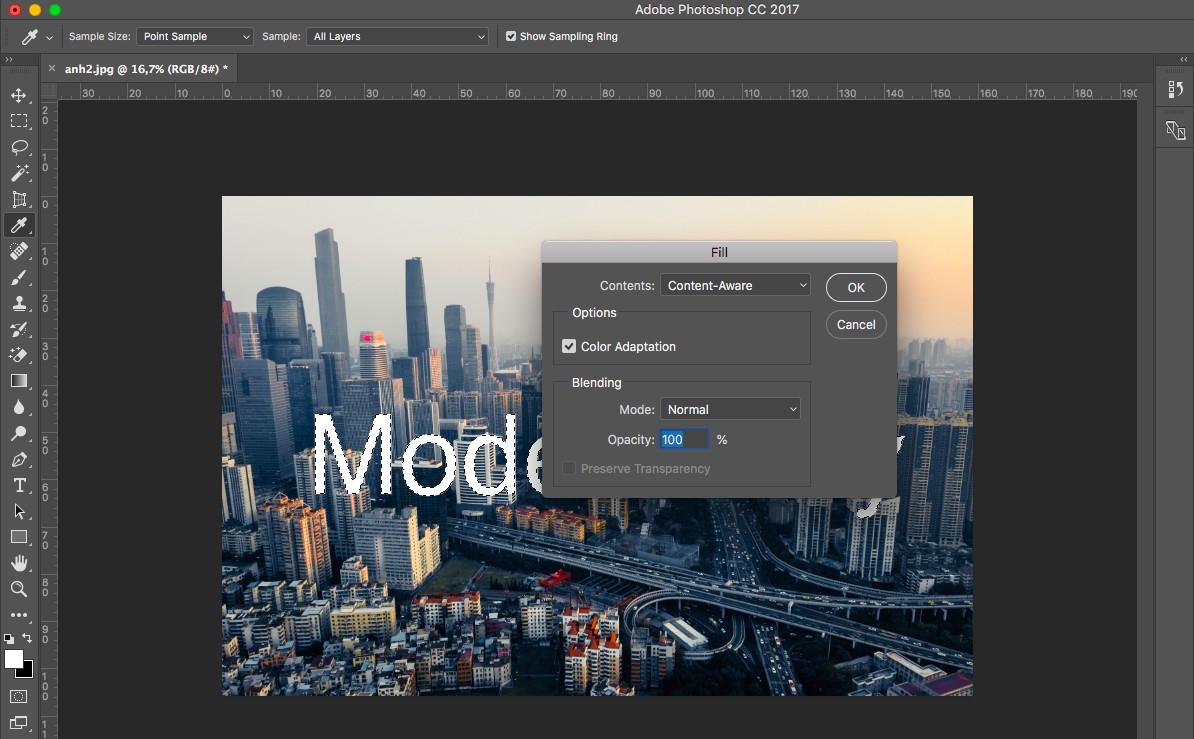
Step 5: Then, the selected text areas will be removed from the photo, press Ctrl + D to turn off the dashed selection areas on the photo.
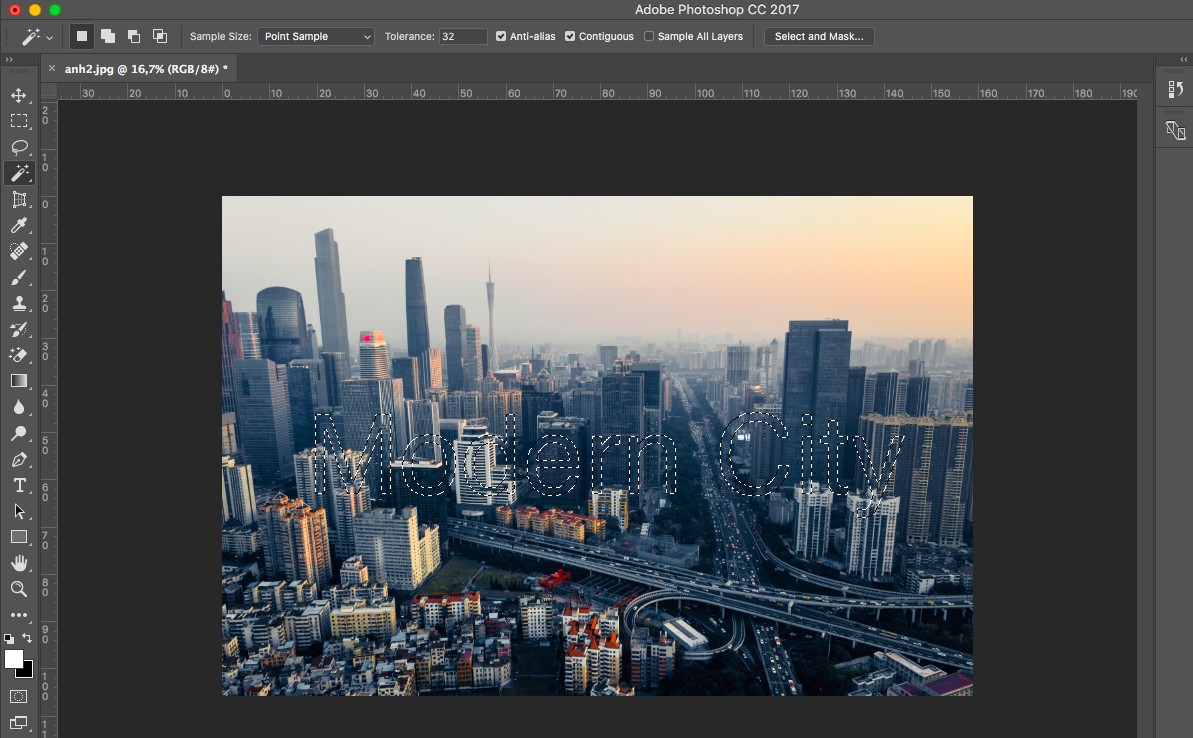
Erase text on photos with many details using Clone tamp tool
Step 1: After opening the photo that needs to be deleted, in the main interface of Photoshop, use the Clone Stamp tool on the toolbar or press the S key.
Step 2: Identify the area containing the text on the image that needs to be deleted, hold down the Alt key and click on other areas that you think are most similar to the area containing the text.
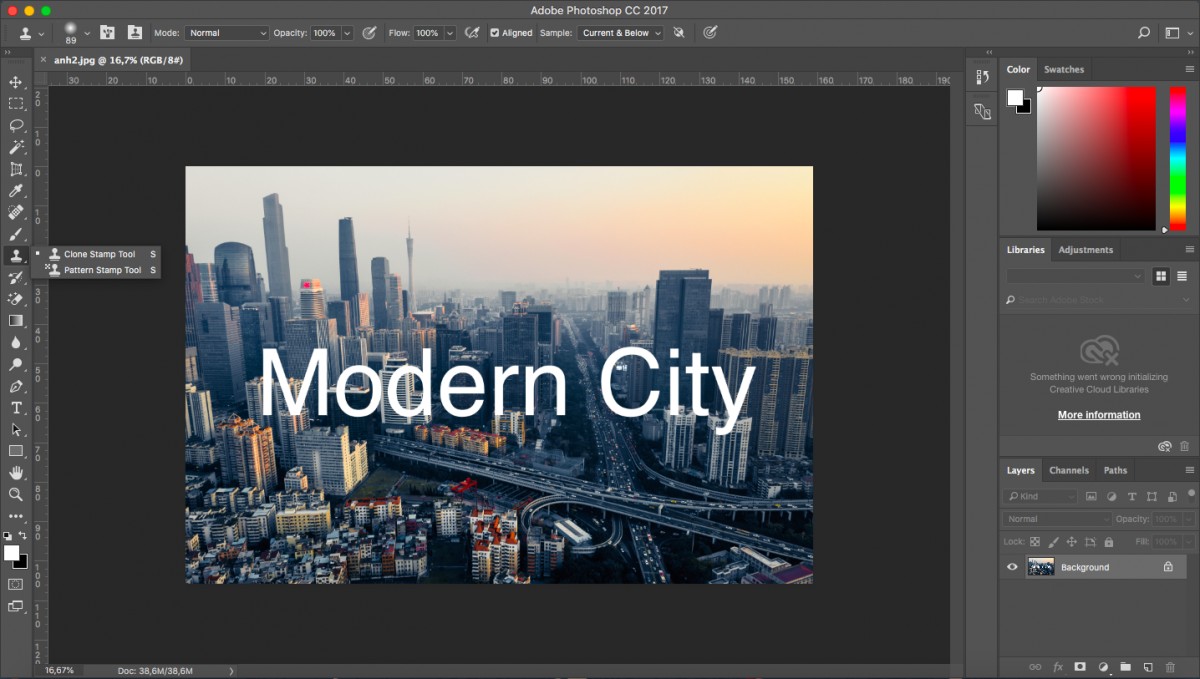
Step 3: Then, click on the text areas to overlay. Change the sampling area frequently to get the best quality.
Above, this guide has instructed you how to erase text on photos using Photoshop in the fastest and most effective way. Each of these methods is applied to different types of photos. Please choose the method that best suits your situation. Good luck!
Key Takeaways
Use the guidance above as a practical reference for erase text on photos using Photoshop. Check compatibility, follow the steps carefully, and verify important details with official documentation when software, security, accounts, health, or purchases are involved.
FAQ
How do I erase text on photos using Photoshop?
Follow the steps in this guide in order, confirm each setting before continuing, and save, restart, or reconnect the device when the instructions require it.
What should I check before I begin?
Confirm the correct device, account access, software version, compatibility, and a current backup whenever the process could affect files, settings, or security.
What should I do if the process does not work?
Repeat the steps carefully, check for model or version differences, install available updates, and consult the manufacturer's official support documentation.
Related Articles
 How to Remove Text on Photos with Photoshop10 minutes read
 How to Delete Text on Photos in Photoshop Online6 minutes read
 How to Erase Stains on Photos, Cleaning Photos in Photoshop4 minutes read
 How to Integrate Images into Text on Photoshop5 minutes read
 Instructions for Inserting Text into Photos in Photoshop5 minutes read
 How to Write Text in Photoshop, Insert Text into Photos in Photoshop3 minutes read
Reader Comments 0
Sign in with email or Google to join the discussion.