How to Reduce Space Between Items in File Explorer Windows 11
Adjusting the spacing between items in Windows 11 will allow more items to fit in a single window, reducing wasted space in Windows Explorer and repetitive scrolling.
Table of Contents
File Explorer in Windows 11 creates wider gaps between files, causing users to scroll longer. Adjusting the spacing between items in Windows 11 allows more items to fit in a single window, reducing wasted space in Windows Explorer and repetitive scrolling. Here's how to reduce the spacing between items in Windows 11.
Enable Compact View in File Explorer Windows 11
Step 1:
Open File Explorer on your computer, then click the View button above and select Show in the menu displayed below.

Step 2:
Displaying the new menu, we click on Compact view to change the design for File Explorer, reducing the vertical distance between items, helping the list to be compact similar to the Windows 10 File Explorer interface.

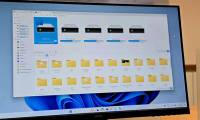
The result you see in the list on the left of the interface will see the items narrowed down as shown below.

Adjust folder spacing via Folder Options Windows 11
Step 1:
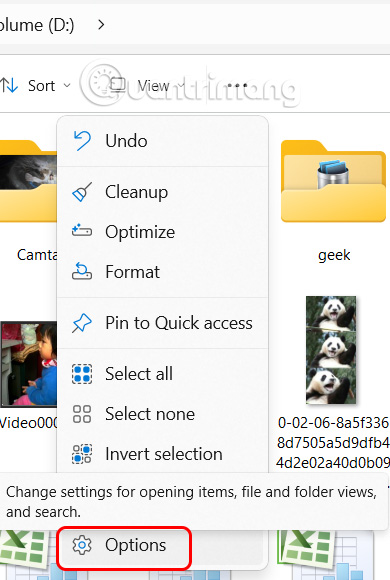
In the File Explorer interface, click on the 3-dot icon and select Options .
Step 2:
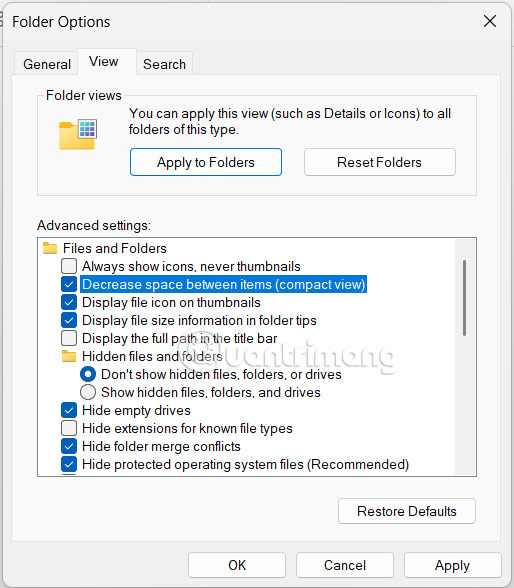
Display the Folder Options interface, click on the View tab and look down below, we scroll down below and select the setting Decrease space between items (compact view) . Then the distance between files on the computer will be arranged closer together, reducing the distance between files and folders on the computer.
Finally, click Apply to apply the new changes to the File Explorer layout on your computer.
Was this article helpful?
Your feedback helps us improve.
Related Articles
 How to enable preloading File Explorer Windows 112 minutes read
 How to hide / show the status bar in File Explorer on Windows 103 minutes read
 How to fix File Explorer lag on Windows 116 minutes read
 6 Windows File Explorer add-ons that make life easier5 minutes read
 Files is a Windows File Explorer alternative that meets all user needs.4 minutes read
 7 notable changes in File Explorer Windows 116 minutes read
Reader Comments 0
Sign in with email or Google to join the discussion.