Fix File Explorer error not working on Windows 10
Here are a few solutions to help users overcome when File Explorer errors do not work, each time opening the system data manager suddenly closed on Windows 10.
Here are a few solutions to help users overcome when File Explorer errors do not work, each time opening the system data manager suddenly closed on Windows 10.
Method 1. Delete File Explorer history.
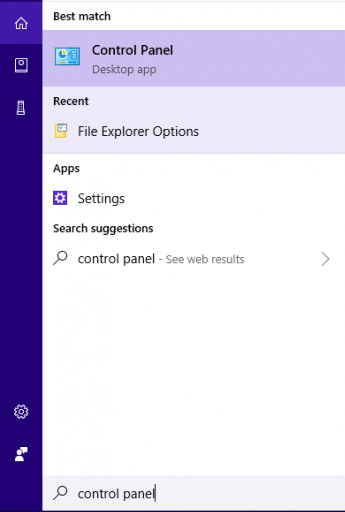
Click Cortana -> type Control Panel in the search box -> press Enter .
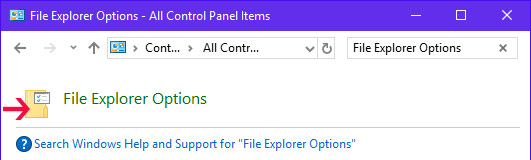
Then, type File Explorer Options into the Control Panel search box . When you have the search results, click on File Explorer Options to open it.
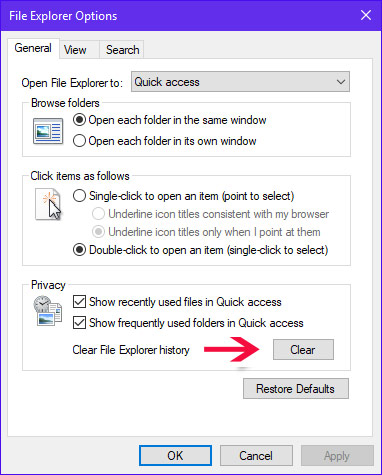
In the File Explorer Options window -> in General -> click on Clear -> select OK .
Method 2. Launch the Windows folder in a separate process
Open Control Panel -> search and open File Explorer Options .
In the File Explorer Options window -> select the View tab -> check the Launch folder windows in a separate process box -> click OK .

Finally, start File Explorer to check the results.
Method 3. Run netsh and winsock reset
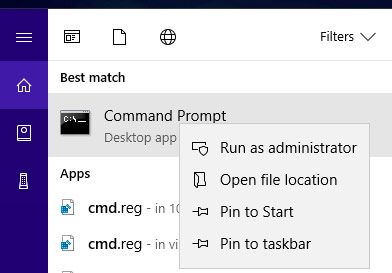
Open Cortana -> enter cmd in the search box -> right-click Command Prompt -> select Run as administrator -> select Yes to run with system administrator rights.
Enter the netsh winsock reset text entry -> press Enter . If it appears Successfully reset the Winsock Catalog line as shown below is successful.
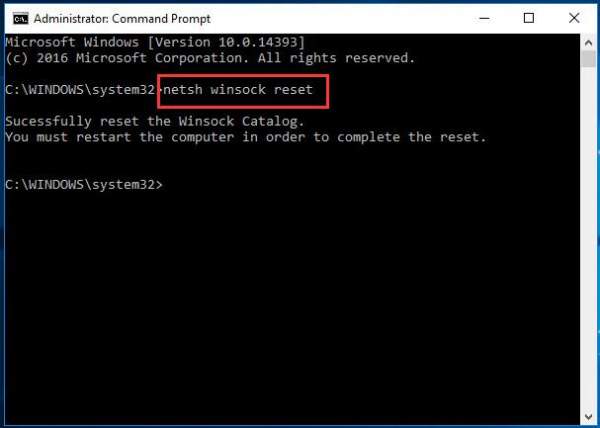
Close the Command Prompt window, restart the computer, and open File Explorer to check.
Method 4. Grant full access to your account
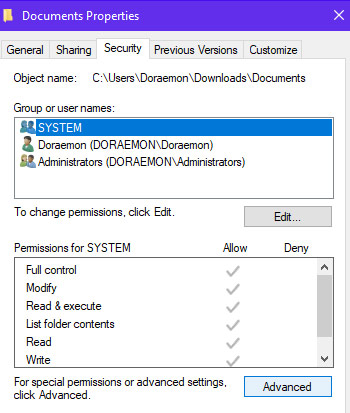
Open File Explore r -> right-click any folder and select Properties .
If you cannot open File Explorer, right-click on the screen -> select New -> select Folder -> right-click on the newly created folder -> select Properties.
In the Documents Properties window - select the Security tab -> click the Advanced button.
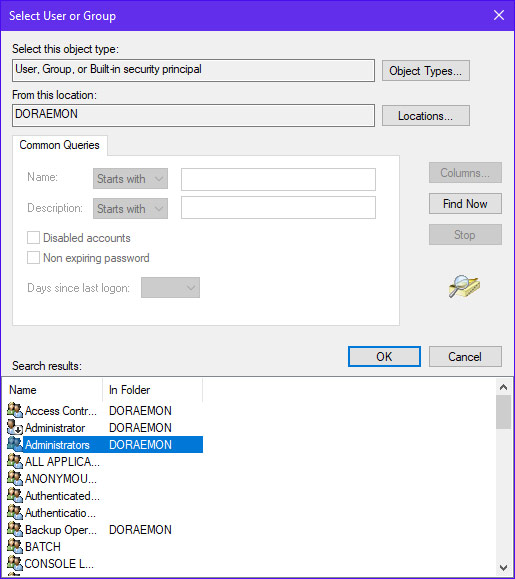
The Advanced Security Settings window -> click Change and enter your account name in the box Enter the object name to select -> click OK .

To know the account name, select Advanced in the window Select User, Computer, Service Account, or Group -> select Find Now -> click on the computer account name -> select -> OK -> OK.
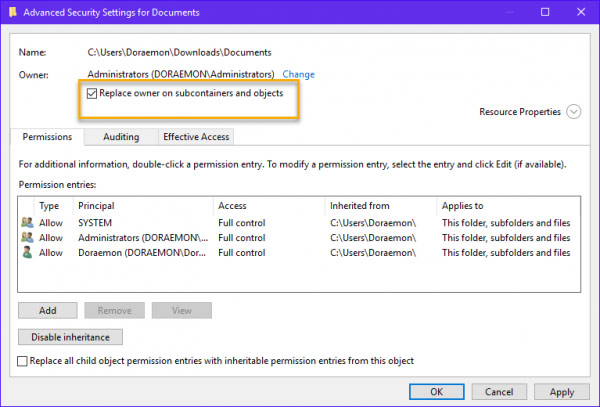
In the Advanced Security Settings window -> check the Replace owner on subcontainers and objects box -> select OK .
Open File Explorer -> open the Properties of your account-owned folder -> Click the Advanced button -> select the Permissions tab -> select Add .

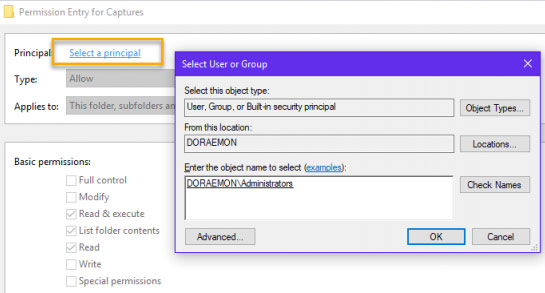
Click on the words Select a principal -> Enter your computer account name -> click OK .
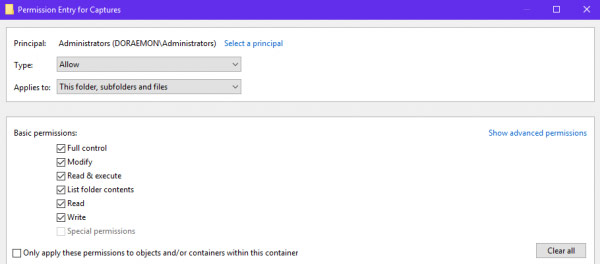
Finally, in the new window that appears, in the Type box select Allow -> in Basic pemissions select Full Control -> select OK .
See more:
- Warning File Explorer error on Windows 10 data loss when connected to Android
- Instructions for running Photo Slideshow from File Explorer on Windows 10
- How to fix Working On It on File Explorer Windows 10
- How to enable File Explorer new interface on Windows 10 Creators Update
Was this article helpful?
Your feedback helps us improve.
Related Articles
 How to fix the File Explorer Not Working search error on Windows 104 minutes read
 Fix File Explorer not responding error in Windows 11/105 minutes read
 How to fix Working On It on File Explorer Windows 103 minutes read
 Warning File Explorer error on Windows 10 data loss when connected to Android3 minutes read
 How to fix explorer.exe error on Windows 102 minutes read
 How to fix File Explorer lag on Windows 116 minutes read
Reader Comments 0
Sign in with email or Google to join the discussion.