Table of Contents
This guide explains how to page Breaks and Page Breaks in Word, with clear steps, practical tips, and important checks before you begin.
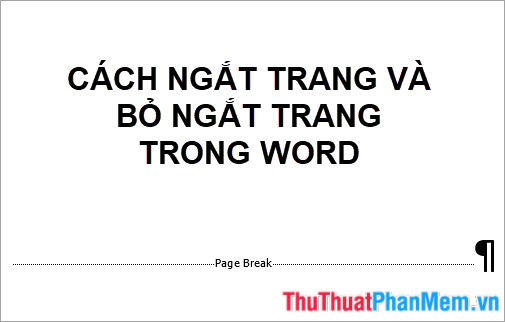
Here's how to break a page and how to remove a page break in Word, please follow along.
Page breaks in Word allow you to move text to the next page before the end of the page. Page breaks help you to organize your structure more coherently, you can use page breaks if you are writing reports, essays. have a title page or main table of contents to be started. on a new page.
How to break a page in Word
Step 1 : Position the mouse cursor at any position you want to break the page.

Step 2: Select Insert -> Page break or Ctrl + Enter to break the page.

Or you can choose Layout -> Breaks -> Page to break the page.

Immediately after the cursor position will be broken to a new page.

How to remove page breaks in Word
Method 1: Remove manual page breaks
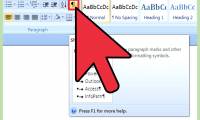
Step 1: In word document, click Home , in Paragraph, click Show / Hide  icon .

Step 2 : At this time the word document will appear page breaks (if any) in the text, you just need to select the page breaks that you want to remove page breaks and select Delete .
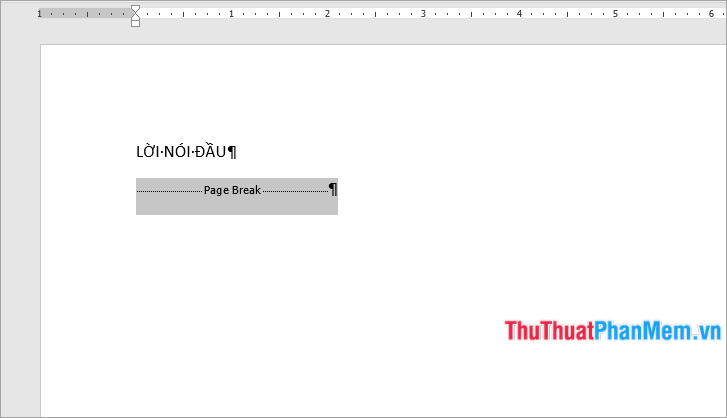
So you have eliminated page breaks in Word.
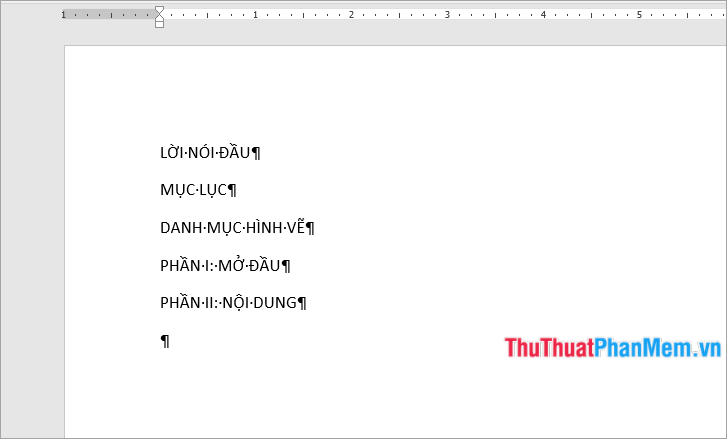
Method 2: Remove all page breaks in Word
If there are many page breaks in Word document that you cannot delete manually, it will take a lot of time. To remove all page breaks in Word, you can use the Find and Replace feature of Word as follows:
Step 1: Click Home -> Replace or Ctrl + H to open the Find & Replace dialog box .
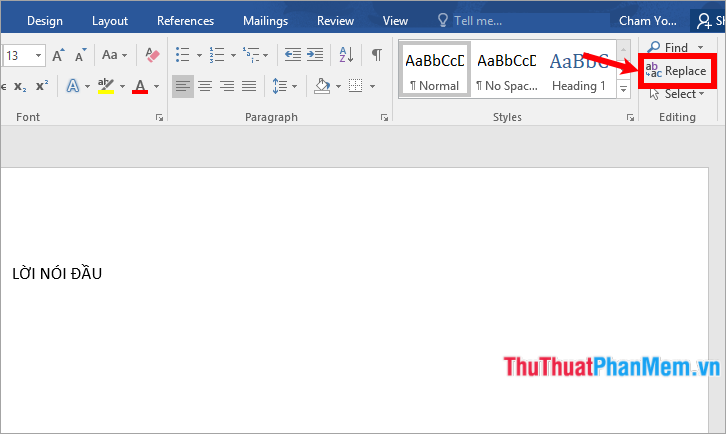
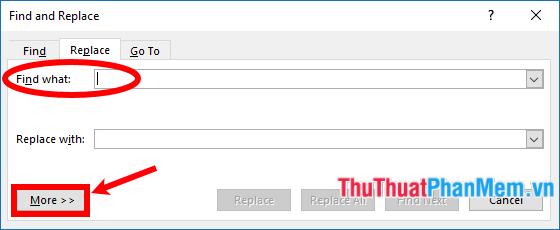
Step 2: On the Find and Replace dialog box, put the cursor in the Find what box, then select More .
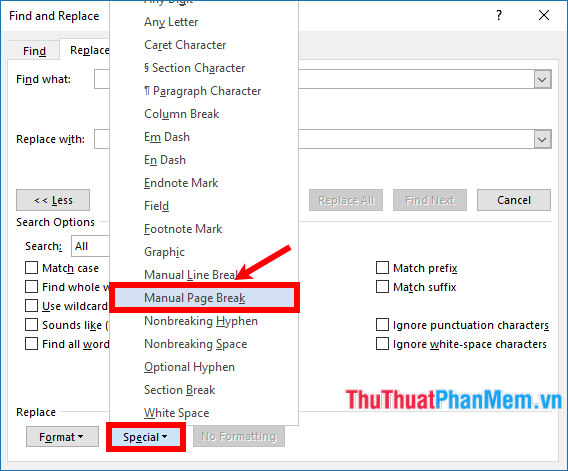
Step 3: Next select Special -> Manual Page Break .
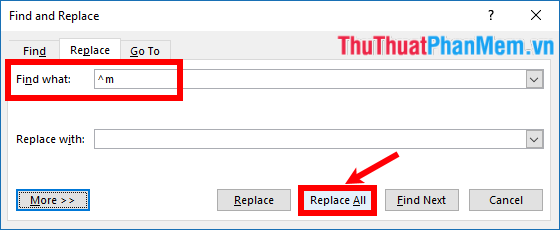
Now in the Find what section will appear '^ m', you select Replace All to replace all.
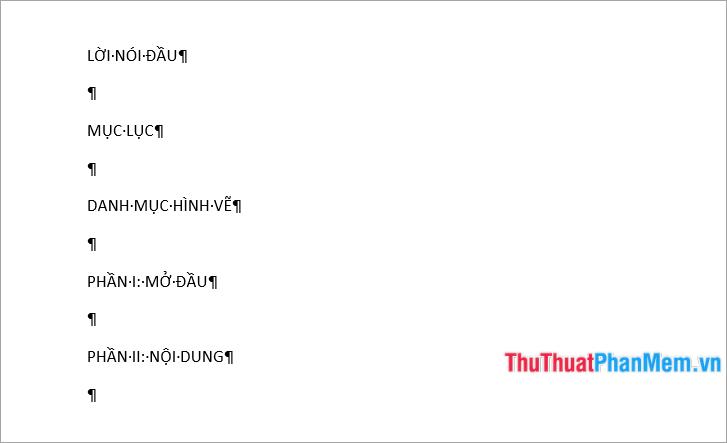
Close the Find and Replace dialog box, so you will eliminate page breaks in Word.
Method 3: Adjust page breaks automatically in Word
To prevent page breaks from automatically appearing in unexpected positions, for example, between lines of text that you want to keep close to each other, you can adjust page break settings for paragraphs. Selected version by following steps:
Step 1: Select the paragraph you want to apply page break correction.
Step 2 : Click the Layout tab, in the Paragraph you select the Paragraph Settings icon to open the Paragraph dialog box.
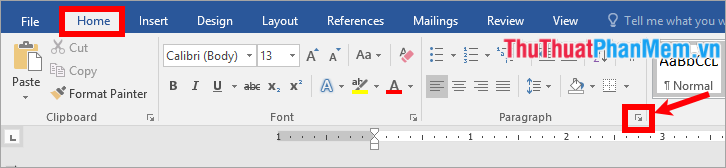
Step 3: In the Paragraph dialog box, select the Line and Page Breaks tab, you select the custom preset tick you want:
- Widow / Orphan control : put at least two lines of a paragraph at the top or bottom of a page.
- Keep with next : prevents punctuation between paragraphs that you want to keep close to each other.
- Keep lines together : Prevent page breaks in the middle of a paragraph.
- Page break before : add page breaks before a specific paragraph.
Then click OK to agree to customize the settings.

Above the article has shared to you how to break pages and break page breaks in Word, hopefully through this article, you will better understand about page breaks in Word and use page breaks in Word documents when necessary, needs. Good luck!
FAQ
What should I know about Page Breaks and Page Breaks in Word?
Focus on the key features, requirements, limitations, and practical use cases explained in this guide.
How do I get the best results with Page Breaks and Page Breaks in Word?
Follow the recommended steps, use current software or information, confirm compatibility, and review settings before major changes.
Are there any risks or limitations?
Potential limitations depend on compatibility, data quality, cost, privacy, support, and how the product or method is used.
Related Articles
 How to Remove Page Breaks in Word3 minutes read
 Word 2013 Full-Text Tutorial (Part 12): How to Break Pages7 minutes read
 How to Create Page Breaks and Page Breaks in Excel3 minutes read
 How to Break Pages, Split Sections in Word 20165 minutes read
 Simple Way to Remove Page Breaks in Microsoft Word3 minutes read
 How to Remove a Blank Page in Word5 minutes read
Reader Comments 0
Sign in with email or Google to join the discussion.