How to mark a tick in Word
How to mark a tick in Word The following article helps you insert traces in Word to facilitate you complete the multiple-choice test as quickly as possible.
Table of Contents
The following article helps you insert traces in Word to facilitate you complete the multiple-choice test as quickly as possible.

1. Mark a fixed area
With fixed tick mark, you will use special characters that contain traces in Word to mark ticks. This way the user cannot manipulate, or check on the content. This method should only be used when the author is only viewing permission for the reader.
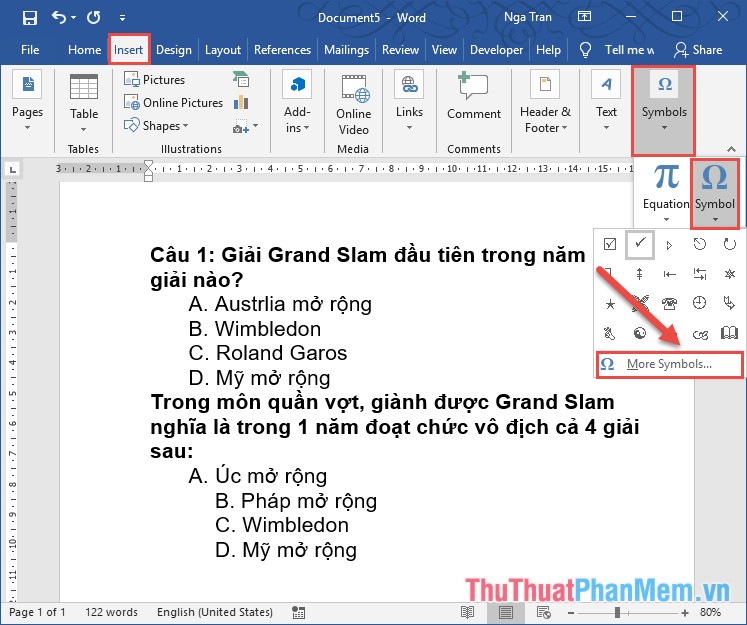
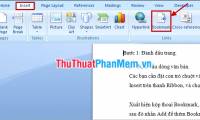
Step 1: Put the cursor at the position where you want to insert the tick mark -> Go to the Insert tab -> Symbols -> Symbol -> More Symbols .
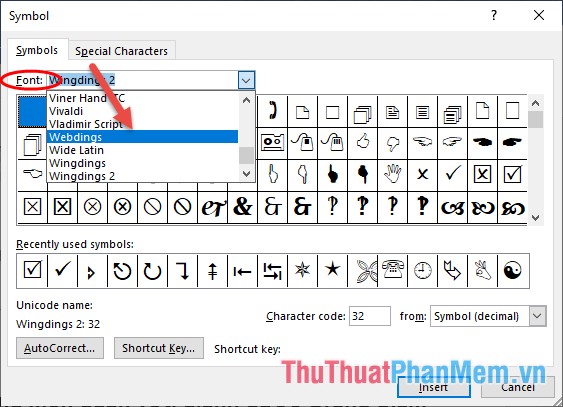
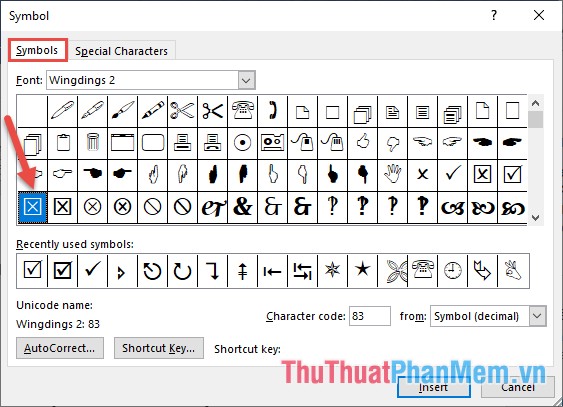
Step 2: The Symbol dialog box appears in the Font section, select Wingdings2:
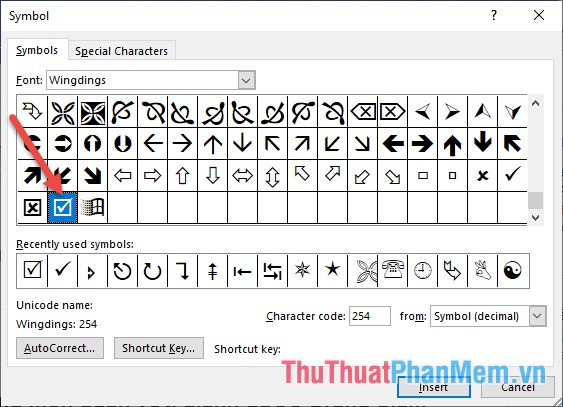
Step 3: Select the icon containing the checkmark at the end of the Wingdings -> double click to insert or click Insert:
Step 4: The result has inserted the correct sign for the answer:

Step 5: Similarly, insert a checkmark for the wrong result in the answer:
Step 6: The result you created the true and false signs for the answer:
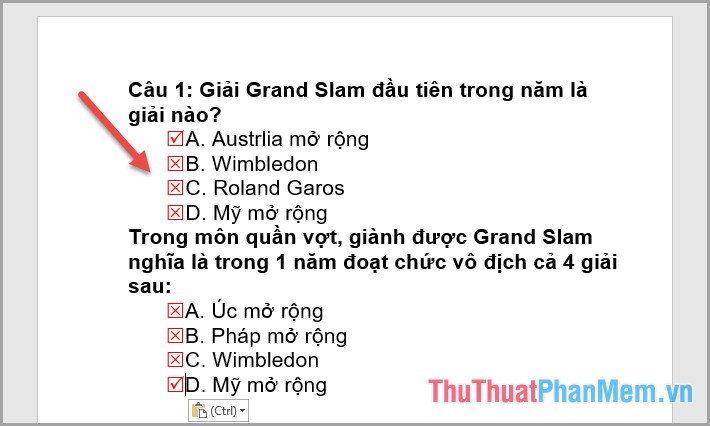
However, with this method, only using traces is the answer for the viewer. In case you want to create a positive check mark, the reader can self-answer the answer you must follow method 2.
2. Active markup
This way the reader can choose the answer that the user thinks is right.
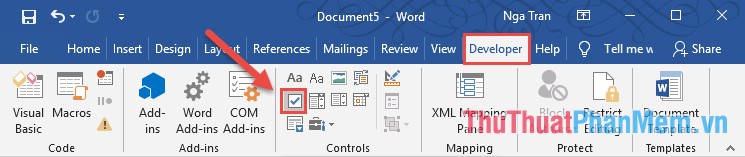
Step 1: Put the cursor in the position where you want to insert the checkbox -> Go to the Developer tab -> click on the Checkbox icon :
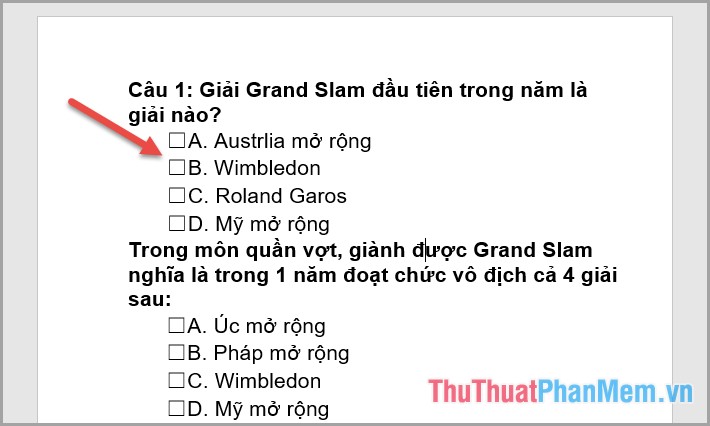
Step 2: Click the location you want to insert the checkmark:
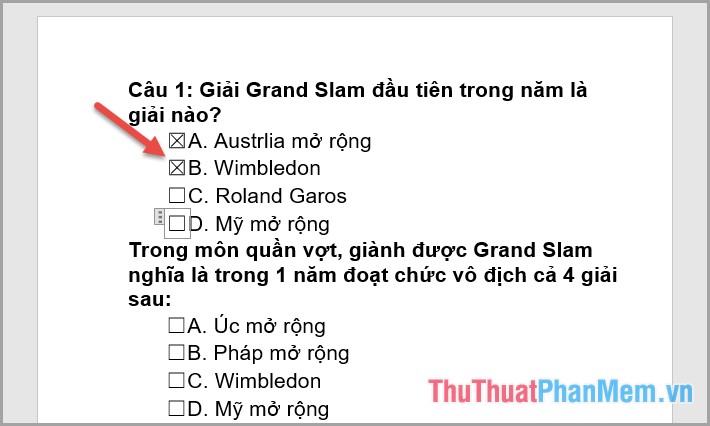
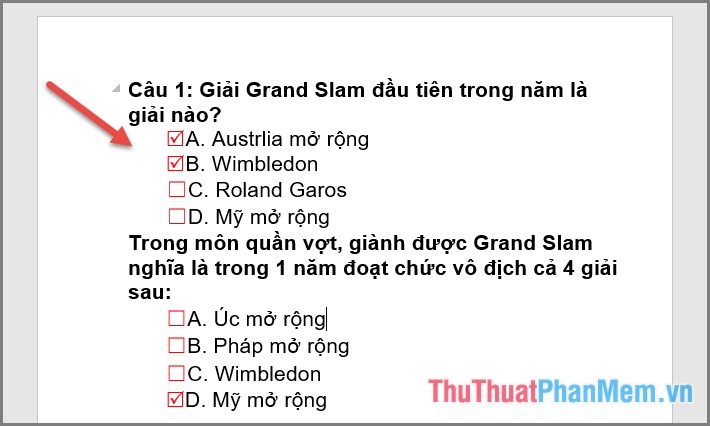
Step 3: Make a check in the checkboxes to the results:
Step 4: By default, when the tick box has an X icon, you want to change the icon after the user clicks to do the following: select the checkbox you want to change -> go to the Developer tab -> click the Properties icon :
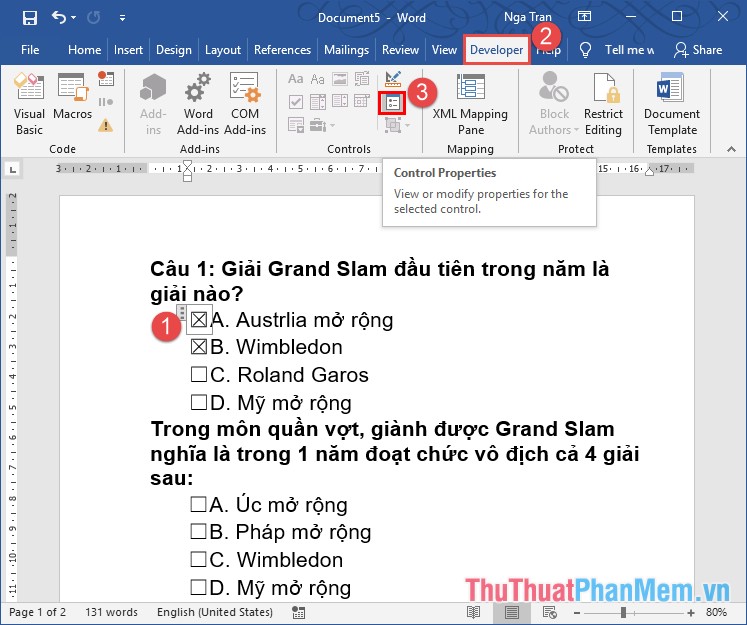
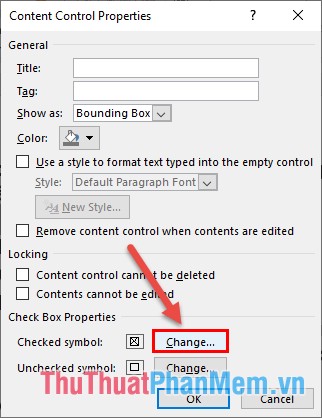
Step 5: The dialog box appears in the Checked symbol, click Change:
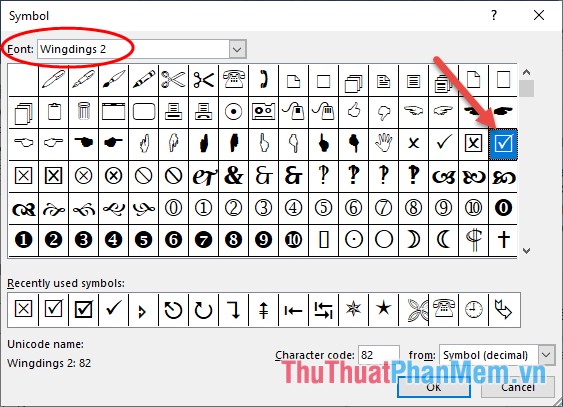
Step 6: The Symbol dialog box appears in the Font section, select Wingdings2 -> click the icon you want to change, for example, select the checkmark as shown -> click Insert or double click:
Step 7: Click OK:

Step 8: Click on the checkbox with the results:
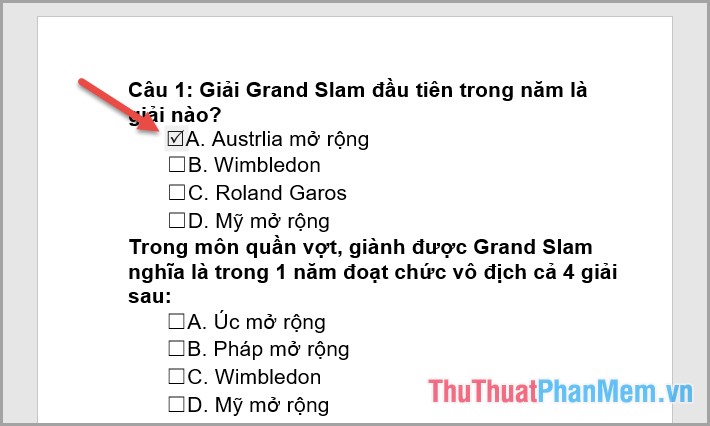
Step 9: Finally, you just need to adjust the size and color of the checkbox -> get the results:
So this way the user can customize the correct answer for himself.
Above is how to mark the mark in Word quickly and effectively hope to help you.
Good luck!
Was this article helpful?
Your feedback helps us improve.
Related Articles
 How to mark products in Excel4 minutes read
 How to insert tick marks into Word and Excel quickly3 minutes read
 Conquer Word 2007 (last term)11 minutes read
 How to fake TikTok blue tick3 minutes read
 Facebook and Instagram are about to sell green ticks, the price is higher than Twitter2 minutes read
 How to mark in in Word2 minutes read
Reader Comments 0
Sign in with email or Google to join the discussion.