How to number pages in all versions Excel (update 2020)
Instructions for numbering pages in Excel versions of Excel 2003, Excel 2007, Excel 2010, Excel 365, and page numbering in Excel when printing easily
Table of Contents
Instructions on how to number pages in Excel when printing, this is a very easy operation. However, not everyone knows how to number the pages quickly and correctly, in this article freetuts will guide you to the standard page numbering but extremely easy and fast.
Excel is like a square matrix of rows and columns, as if infinitely long. But when printed, they are divided into pages that look very nice and reasonable, depending on the length of the paper size. Below are some of the simplest ways to number a page.
Option 1: Use Layout interface
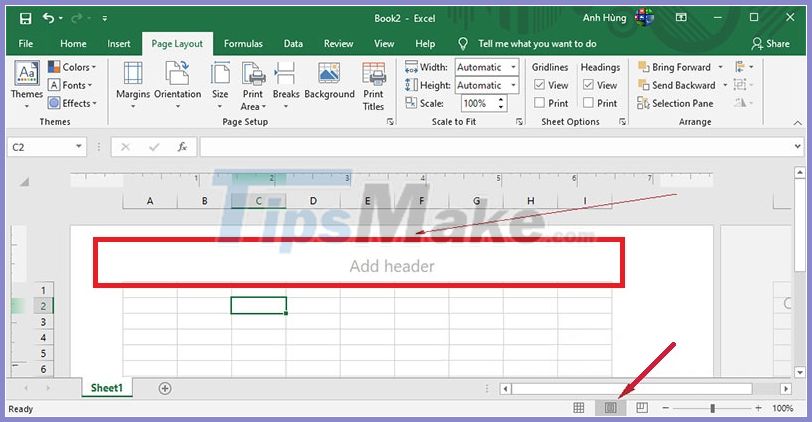
To add ordinal numbers to the top of the worksheet, follow these steps.
Step 1: Create an editing interface, we click the Page Layout icon .
-> At the top of the sheet, the Add header area appears .
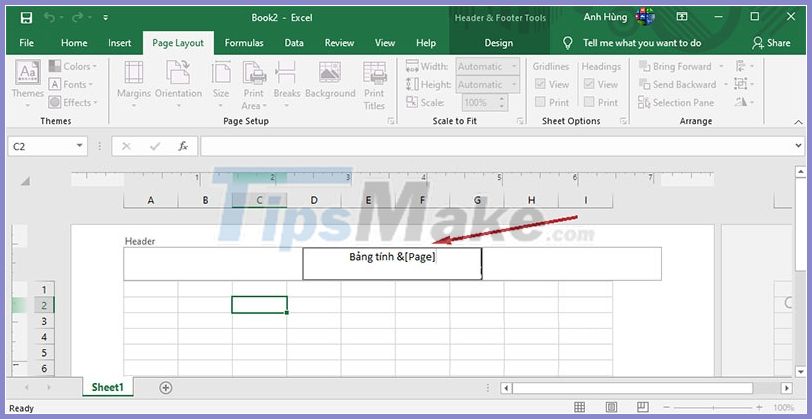
Step 2: We enter the sheet name and ordinal number according to the following formula:
Sheet name & [Page] . Inside:
- Sheet name: Optionally, you can name sheets in different ways. For example 'Sheet', 'Spreadsheet', 'Sheet Number' .
- & [Page]: this is required syntax for Excel to automatically fill the correct page number.
In the following example I enter the header area in the middle, the syntax: Spreadsheet & [Page]
After entering, remember to press Enter to see the results.
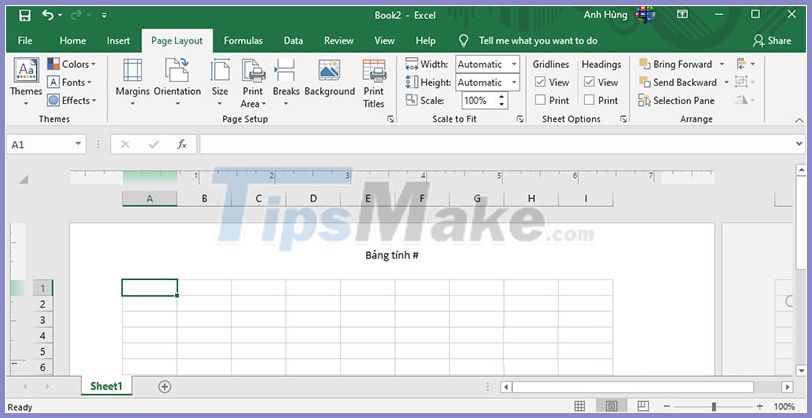
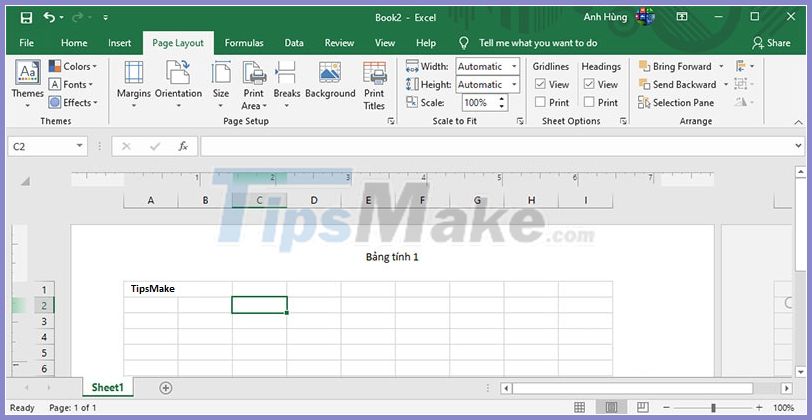
You can see the following result: Sheet #.
This error is due to the fact that there is no data in the spreadsheet, we try to enter anything and see the results.
With 2 simple steps, you have successfully numbered Excel sheet.
How do I add a number to the bottom of the page?
Simply scroll down the page and enter the same syntax as the top.

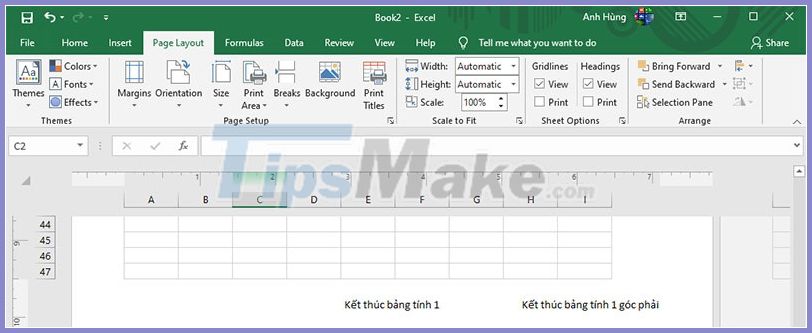
The following example I entered: End of the spreadsheet & [Page]

-> The page results will be automatically numbered: End of worksheet 1
So with a very simple operation you can add a number to the sheet, next we do it in a different way.
Method 2: Use the Page Setup feature
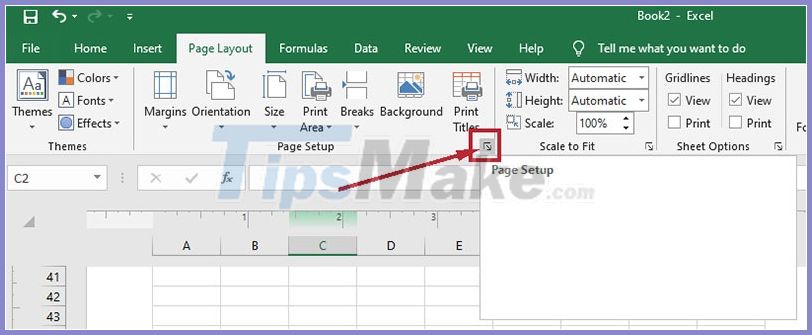
Step 1: On the toolbar, click the Page Layout option .
-> Press the Page Setup small key to start.
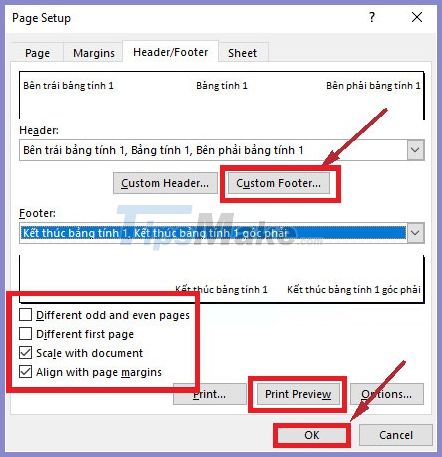
Step 2: Click the Head / Footer tab . Here you can customize the page number at the top and bottom in detail. Click on Custom Header .
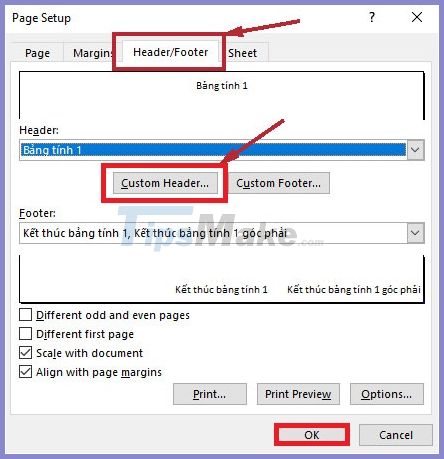
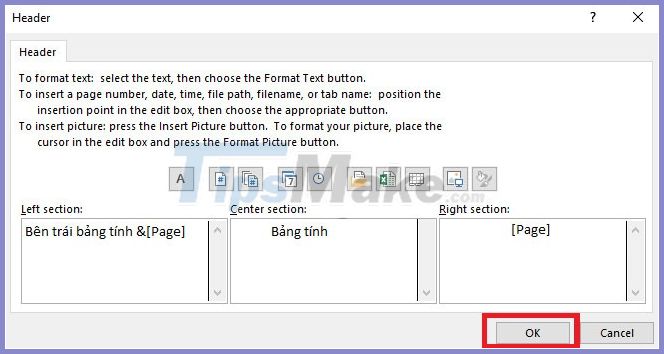
Step 3: You can enter all 3 locations at the same time, including:
- Left section: Left section.
- Center section: The center position.
- Right section: Right section.
Step 4: Select C ustom Footer to customize the order number at the bottom of the page.
In addition, you can also customize many other items such as:
- Different odd and even pages
- Different first page
- Scale with document
- Align with page margins
Finally click Print Preview to preview the printout.
-> Click OK to apply the setting.
Above are extremely simple operations, anyone can add a number to an Excel sheet very quickly. If your friends or colleagues do not know this way, please share this article with them. Wish you work with Excel more easily and fluently.
Was this article helpful?
Your feedback helps us improve.
Related Articles
 How to number Excel pages from any number4 minutes read
 Numbering pages in Excel2 minutes read
 How to number pages in Excel very quickly and easily4 minutes read
 Page numbering method of type 1/2 in Excel3 minutes read
 How to number pages in Word starting from page 23 minutes read
 How to convert money amounts to words in Excel, no add-in needed, supports both 32-bit and 64-bit Excel4 minutes read
Reader Comments 0
Sign in with email or Google to join the discussion.