How to lock, not edit PowerPoint files
This article will guide you to lock PowerPoint files with a password to protect your presentation content..
1. How to lock PowerPoint files
Locking PowerPoint files means that you must use a password to be able to view and edit content.
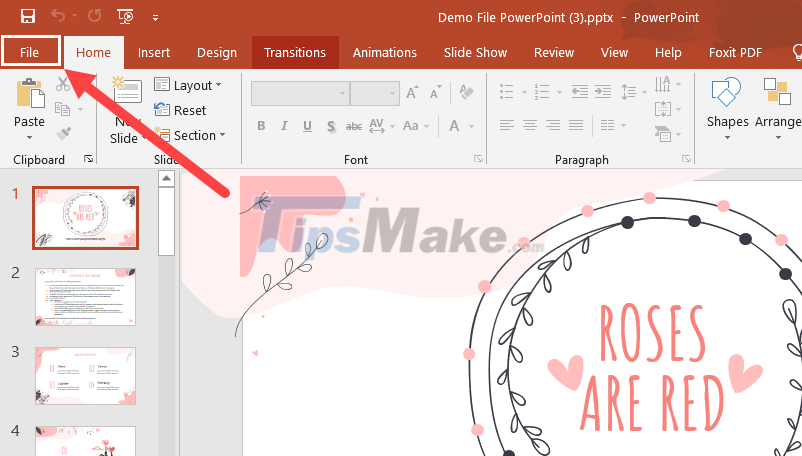
Step 1: At the main screen of PowerPoint, select the File tab.
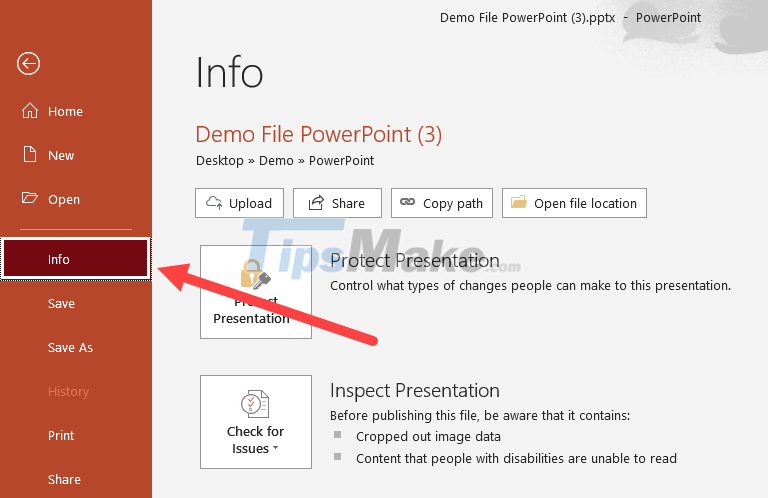
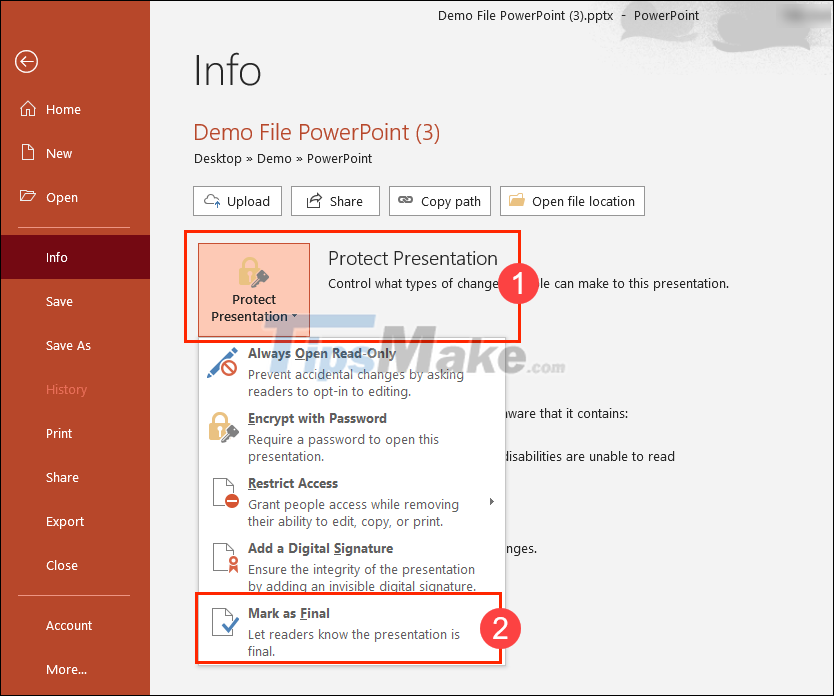
Step 2: Next, select the Info tab to view information related to the PowerPoint file.
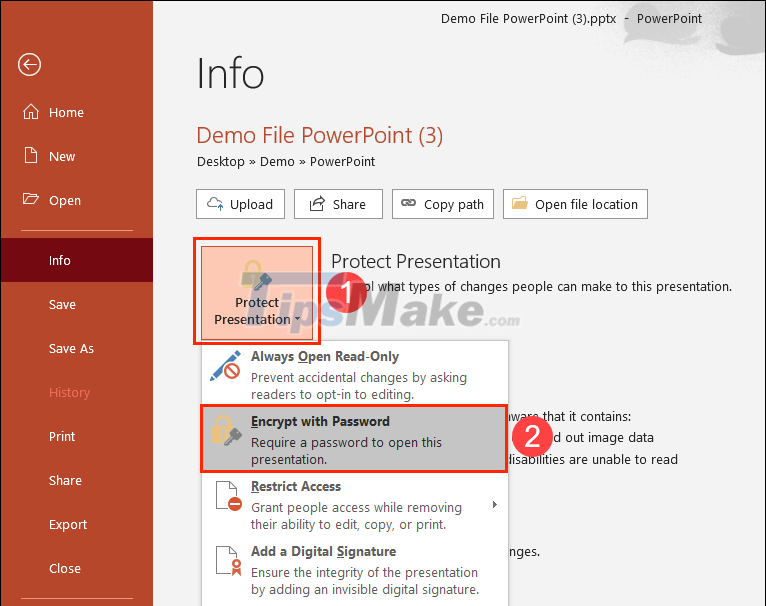
Step 3: Here, you proceed to select Protect Presentation (1) and select Encrypt with Password (2) to create a security key.
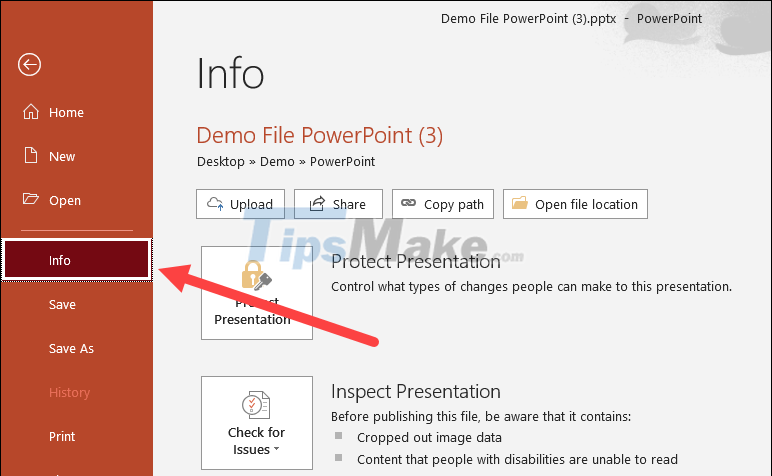
Step 4: Finally, you proceed to set a password to unlock the PowerPoint file on the computer. When you finish setting the password, you will receive the message 'A password is required to open this presentation'.

2. How to enable view-only mode on PowerPoint files
In view-only mode on PowerPoint files, users can only view the content and if they want to edit, they will need a few different operations.
Step 1: At the main screen of PowerPoint, select the File tab.

Step 2: Next, select the Info tab to view information related to the PowerPoint file.
Step 3: In Protect Presentation (1), proceed to select Mark as Final (2).
Step 4: Then, select OK to agree to the changes.

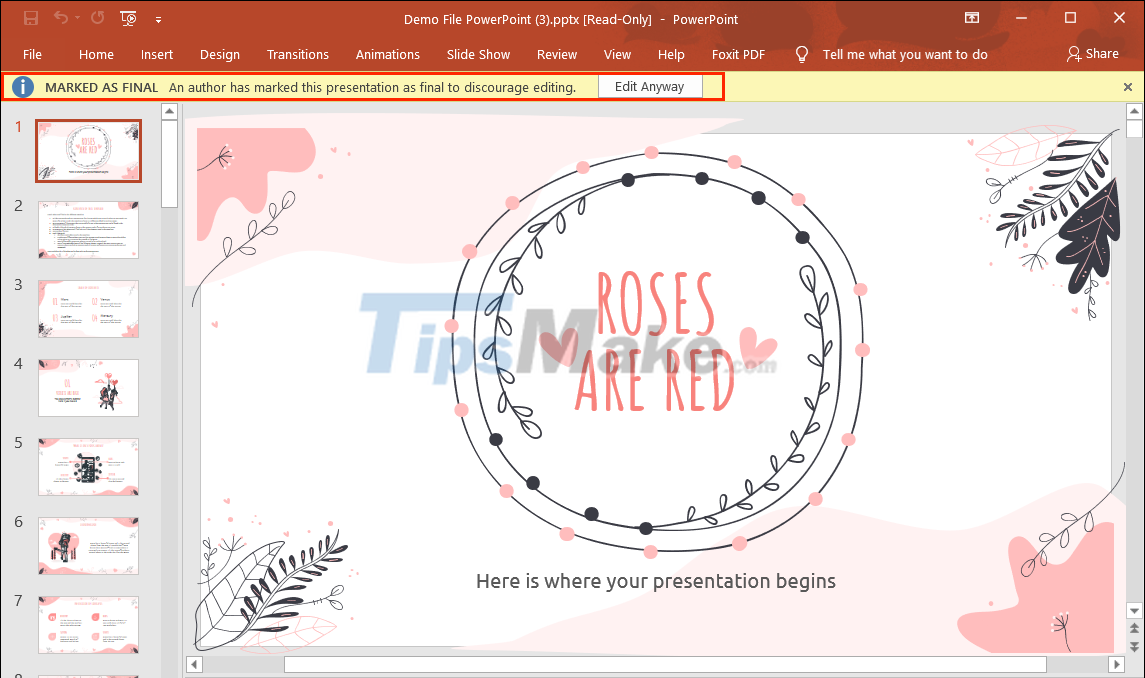
Step 5: Marked as final mode will appear, this is a message indicating that the PowerPoint file is complete and does not need to be repaired.
If you want to edit a PowerPoint file marked Marked as final, you will have to choose Edit Anyway.
In this article, Tipsmake has shown you how to lock and secure PowerPoint files to avoid being edited by others. Good luck!