Table of Contents
This practical guide explains how to lock the position of an object in microsoft powerpoint with clear steps and useful context. It also covers common requirements, potential problems, and the details that can help you get better results.
(Note: As of January 2022, this object locking feature is currently only available in PowerPoint for Windows).
Lock an Object's Position in Microsoft Powerpoint
You have 2 easy ways to lock an object on your PowerPoint slide. The first method is useful if you only have a small number of items on the slide, while the second method is suitable if you want to lock many items.
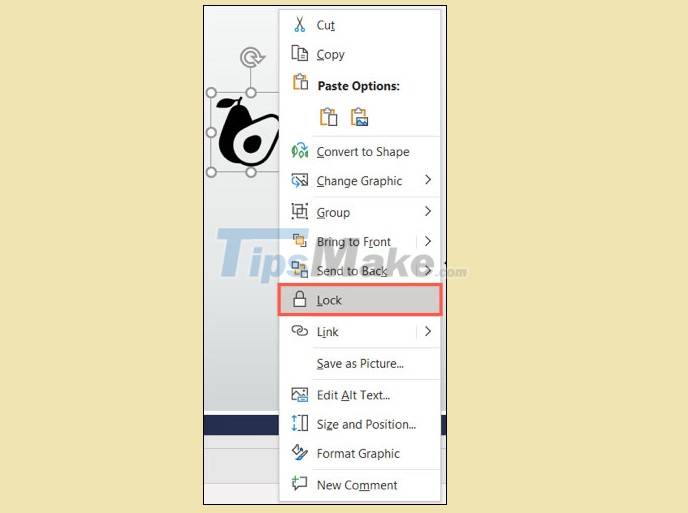
To quickly position an object, simply right-click on the object and select the 'Lock' option from the menu that appears.
If you have a lot of objects to lock, you can use the Selection Pane. This allows you to view, lock and unlock specific objects from the list.
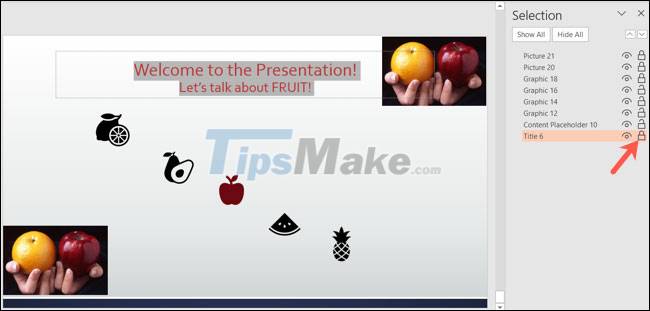
Open the Selection Pane by navigating to the Home and Drawing tabs on the ribbon. Click the drop-down arrow titled Arrange and select 'Selection Pane' at the bottom of the list.

When the Selection Pane opens, you'll see all the existing objects in your slide fully listed. To lock a specific item, simply click on the padlock icon to the right of the respective item. It is possible to lock multiple items simultaneously if you want to make sure nothing messes up while working on a particular object.
You'll notice that each item has a corresponding lock option, from images and videos to icons and title boxes.

Depending on the type of object, you may see a special border appear around the object after it is locked. For example, you can see below the title text box there is a highlight border when you lock and select it.
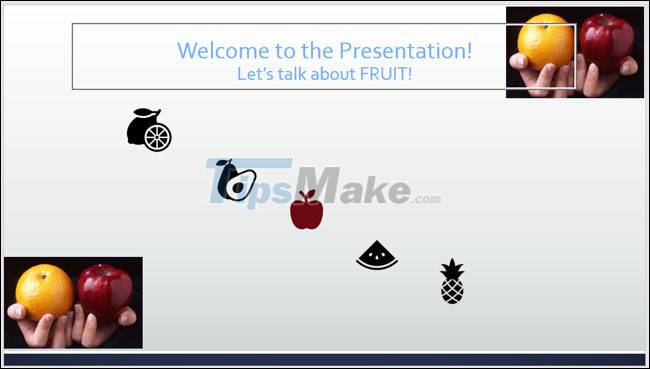
Of course it won't be possible to move a locked object, but you can still make the necessary changes to it as usual using the options on the ribbon, shortcut menu, or format sidebar. Below you see the title is locked, but the font color can still be changed.
To unlock an object, simply right-click on the object and select 'Unlock', or click the padlock icon next to the object's name in the Selection Pane.

Wish you always have a good experience with PowerPoint.
Conclusion
Understanding Powerpoint makes it easier to compare options, avoid common mistakes, and apply the information in this guide more effectively. Review the relevant requirements before making changes or choosing a solution.
FAQ
How do you lock the position of an object in microsoft powerpoint?
Follow the steps in this guide in order, confirm the required settings or tools, and verify the result before making additional changes.
Is it safe to lock the position of an object in microsoft powerpoint?
It is generally safe when you follow the recommended instructions, use trusted tools, and avoid changing settings you do not understand.
What should you do if the process does not work?
Recheck the requirements, restart the device or application when appropriate, and review each step for missed settings or compatibility issues.
Related Articles
 How to Add Alt Text to an Object in PowerPoint4 minutes read
 How to Lock, Not Edit PowerPoint Files3 minutes read
 Basic Operations on Objects on Slides in PowerPoint5 minutes read
 How to Insert Images Below the Word on PowerPoint: PowerPoint Tips4 minutes read
 Macromedia Flash - the Object Moves with the Mouse Click Position5 minutes read
 How to Create a Powerpoint File Password4 minutes read
Reader Comments 0
Sign in with email or Google to join the discussion.