How to adjust the slide thumbnail in PowerPoint
By default when opening a PowerPoint presentation file, on the left side of the screen, the thumbnail of each slide is displayed. The presentation has many slides, each with a small thumbnail for users to conveniently track the number.
And if users feel that these slide thumbnails take up a lot of space, they can reduce their size, or want to zoom in to make viewing easier. We can fully adjust the size of the slide thumbnail, or hide them if desired. The following article shows you how to adjust PowerPoint slide thumbnails.
- Presenting slide shows in PowerPoint 2016
- How to add and print notes in PowerPoint slides
- How to adjust the size of PowerPoint photos automatically
- How to cut photos using Microsoft PowerPoint
Instructions for adjusting PowerPoint thumbnails
Step 1:
Open presentation file in normal mode. We can adjust the display mode of PowerPoint slides by clicking View and then selecting Normal.

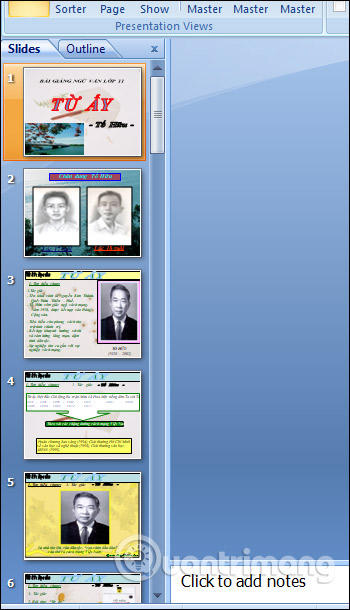
Then the slide thumbnail appears on the left of the screen as shown below, separated from the content slide with vertical bars.
Step 2:
To reduce the size of the slide thumbnail, click and drag the 2-part split bar to the left .
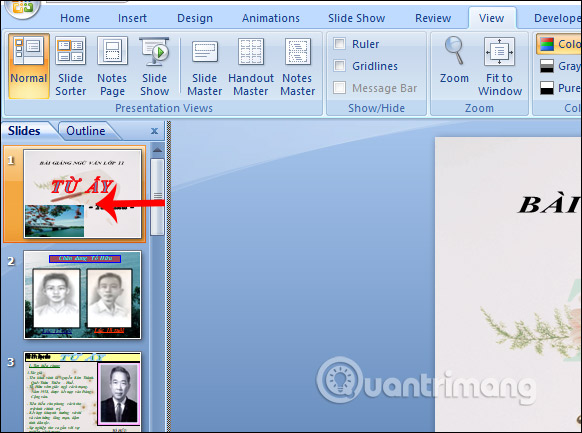
The more you drag to the left, the smaller the size of the PowerPoint slides as shown below. The number of thumbnail slides displayed will increase.

Step 3:
In case you want to hide the entire thumbnail column this slide , we drag the separator bar to the left until they disappear . At that time, the interface only displays content slides.
If you want to show it again, drag the longitudinal vertical bar to the right.
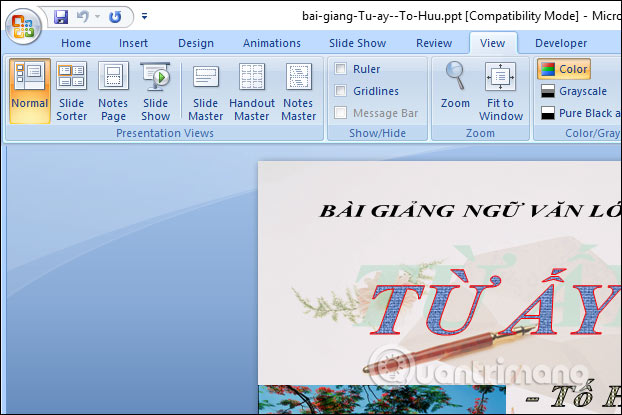
To enlarge these thumbnails , just drag them to the right , but only to a certain extent.

Another trick to zoom in and out of a thumbnail of a PowerPoint slide is to hover over the PowerPoint slide thumbnail, press the Ctrl key, then use the scroll wheel to scroll up or down to increase or decrease the size of the thumbnail column. slides, but can't hide slide thumbnails this way.
2. How to change PowerPoint slide show mode
When working with PowerPoint slides you often need to hide the slide thumbnail, you can adjust the slide display, no need to minimize the thumbnail size anymore.
Step 1:
Click the Office icon and select PowerPoint Options .

Step 2:
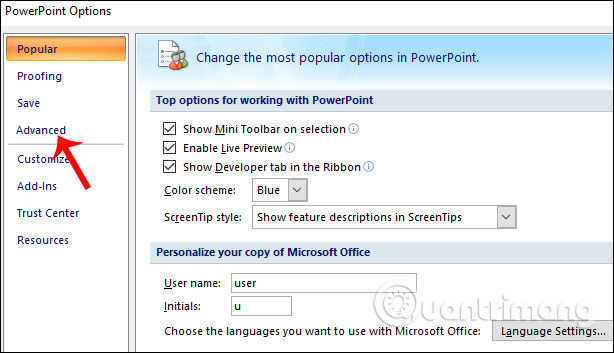
Switch to the PowerPoint setup interface, click on Advanced .
Step 3:
Look at the content on the right in the Display section, and go to Open all documents using this view , then click on the triangle to show the drop down menu.
Display lists with different PowerPoint slide viewing modes. No thumbnails view means that there is no PowerPoint slide thumbnail. Select a new display type and click OK below.
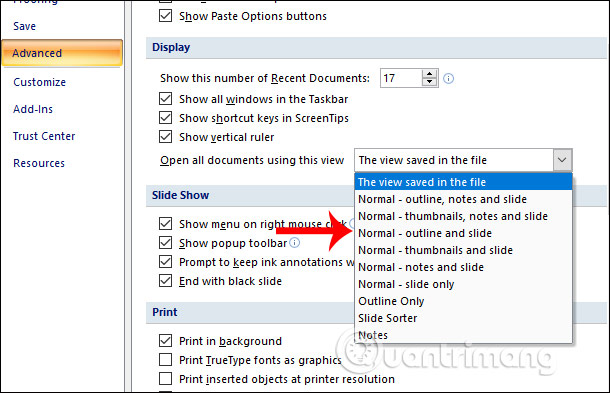
For example, choose Normal - outline and the slide for PowerPoint slides will be as shown below. On the left is the Outline content and the right is the main slide.

Depending on how you work and slide your PowerPoint slide, you can change the slide thumbnail to your liking. If you choose another slide display mode, the PowerPoint files will later be defaulted to the established style.
I wish you all success!