How to lock and unlock Powerpoint file to edit
If you want to edit a read-only PowerPoint file, you must unlock it. This article will show you how to lock and unlock Powerpint files for editing with a few simple steps.
- How to create a PowerPoint file password
- Check and protect presentations in PowerPoint 2016
- Instructions to turn off the Protected View feature in Office 2013
Unlock a read-only PowerPoint file
There are two ways to know a read-only PowerPoint file. The first one is to see the phrase 'Read-only' after the file name, the second is to see the yellow notification bar at the top of the presentation with a notice that this document has restricted access.
Next to the yellow message is the button that says Edit Anyway . Click that button to unlock the PowerPoint file.

The yellow bar will disappear with the word Read-only after the file name. The PowerPoint file is now editable.

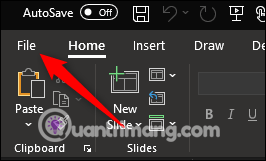
Another way to unlock PowerPoint files is to access the File tab.

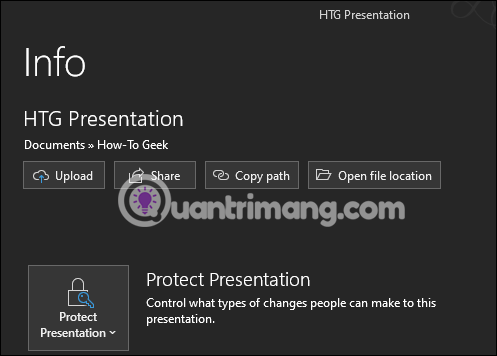
You will be redirected to the Info menu. Here the Protect Presentation option is highlighted in yellow and the message 'The presentation has been marked as final to discourage any editing' is displayed next to it. Select Protect Presentation .

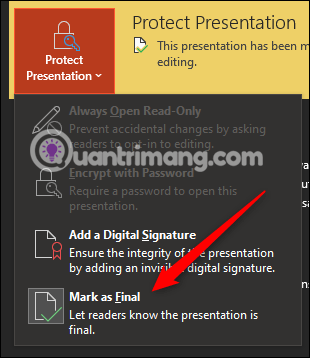
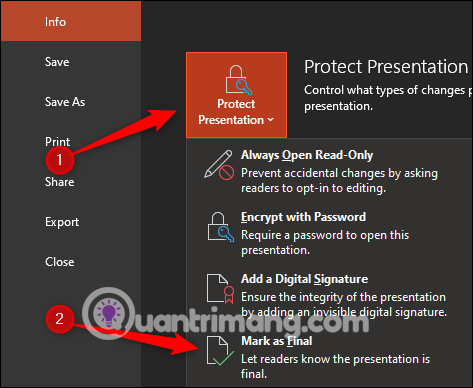
From the submenu, choose Mark as Final to unlock the PowerPoint file.

You should now see the yellow banner and the message next to the Protect Presentation option have disappeared. The phrase Read-only next to the file name is no longer available.

Why is it necessary to leave the PowerPoint file in Read-only mode?
People use this mode to prevent editing, they merely notify the recipient of this PowerPoint file this is the final copy of the author. Read-only status can also prevent inadvertent editing of documents.
Leaving the document read-only is a more polite way of asking people not to edit it and protect your content. Taking steps to let people know you don't want content to be edited is the right thing to do.
How to lock out a read-only PowerPoint file
Now you know how to unlock the PowerPoint file and why it needs to be locked. This is how to enable read-only mode.
Open the PowerPoint file you want to leave without editing, select the File tab.

You will be taken to the Info menu. Select Protect Presentation to open the drop down menu, click on Mark as Final .

In the dialog box that appears PowerPoint file marked as final and saved, click Ok .

Now, when sending the document, it will display the Marked as Final bar, informing the recipient that this PowerPoint file is read only, not editable.
I wish you successful implementation!